Construction of roofs of private houses. The roof of a private house - types of construction, the best design ideas and modern forms (75 photos). The scheme of the structure of the roof truss system
The roof is one of the most complex and important architectural elements of the house. Its construction must be approached very responsibly - mistakes are too expensive. No wonder roofers are considered the most paid builders, the durability and comfort of the building largely depend on their skill. The construction process itself consists of several steps.
Step 1. Selecting a project
The main differences between roof projects are not design, although they are primarily striking, but structural. When selecting a specific project, the maximum number of specifications buildings and the climatic zone of its location.
What roof options are offered to developers today?
| roof type | Short description |
|---|---|
| The simplest, used in small houses. The advantage is a simple truss system. The disadvantage is the lack of residential attic space. It is rarely used in our country, more often such houses can be seen in the Scandinavian countries. |
| Universal roof for houses, allows you to build attic rooms, can be simple and broken. In terms of complexity, cost and manufacturability, most developers are satisfied. By changing the angle of inclination, the load indicators on the elements of the truss system are adjusted. |
| A more complex design, it is recommended to install on large houses. The rafter system must be installed taking into account all building codes and regulations, it is imperative to make preliminary calculations. |
| It differs from the hip in that the sizes of the slopes are not the same. Two slopes are large, and two trimmed are small. By technical device somewhat more complicated than the hip, but such roofs increase the volume of the attic. |
| All slopes are in the form of equilateral triangles, and the vertices converge at one point. The roof can be placed on houses that have the shape of a square. |
| The most complex of all the listed roofs, it is rarely used and only on multi-storey buildings. |


Step 2. Selecting materials
After a specific roof option has been selected, it is necessary to decide on the materials for the construction of the truss system and the type of roofing.
Important. At the same stage, you need to decide whether the roof will be warm for living quarters or cold.
truss system
For the truss system, you only need quality materials not below the second grade.


Practical advice. To save money for the truss system, you can buy not dry, but raw boards, they are much cheaper. But it should be remembered that raw lumber must be used no later than 7-10 days later, during this time the rafter system must be installed and the roof covered. Boards under load will dry in the optimal mode, and strong mechanical bonds will not allow them to warp.

Prices for different types of building boards
Building boards
Mauerlat is made from a bar 100 × 100 mm or a board 50 × 200 mm. Rafter legs are made of boards 50 × 150 mm or 50 × 100 mm. The linear dimensions of the rafter legs should take into account the maximum possible static and dynamic forces. The width of the boards can be changed by using various vertical and angular stops. Each truss system has its own characteristics, the master must have extensive practical experience in order to correctly solve the problems that arise during construction. And, of course, a project must be ordered for a residential building, a self-built building is considered illegal and will not be accepted for operation. And this means that it is impossible to connect light and heating to it, they do not register in such a room, it cannot be given and bequeathed. The project, among others, has working drawings of the truss system, it is necessary to strictly follow the recommendations of the engineers.

The type of crate depends on the type roofing, for soft roofing materials it is required to make a solid one, for hard ones any one is suitable. For solid, it is necessary to prepare sheets of plywood or OSB, the thickness is at least one centimeter, but it can be changed depending on the pitch of the rafter legs.

Prices for OSB (Oriented Strand Board)
OSB (Oriented Strand Board)
You can make a continuous crate of edged rails, although this option is difficult to consider optimal - it is very expensive and time consuming. Under solid roofing materials, the crate is made of slats or unedged boards. Unedged lumber must be sanded.

Roofing materials
For residential buildings budget options bituminous or metal tiles are considered.
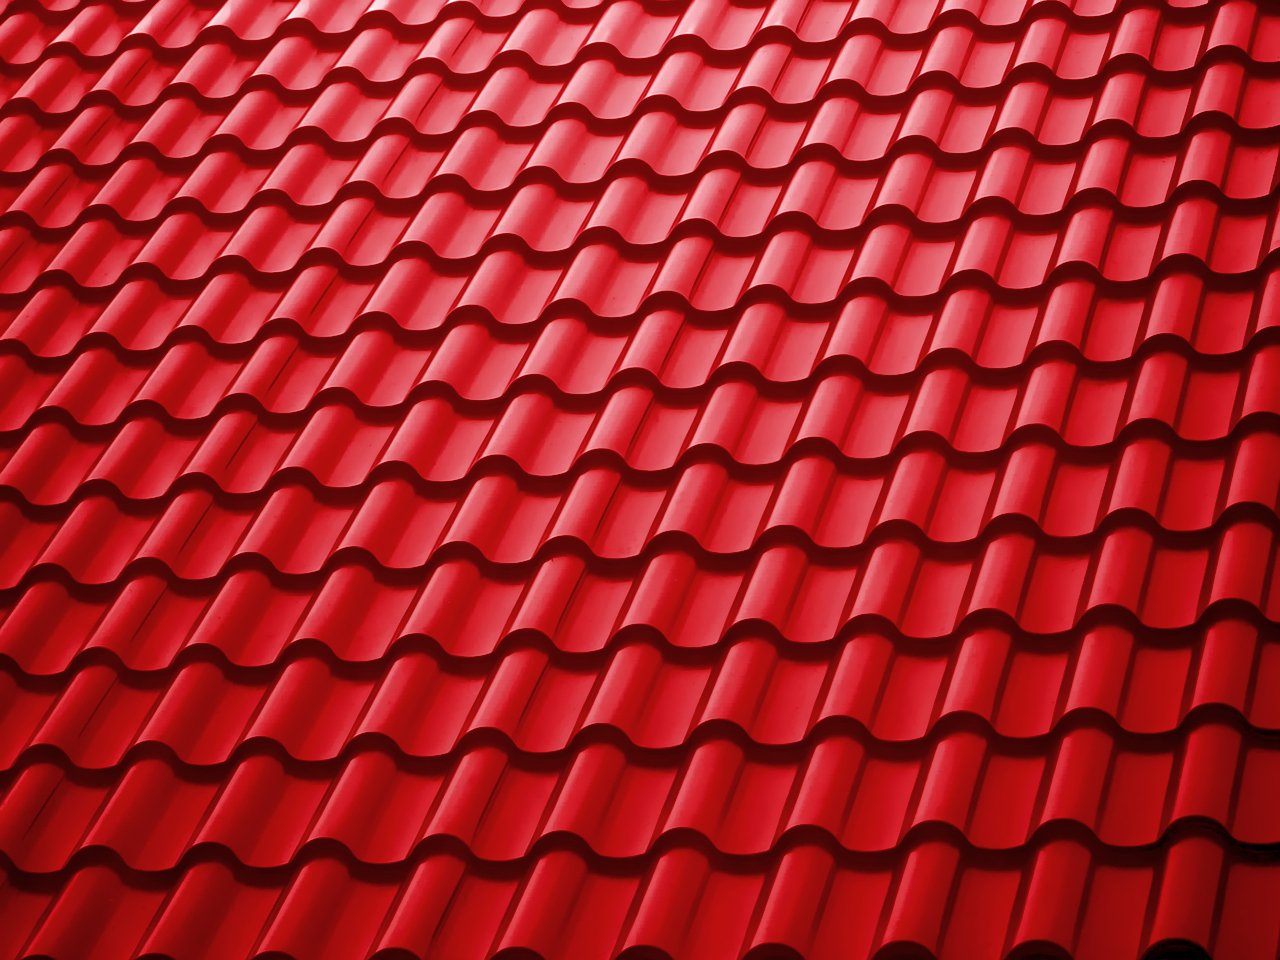
Less commonly used profiled sheet or roll coatings.

Very rarely natural or artificial piece tiles.

The rafter system largely depends on the type of materials. At the stage of its design, it is necessary to take into account the weight and features of fastening roofing.
Prices for various types of roofing materials
Roofing materials
Heaters
Warm roofs are installed only in cases where the attic space is planned to be made residential attic. Currently, two types of insulation are used: mineral wool or polystyrene.
The distance between the rafters should take into account the factory width of the heaters, due to this the amount of unproductive waste is reduced and work is accelerated.

The weight of the heaters is minimal and during the design of the truss system it can be neglected. But you should keep in mind the climatic zone of the location of the house, the thickness of the insulation and, accordingly, the width of the rafters depend on it.
Practical advice. For all climatic regions, the thickness of the insulation should be at least 10 cm, for the middle lane this parameter increases to 15 cm. If the insulation layer is less than the recommended values, then the heat saving efficiency drops sharply.
Additional materials for the roof
If the roof is warm, then it is imperative to provide for the installation of steam and hydro protection, the arrangement of a counter-lattice to ensure natural ventilation roof space. The range of materials is huge, but by and large they are not much different from each other. The performance characteristics are more influenced by the observance of the laying technology than the physical indicators of the roofing membranes. Even more cheap material can be used in such a way that it will satisfy all building codes and requirements. And vice versa, the most modern innovative material can be mounted in such a way that, apart from harm, no positive effect will not.


And the last thing to think about during the planning of the construction of the roof is the drainage system and special elements for bypassing chimneys and ventilation pipes. Under some strokes and snow retainers, it is necessary to provide additional fixing points on the rafter system. It is much more expedient to do this at the stage of its construction than after fixing the roofing materials. Although modern technologies allow the use of both mounting options for additional and special roof elements.

On this preparatory stage finished. If all building materials are prepared, the type of roof, roofing is selected, the truss system is calculated, then you can proceed to the direct construction of the roof.
Construction of the truss system
Important. Mistakes made during the construction of the truss system are very difficult to correct. Most of them will become noticeable already during the operation of the building, this is extremely unpleasant. There are situations when it will take more money to correct the shortcomings of the truss system than to build a new roof. And this is even in the case when, due to leaks, it is not necessary to repair the interior.
For example, we will consider step-by-step instructions for one of the most complex roofs - a hipped one. Understanding the construction technology of this rafter system, it will not be difficult to understand the technology and assemble simpler single-pitched or gable ones on your own.
Step 1. Take two long boards, with their help it is easier to determine the length of the rafter legs, the angle of inclination of the slopes and the height of the roof. Temporarily fix the boards to a vertical support on the wall of the house. Raise or lower them until you find an acceptable position. If the size of the house allows, then it is better to design the rafter system so that the length of the legs does not exceed 6 m. You can buy such lumber, there will be no need to build it up. Building up not only takes a lot of time, but also weakens the structure, requires the installation of additional supports.
Step 2 Fill in the reinforcing belt. It not only increases the height of the attic space, but also makes it possible to lengthen the overhang of the rafter legs and additionally protect the facade walls from atmospheric precipitation. The width of the belt should be at least 30 cm, the height depending on the size of the house.
How to pour a reinforcing belt?

Important. The difference in height at the corners of the reinforcing belt should not exceed ± 2 cm. To check, you need to pull the rope, with its help it is much easier to level the concrete surface.
Allow at least three days for the concrete to set. Remember that it will gain 50% strength only after two weeks, only then can the structure be fully loaded. If the weather is very warm and windy, then the concrete belt should be watered at least twice a day with plenty of water. Concrete gains strength not during drying, but during the favorable course of chemical reactions, this constantly requires moisture.

The construction of the truss system conditionally consists of four stages: the installation of the mauerlat, the installation of the ridge beam, the installation of rafters (hip and diagonal) and the arrangement of the batten.
Mauerlat installation
Work begins after the concrete of the reinforcing belt has gained sufficient strength and the formwork has been dismantled. For Mauerlat, a beam of 200 × 100 mm is used. This is a very important element of the truss system, it serves to stop the rafter legs and evenly distribute point loads over the entire area of \u200b\u200bthe facade walls.
Step 1. Lay the beam next to the reinforcing belt, accurately mark the exit points of the anchors. It is easier to do this without a tape measure. Turn it narrow side down and put it on your belt, mark the position of the anchors with a pencil. Then transfer the marks to the wide side of the beam, in these places it is necessary to drill holes.

Practical advice. If there is any doubt about the accuracy of taking measurements, then drill holes for anchors with a diameter of 2–3 mm larger than the diameter of the studs. It won't negative impact on the strength of the Mauerlat fastening, but it will greatly facilitate its installation in place.
Step 2 Drill holes, hold the drill as vertically as possible, do not skew. The work must be carried out by an experienced carpenter. A beginner can ruin the beam, you will have to shift all the holes by reducing its length.
Practical advice. If there is doubt about the strength of the concrete of the reinforcing belt, then do not tighten the nuts with great force. They can be pulled up later during the construction of the truss system.
Step 3 Prepare strips of waterproofing under the Mauerlat, it is better to buy an ordinary cheap roofing material. The strip is cut off from the roll, no need to roll it out. The material is perfectly cut by a grinder with a metal disc.
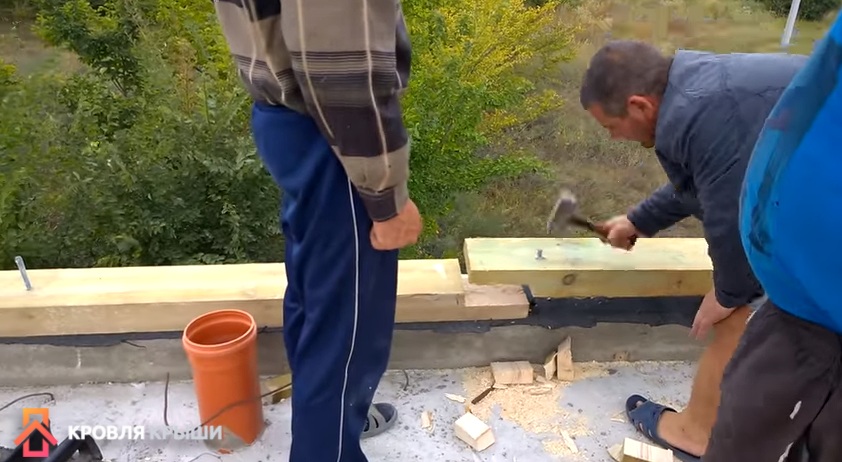
Step 4 Spread strips of waterproofing on the reinforcing belt. Making holes is much easier with a hammer. Place the roofing material on the anchors and carefully punch holes in the waterproofing for the studs with a hammer. Just do it carefully, you can not hit hard. Otherwise, there is a risk of damaging the upper threads, problems will arise during the tightening of the nuts. If you are afraid, then before laying the roofing material on all the studs, screw the nuts, after unscrewing they will automatically align the damaged turns.

Step 5 Install the beam on the anchors and tighten with nuts. Be sure to put large washers under them. If the Mauerlat is tight on the studs, then you will have to score with a sledgehammer. This situation indicates the lack of qualifications of roofers.

It is better to make Mauerlat from pine, and not from spruce, it has a lot more resin, respectively, it is not damaged by putrefactive diseases longer. How to distinguish a pine tree from others conifers wood? On several grounds. The first - the tree smells of resin and turpentine. The second - pine has a bright yellow tint, large and lively knots. Third - the presence of black spots on pine lumber indicates a high content of resin, it acquires this color after oxidation in air. Spruce is whiter, lighter in weight, there are few knots and has bad smell cat feces.
At the corners and along the length, the bars are connected into half a tree, it is advisable to fix these places with long nails or self-tapping screws made of stainless alloys.

Installation of a ridge beam
For horizontal support, vertical posts and the upper ridge run, you can use a beam of 50 × 150 mm. The lower element must be fixed with anchors, waterproofing should be placed between the concrete floor slab and the tree. All fasteners are made with nails, they should be driven in obliquely. If you wish, you can use metal corners. To calculate the dimensions of the ridge beam, you need to subtract its width from the length of the house, the resulting value is the length of the element. The calculation is needed so that all four overhangs are the same.
Installation of rafters
This is the most difficult stage in the construction of the truss system. The system will be non-spreading, special cuts are made on the rafter legs to rest on the Mauerlat. In this position, they do not push the walls apart, but press them, this rafter system is more stable than the layered one.
Step 1. Install diagonal rafters. For their manufacture, a board of 50 × 150 mm is used, if the length is not enough, then the materials should be spliced. During splicing, it is necessary to strictly observe existing recommendations, while at the junction it is imperative to install a backup in the future, this should be borne in mind when choosing a place to build. Make sure that all four elements are at the same angle. If the overhang value is slightly different - not a problem, the parameter can be easily adjusted to the required value by fillies.

Practical advice. To increase the strength of the diagonal rafters, it is recommended to knock down two beams, as a result, the thickness will increase to 100 mm. It is necessary to shoot down with a shift, due to this, the length of the element is simultaneously increased.
Step 2 Proceed with the installation of ordinary rafters. In places of emphasis with a Mauerlat, it is necessary to cut down the platform, the upper end is fixed to the ridge run.


Drive all connections with three nails at an angle. Two nails are driven into the sides and one into the edge of the timber.


Important. If the roof is insulated, then the pitch of the rafters is 60 cm, which is the width of most heaters. But dimensions should not be taken along the side planes of the lumber, but along the axis of symmetry.
To increase stability, additionally fix the rafters with metal corners. It is not necessary to screw in the screws, it is much more convenient to use nails, the stability of the structure does not decrease from this. The fact is that they work on a cut, and not on pulling out.


It is necessary to expose the rafters under the rope. First, two extreme legs are mounted, their position is carefully checked. Everything is within the normal range - pull the rope between them and already under it, install all the remaining elements.


Step 3 Trim the reach of the rafter legs under the eaves. It should be marked with a chop construction rope, it is easier to cut it off with a gasoline saw.


Practical advice. If piece tiles are used to cover the roof, then it will be necessary to strengthen the truss structure. This is easy to do, you just need to install additional runs and rest your feet on them.
Lathing installation
As we mentioned above, the type of lathing depends on the type of roofing. But in all cases, it is recommended to treat the materials for the crate with antiseptics. The fact is that they work in difficult conditions for natural ventilation, additional protection against decay is very important. Building codes require that all wooden elements be impregnated with fire protection, now there are dual-action preparations that protect against both fire and decay. Requirements must be met. But in practice, both protected and unprotected houses burn with equal success.

Video - Installation of the crate under the metal tile
Roof installation
The technology depends on the selected materials. For all cases, there is universal advice - you need to cover the house as quickly as possible. If insulation is to be installed, then this must be done from the inside of the building, thus eliminating the risk of getting wet mineral wool. Wet wool is a problem for roofers. It will have to be taken out to dry, during dismantling a large number of becomes unusable, the total time for the construction of the roof of the house increases significantly.
Prices for mineral wool
Video - Do-it-yourself metal roofing installation
Video - Errors in the installation of metal tiles
Installation of a drainage system
Video - Installation of gutters
Roofing is the final stage of construction, which requires strict adherence to and implementation of building rules and regulations. The main task of the design is to provide protection from the negative effects of natural phenomena (snow, rain, wind), as well as to give and complement the image of the house. With quality work performed, the roof of the house is able to provide high sound insulation, waterproofing and act as a thermal barrier. In this article, we will tell you what the construction of the roof of a private house consists of, and also consider what designs are.
The photo shows the schemes of roofs of different types.
The design and construction of the roof in a private house can be pitched or flat type. Usually, flat designs used in countries with a hot climate, and pitched is more common. This is because pitched roof does not retain precipitation on the surface. In the construction of a pitched roof, an angle of 10 degrees or more must be observed, and the structure of the roof itself allows you to equip the attic. Structures can be:
- lean-to;
- gable;
- four-pitched tent;
- four-slope hip;
- attic;
- tented;
- spire-shaped.
For information! The roof device of a private attic-type house can be insulated or cold, a non-attic type can be an unventilated, partially or fully ventilated room.
Device and design

In the process of designing a future building, it is necessary to immediately determine the type of roof for the house. You can build the roof of a private house on your own, for this you need to use special architectural programs or contact a company that will help you choose a roof project, as well as advise roofing materials. If you decide to make a roof with your own hands, it is recommended that you carefully study the manual, which will describe step by step how to design a roof. Experts recommend starting construction on some small object, this will help to avoid possible errors and save a lot of purchasing costs. building material.
For information! Roof structures and truss systems must be strong and reliable, because. when using heavy material, the walls and foundation of the house may suffer.
To date, the roof of a private house can be made of wood, metal wood, reinforced concrete and steel. Do-it-yourself roof construction consists of the following steps:
- Mauerlat mounting;
- assembly and installation of the sling system;
- installation of horizontal screeds;
- laying waterproofing;
- fixing the rafters on the ridge;
- installation of the crate;
- finishing front side surfaces.
Important! The rafter system can be hanging and layered. For roofs of private houses with several spans, both types of truss systems are used, i.e. where there is no place for support, hanging ones are used, and where there is support, layered ones.
The photo shows a diagram of the roof of a house with a layered and hanging truss system.

The roof and the structure are fixed to the walls of the house with the help of special building studs, and supporting niches are mounted under the rafter system, which are connected to each other with strong steel wire. The following factors influence the choice of roof and scheme:
- the size and shape of the future structure;
- the presence of internal load-bearing walls;
- the presence of an attic;
- appearance of the structure.
Rafter systems for roofs of private houses must meet the following requirements:
- rafters must be strong and reliable, this allows you to evenly distribute the load on the walls of the house;
- the material used for the roof of the house should be light;
- the truss system should exclude possible thrust on the building;
- when constructing a truss system, it is necessary to use high-quality materials, tk. repair or replacement is quite expensive.
The design of the roof plays an important role in designing the architecture of a home. As a rule, specialists use a roofing coating that excludes water stagnation and does not lend itself to deformation (corrugated wall, arched, soft sheet tiles). Therefore, when designing a house, it is important to initially take into account not only the type of future building, but also decide on the material.
Roof device

The roof for a private house is an important element, the installation of which completes the entire structure of the building. The roof of the house can have a different slope, and the choice of roofing material depends on this. Roof structure can be:
- single-layer - it can be made from asbestos-cement, polymer and metal sheets or tiles;
- multilayer - they lay on the roof roll material or wooden crafts(gonta, drani, tesa).
When using multilayer materials, the number of layers can be from 2 to 5, it all depends on the type of roofing material. In practice, the roof is a complex structure; in appearance it is a multilayer sandwich consisting of several layers. Sandwich consists of: waterproofing, vapor barrier, wind protection, insulation and other important components. The photo shows the scheme of the roof
A properly designed house roof and a well-arranged roof provide reliable protection of the building from the formation of condensate, insulate it and allow ventilation of the under-roof space.
House roof construction
When the design documentation is ready and the material has been purchased, the truss system is being erected. The roof of the house begins with the manufacture of the necessary structural elements. Installation consists of the following steps:
- the Mauerlat is laid and fastened to the longitudinal and bearing walls, fasten them with anchor bolts;
- then a rafter template is made, for this two boards are connected with nails, the free edges are fixed on the Mauerlat, the desired angle level is selected by diluting the boards;
Important! When fixing the template of the truss system, the ridge should be in the center, in order to avoid errors in the design, it is necessary to use a plumb line.
- the finished template is fixed to the beams and cut to the desired angle;
- when the first rafters are ready, they should be connected, and fixed with nails at the place of their intersection;
- then the finished rafters are lifted and installed, after which you can proceed to the next production of parts;
- the second rafters are mounted in another part of the building;
- a construction cord is stretched between the installed rafters, which must be stretched horizontally;
- then the remaining rafters are made and installed along a stretched building cord, taking into account the step prescribed in the project;
- the final stage is the installation of support racks, this design will give greater strength and stability.
For information! For a strong fixation of all elements of the truss system, experts recommend using stamped metal parts.
When the rafter system is installed, you can proceed to the insulation of the roof.
The roof of the house is an important element of the structure, with the correct calculation and installation of the structure, it will serve long time, will provide protection and comfort for living.
One of last stages private housing construction is a device for the roof of a private house correct scheme which is of particular importance. The roof performs many different functions, but one of its main purposes is protection. interior spaces buildings from natural phenomena: wind, sun, precipitation. Not one building, especially residential buildings, can do without roof structures, during the construction of which it is important not to make even the most elementary mistakes inherent in inexperienced builders. Otherwise, after a few years of operation of the house, the roof will already have to be repaired.
And the repair of the roof structure is a rather laborious work, accompanied by a number of difficulties, infringement of the comfort of living for a given period, and, of course, additional financial costs. Therefore, before performing the installation of the roof of a private house, you need a diagram with a detailed reflection on it of all the structural elements of the roof, the building material used, and other details.
Options for roofing schemes for private housing construction
During the construction of private houses, pitched roof structures are often used to cover them, which can be single-pitched or multi-pitched.
The shed roof drawing is used mainly for small, simple outbuildings.
Varieties of multi-pitched roof structures
- Double pitched roofs. The most common type of construction under which any roofing material can be used. Such a roof is quite simple in terms of its installation, but at the same time reliable and durable.
- Hipdesigns- roofs with an envelope according to the scheme of a hipped roof, when two slopes are made in the form of a trapezoid, the other two are in the form of a triangle. Most often used to cover houses in the southern regions, as they are distinguished by their excellent ability to withstand significant wind loads.
- Half hip roofs. This is a subtype of the hip structure, in which the length of the side slopes along the slope line is less than the main slopes. Most of these structures are located in regions with adverse climatic conditions.
- hipped roofs. Their design consists of four triangular-shaped slopes, the tops of which are connected at one point.
- Broken roof structures. Such roofs belong to gable roofs, they consist of four surfaces that intersect each other at an obtuse angle.
- Multi-gable roofs. Such roofs have a rather complex design scheme, which is most often used to cover elite class houses with a complex geometric configuration.
Pitched roofs, depending on their design features, are subdivided into attic, non-attic roofs. In the first case, an attic space is arranged between the ceiling and the roof (a separate type of pitched roof). In the second case, all load-bearing components of the roof structure are also the floor of the outer floor of the building (combined type of pitched roof).
To cover private houses, an executive scheme of attic type roofing is often used.
Structural features of the attic roof
When constructing roofs with an attic space, the following details should be considered:
Particular attention must be paid to the parameters of the floor spans. If the width is large enough, then the rafter leg should have a maximum cross section. For example, the span of a shed roof is 5 meters, then the cross section of the beam used for the manufacture of rafters should be 15x5 cm, and the installation step is about one meter.

If you make a partial section of the roof with an attic, you can consider its main components:
- roofing material;
- ridge beam;
- load-bearing inner wall;
- rafter legs;
- support racks;
- Mauerlat;
- struts;
- crate;
- metal fasteners.
Be sure to take into account the slope of the slope. A roof with slopes at a large angle will be released from precipitation faster, since water and snow on such a surface are not able to hold. Therefore, for roofs with a slope of 50º, rafters with a smaller cross section can be used than for roofs with a slope of less than 20º. These data must be reflected in the scheme of arrangement of the roof structure.

It is also worth remembering the period of operation of individual parts of the roof structure, depending on the building material used for their manufacture. For example, load-bearing elements made of natural wood can serve without loss of initial strength for about 30 years, structures made of reinforced concrete - 50 years. With the proper organization of the wooden truss system, proper care during the period of operation, it can not be changed for 100 years. When choosing the design of the future roof, it is necessary to take into account the expected conditions for its operation.
When designing a roof scheme, its thermal properties must be taken into account without fail.
When calculating the cross-section of a beam for a rafter system, it is also necessary to take into account the mass of the roofing "pie".
The main nuances that must be considered when making a do-it-yourself rafter system
- In order to prevent the deflection of the building legs in the case of the manufacture of rafters of insufficient section when calculating the required roofing material, the farm is necessarily equipped with additional support posts, struts, puffs.
- When calculating the roof, it is imperative to take into account the possibility of disruption by strong gusts of wind of the roofing material. To prevent this, the rafter legs must be fixed with brackets and additionally with steel wire (section up to 8 mm, but not less than 4 mm).
- For the manufacture of a roof ridge run, it is recommended to use logs (boards in the most extreme case, the thickness of which should be 5 cm or more).
- If the roof scheme for attic construction, then the puffs are not equipped, they will be compensated by overlapping the floors, which will subsequently serve as the floor of the attic.
- The density of the lathing will depend on the roofing used, the main building material for which are logs (boards) and tes. The main purpose of the crate is to take on the load from the entire roof covering, then transfer it to the rafter system.
- Depending on the type of roof being built, the crate is sparse, solid. The peculiarity of the sheathing of a continuous type is as follows: it is made of two layers, a gap of no more than 2 mm is allowed between the boards. In this case, the first layer is sparse, the second one is mounted at an angle of 45º relative to the first one. This is due to the peculiarity of laying some types of materials for the roof. When arranging a sparse type crate, a distance of 6 to 14 cm can be maintained between the boards (depending on the snow cover of the region in which the house is being built).
- You also need to remember that a continuous crate is always performed on the slopes of the roof, the joints of the rafter system.

The main features of the roof design are necessarily reflected in the drawing up of the scheme.
When planning to cover the roof of a house with your own hands, it must be borne in mind that when choosing a scheme for its arrangement, it is worth relying not only on the conditions for its further operation, but also on your own financial capabilities. It is also important to understand that the safety of the residents of the house will depend on the quality of the installation of the roof of the house with their own hands. Before using a specific roof structure scheme, you can first study their features from photographs on the Internet.
Types and arrangement of roofs of private houses
Roofing is the final stage of construction, which requires strict adherence to and implementation of building rules and regulations. The main task of the design is to provide protection from the negative effects of natural phenomena (snow, rain, wind), as well as to give and complement the image of the house. With quality work performed, the roof of the house is able to provide high sound insulation, waterproofing and act as a thermal barrier. In this article we will tell you what it consists of, and also consider what designs are.
Types of structures in private houses
The photo shows the schemes of roofs of different types.

The design and construction of the roof in a private house can be of pitched or flat type. As a rule, flat structures are used in countries with a hot climate, and pitched structures are more common. This is due to the fact that the pitched roof does not retain precipitation on the surface. In the construction of a pitched roof, an angle of 10 degrees or more must be observed, and the structure of the roof itself allows you to equip the attic. Structures can be:
- lean-to;
- gable;
- four-pitched tent;
- four-slope hip;
- attic;
- tented;
- spire-shaped.
For information! The roof device of a private attic-type house can be insulated or cold, a non-attic type can be an unventilated, partially or fully ventilated room.
Device and design

In the process of designing a future building, it is necessary to immediately determine the type of roof for the house. You can build the roof of a private house on your own, for this you need to use special architectural programs or contact a company that will help you choose a roof project, as well as advise roofing materials. If you decide to make a roof with your own hands, it is recommended that you carefully study the manual, which will describe step by step how to design a roof. Experts recommend starting construction on some small object, this will help to avoid possible mistakes and significantly save the cost of buying building material.
For information! Roof structures and truss systems must be strong and reliable, because. when using heavy material, the walls and foundation of the house may suffer.
To date, the roof of a private house can be made of wood, metal wood, reinforced concrete and steel. Do-it-yourself roof construction consists of the following steps:
- Mauerlat mounting;
- assembly and installation of the sling system;
- installation of horizontal screeds;
- laying waterproofing;
- fixing the rafters on the ridge;
- installation of the crate;
- surface finishing.
Important! The rafter system can be hanging and layered. For roofs of private houses with several spans, both types of truss systems are used, i.e. where there is no place for support, hanging ones are used, and where there is support, layered ones.
The photo shows a diagram of the roof of a house with a layered and hanging truss system.

The roof and the structure are fixed to the walls of the house with the help of special building studs, and supporting niches are mounted under the rafter system, which are connected to each other with strong steel wire. The following factors influence the choice of roof and scheme:
- the size and shape of the future structure;
- the presence of internal load-bearing walls;
- the presence of an attic;
- appearance of the structure.
Rafter systems for roofs of private houses must meet the following requirements:
- rafters must be strong and reliable, this allows you to evenly distribute the load on the walls of the house;
- the material used for the roof of the house should be light;
- the truss system should exclude possible thrust on the building;
- when constructing a truss system, it is necessary to use high-quality materials, tk. repair or replacement is quite expensive.
The design of the roof plays an important role in designing the architecture of a home. As a rule, specialists use a roofing coating that excludes water stagnation and does not lend itself to deformation (corrugated wall, arched, soft sheet tiles). Therefore, when designing a house, it is important to initially take into account not only the type of future building, but also decide on the material.
Roof device
The roof for a private house is an important element, the installation of which completes the entire structure of the building. The roof of the house can have a different slope, and the choice of roofing material depends on this. Roof structure can be:
- single-layer - it can be made from asbestos-cement, polymer and metal sheets or tiles;
- multilayer - rolled material or wooden products (shingles, shingles, tesa) are laid on the roof.
When using multilayer materials, the number of layers can be from 2 to 5, it all depends on the type of roofing material. In practice, the roof is a complex structure; in appearance it is a multilayer sandwich consisting of several layers. Sandwich consists of: waterproofing, vapor barrier, wind protection, insulation and other important components. The photo shows the scheme of the roof
A properly designed house roof and a well-arranged roof provide reliable protection of the building from the formation of condensate, insulate it and allow ventilation of the under-roof space.
House roof construction
When the design documentation is ready and the material has been purchased, the truss system is being erected. The roof of the house begins with the manufacture of the necessary structural elements. Installation consists of the following steps:
- the Mauerlat is laid and fastened to the longitudinal and load-bearing walls, they are fixed with anchor bolts;
- then a rafter template is made, for this two boards are connected with nails, the free edges are fixed on the Mauerlat, the desired angle level is selected by diluting the boards;
Important! When fixing the template of the truss system, the ridge should be in the center, in order to avoid errors in the design, it is necessary to use a plumb line.
- the finished template is fixed to the beams and cut to the desired angle;
- when the first rafters are ready, they should be connected, and fixed with nails at the place of their intersection;
- then the finished rafters are lifted and installed, after which you can proceed to the next production of parts;
- the second rafters are mounted in another part of the building;
- a construction cord is stretched between the installed rafters, which must be stretched horizontally;
- then the remaining rafters are made and installed along a stretched building cord, taking into account the step prescribed in the project;
- the final stage is the installation of support racks, this design will give greater strength and stability.
For information! For a strong fixation of all elements of the truss system, experts recommend using stamped metal parts.
When the rafter system is installed, you can proceed to the insulation of the roof.
The roof of the house is an important element of the structure, with the correct calculation and installation of the structure, it will last a long time, provide protection and comfort for living.
Construction of the roof of a private house

Types of roofs of a private house
Flat roof
Float:="" left="" margin:="">
gable roofs

Four-pitched roofs

broken roofs

Multi-gable roofs


Stage 1 - Mounting the Mauerlat


Stage 3 - Installation of the crate
Float:="" left="" margin:="">
Construction of the roof of a private house
Before talking about how the roof of a house is being built with our own hands, let's dwell a little on existing types roofs
Scheme of the construction of a gable roof for a house
Types of roofs of a private house
All roofs of private buildings are divided into two large groups: flat roofs and pitched roofs. The latter, in turn, are divided into one-, two- and four-slope, as well as broken and multi-gable. Let's take a look at each separately.
Flat roof
Its undeniable advantages include:
- You can build quite simply and quickly;
- Reliability and strength of the structure;
- Long service life;
- The original appearance (although many people are trying to argue with this statement, stated by experts);
- The possibility of additional functional load on the roof (arrangement of an observation deck, places for relaxation and sunbathing, a summer mini-garden, etc.).
However, despite all the advantages of flat roofs, there are several significant disadvantages. Firstly, precipitation in the form of snow accumulates on such roofs, which require regular cleaning.
Float:="" left="" margin:="">Construction and arrangement of a shed roof for a cottage
In addition, it is almost impossible to make an attic on such roofs.
gable roofs
A gable roof is very often used to cover private houses. It is especially relevant for small country houses. This is due to its advantages, which include the following:
Among the disadvantages of such roofs, one can single out the need to equip a ridge, as well as two drainage lines. In addition, if we compare gable roofs with single-pitched ones, then their weight will be greater, which requires adjustments in the calculation and construction of the foundation. In addition, making such a roof with your own hands is much more difficult than a shed roof.
Four-pitched roofs
In house projects, hipped roofs are not as common as gable roofs, although they have a more attractive look. This is due to the fact that such a roof structure is very difficult to perform and its weight is very large.
But such roofs make it possible to make a more spacious and bright attic inside, which will always be warm due to the fact that it will be heated from four sides.
Roof truss system
broken roofs
Broken roofs - the most popular type of roofing in private construction. This is due to the fact that, if it is built correctly, then such a roof is practically devoid of flaws. But it has a lot of advantages:
- The possibility of expanding the living space of the premises due to the attic, equipped in a sloping roof;
- Reduced heat loss through the roof;
- Gives originality to the appearance of the house;
- Under the arch of such a roof, you can make a two-level attic.
There are also disadvantages that are easily eliminated with the proper arrangement of the roof. These "cons" include:
Skylights themselves are more expensive than conventional ones, which also cannot be attributed to the advantages of sloping roofs.
Multi-gable roofs
Houses with a multi-gable roof are original in their design and are suitable for private houses of any architectural form. But besides this, they also have the following advantages:
- Reliability and durability, which is provided by a special truss structure;
- Under the arch of such a roof, it is possible to equip a spacious comfortable attic, which will significantly increase the area of \u200b\u200bliving premises in the house;
- Atmospheric precipitation does not accumulate on the roof, but flows down from it complex system gutters due to the steep angle of incidence of the roof slopes.
However, such a roof also has disadvantages, which boil down to the difficulty of erecting a truss system under a plucked roof, an increased amount of building material, as well as the complexity of arranging drainage systems.
Finished project two-story house with multi-gable roof
You are unlikely to be able to build this type of roof on your own, and therefore in our article we will not dwell on it, as, in fact, on the rarely demanded - hipped one.
Let us consider in detail the technology of erecting such roofs as single-pitched and gable, since they are the most popular in private construction.
Do-it-yourself shed roof
Before proceeding with the construction of a pitched roof, it is necessary to decide on a few points.
Features of mounting pitched roofs
First, you need to understand where the only roof slope will be directed. Experts recommend that the non-windy side be considered a guideline for the direction of the roof slope. Secondly, you need to decide on the angle of the roof. Here it is worth adhering to the following pattern: the more precipitation falls in your area, the steeper you need to make a pitched roof.
Installation of a single-pitched roof frame log
But do not overdo it, because by increasing the angle of the roof, you increase the windage of the structure. Thirdly, depending on the chosen angle of inclination of the roof, it is necessary to determine the type of roofing material. Yes, for various angles roof slope, a variety of roofing materials are recommended:
Having decided on all the above parameters, you can begin to build a pitched roof.
Materials and tools needed for construction
The construction of a shed roof will require you to purchase the following building materials. First, stock up wooden beam for the rafter system, boards and nails for mounting the structure.
Secondly, do not forget to purchase a wood preservative that protects it from insects, moisture, mold and mildew. Thirdly, purchase the required number of rolls of steam, hydro and thermal insulation, roofing material, as well as fasteners in order to install the roof.
As for tools, here you will not need any specialized tool, it is enough to have a hammer, a hacksaw, an ax, a stapler, a measuring tape, and also building level. In addition, you will need a knife, a pencil and a brush for working wood.
Stages of construction of a shed roof
The construction of a shed roof comes down to several stages.
Stage 1 - Mounting the Mauerlat
Mauerlat is a beam, which is the lowest part of the roof structure. It is mounted on the wall of the house and acts as a support for the rafters.
An example of fastening a shed roof Mauerlat
It can be made from a 10 x 15 cm timber, which is attached to the wall in one of the following ways: using wire, using construction studs or anchors. The installation sequence of the Mauerlat is as follows. First of all, to ensure the durability of the roof, the Mauerlat must be waterproofed from the wall of the house using a sheet of roofing material or polyethylene, which is laid between them.
Further actions will vary depending on the fastener method you choose. If you decide to use anchors or studs, then you need to make holes in the wall and in the Mauerlat, matching each other in step.
To facilitate this process, use a board with marks for the holes. Alternatively, the studs can be fixed into the wall during masonry. last row brick (block).
It is necessary to insert bolts into the holes in the wall, and subsequently simply put the Mauerlat on them.
The name of the structural elements of a pitched roof
It remains only to tighten with nuts and with the use of Mauerlat fastening washers.
If the Mauerlat is planned to be mounted using a wire, prudently mounted in the top row of the wall masonry, then the process is greatly facilitated. Then in the Mauerlat at a distance of at least 25 mm from the edge it is necessary to drill a through hole, face parallel timber. The ends of the wire are passed through it and tightened tightly.
Stage 2 - Installation of the truss system
shed roof has a fairly simple design truss system.
Shed roof truss system
As rafters, either a beam of a smaller section (up to 50 mm) or a board (5 x 15 cm) is used. It is necessary to take into account the nuance that the rafters should protrude at least 30 cm beyond the wall level. This is necessary in order to protect the walls of a private house from rain and other precipitation.
For a snug fit of the rafter legs to the Mauerlat, it is necessary to make cutouts in the rafters for the base beam. The step for placing the rafters is chosen based on the width of the heat insulator roll. The rafters are fastened with nails (10 cm).
Stage 3 - Installation of the crate
Now it is necessary to fill the boards of the crate across the rafter legs. For it, as a rule, bars of a small section (up to 5 cm) are used. The step of the crate depends on the type of roofing material you choose. For example, when using rolled roofing materials, it is recommended to make the crate solid. The installation of the crate is also carried out using nails (10 cm).
Stage 4 - Creating a roofing cake
At this stage, the main thing is to correctly follow the sequence of laying hydro-, steam- and heat-insulating materials. So, a waterproofing layer is laid on the crate, and steam and heat insulators are mounted on the inside of the roof (thermal insulation is adjacent to the crate, which is covered with a waterproofing material on top). It turns out that the thermal insulation is closed between the layers of vapor and water insulators.
Float:="" left="" margin:="">Installation of corrugated board on a shed roof
Let's start laying the waterproofing membrane. The features of its structure are such that it will not allow moisture from the outside to get onto the insulation layer, but at the same time, vapors from the heat-insulating layer will come out. The waterproofing is attached in the same way as a vapor barrier film. In conclusion, a shed roof requires the installation of a finish coating and a drain.
Construction of the roof of a private house
Before we talk about how the roof of a house is built with our own hands, let's dwell a little on the existing types of roofs.
Scheme of the construction of a gable roof for a house
Types of roofs of a private house
All roofs of private buildings are divided into two large groups: flat roofs and pitched roofs. The latter, in turn, are divided into one-, two- and four-slope, as well as broken and multi-gable. Let's take a look at each separately.
Flat roof
Its undeniable advantages include:
- You can build quite simply and quickly;
- Reliability and strength of the structure;
- Long service life;
- The original appearance (although many people are trying to argue with this statement, stated by experts);
- The possibility of additional functional load on the roof (arrangement of an observation deck, places for relaxation and sunbathing, a summer mini-garden, etc.).
However, despite all the advantages of flat roofs, there are several significant disadvantages. Firstly, precipitation in the form of snow accumulates on such roofs, which require regular cleaning.
Float:="" left="" margin:="">Construction and arrangement of a shed roof for a cottage
In addition, it is almost impossible to make an attic on such roofs.
gable roofs
A gable roof is very often used to cover private houses. It is especially relevant for small country houses. This is due to its advantages, which include the following:
Among the disadvantages of such roofs, one can single out the need to equip a ridge, as well as two drainage lines. In addition, if we compare gable roofs with single-pitched ones, then their weight will be greater, which requires adjustments in the calculation and construction of the foundation. In addition, making such a roof with your own hands is much more difficult than a shed roof.
Four-pitched roofs
In house projects, hipped roofs are not as common as gable roofs, although they have a more attractive look. This is due to the fact that such a roof structure is very difficult to perform and its weight is very large.
But such roofs make it possible to make a more spacious and bright attic inside, which will always be warm due to the fact that it will be heated from four sides.
Roof truss system
broken roofs
Broken roofs - the most popular type of roofing in private construction. This is due to the fact that, if it is built correctly, then such a roof is practically devoid of flaws. But it has a lot of advantages:
- The possibility of expanding the living space of the premises due to the attic, equipped in a sloping roof;
- Reduced heat loss through the roof;
- Gives originality to the appearance of the house;
- Under the arch of such a roof, you can make a two-level attic.
There are also disadvantages that are easily eliminated with the proper arrangement of the roof. These "cons" include:
Skylights themselves are more expensive than conventional ones, which also cannot be attributed to the advantages of sloping roofs.
Multi-gable roofs
Houses with a multi-gable roof are original in their design and suitable for private houses of any architectural form. But besides this, they also have the following advantages:
- Reliability and durability, which is provided by a special truss structure;
- Under the arch of such a roof, it is possible to equip a spacious comfortable attic, which will significantly increase the area of \u200b\u200bliving premises in the house;
- Atmospheric precipitation does not accumulate on the roof, but flows down from it through a complex system of gutters due to the steep angle of incidence of the roof slopes.
However, such a roof also has disadvantages, which boil down to the difficulty of erecting a truss system under a plucked roof, an increased amount of building material, as well as the complexity of arranging drainage systems.
Ready-made project of a two-story house with a multi-gable roof
You are unlikely to be able to build this type of roof on your own, and therefore in our article we will not dwell on it, as, in fact, on the rarely demanded - hipped one.
Let us consider in detail the technology of erecting such roofs as single-pitched and gable, since they are the most popular in private construction.
Do-it-yourself shed roof
Before proceeding with the construction of a pitched roof, it is necessary to decide on a few points.
Features of mounting pitched roofs
First, you need to understand where the only roof slope will be directed. Experts recommend that the non-windy side be considered a guideline for the direction of the roof slope. Secondly, you need to decide on the angle of the roof. Here it is worth adhering to the following pattern: the more precipitation falls in your area, the steeper you need to make a pitched roof.
Installation of a single-pitched roof frame log
But do not overdo it, because by increasing the angle of the roof, you increase the windage of the structure. Thirdly, depending on the chosen angle of inclination of the roof, it is necessary to determine the type of roofing material. So, for different angles of inclination of the roof, a variety of roofing materials are recommended:
Having decided on all the above parameters, you can begin to build a pitched roof.
Materials and tools needed for construction
The construction of a shed roof will require you to purchase the following building materials. First, you need to stock up on wooden beams for the truss system, boards and nails for mounting the structure.
Secondly, do not forget to purchase a wood preservative that protects it from insects, moisture, mold and mildew. Thirdly, purchase the required number of rolls of steam, hydro and thermal insulation, roofing material, as well as fasteners in order to install the roof.
As for tools, here you will not need any specialized tool, it is enough to have a hammer, a hacksaw, an ax, a stapler, a measuring tape, and a building level. In addition, you will need a knife, a pencil and a brush for working wood.
Stages of construction of a shed roof
The construction of a shed roof comes down to several stages.
Stage 1 - Mounting the Mauerlat
Mauerlat is a beam, which is the lowest part of the roof structure. It is mounted on the wall of the house and acts as a support for the rafters.
An example of fastening a shed roof Mauerlat
It can be made from a 10 x 15 cm timber, which is attached to the wall in one of the following ways: using wire, using construction studs or anchors. The installation sequence of the Mauerlat is as follows. First of all, to ensure the durability of the roof, the Mauerlat must be waterproofed from the wall of the house using a sheet of roofing material or polyethylene, which is laid between them.
Further actions will vary depending on the fastener method you choose. If you decide to use anchors or studs, then you need to make holes in the wall and in the Mauerlat, matching each other in step.
To facilitate this process, use a board with marks for the holes. Alternatively, the studs can be fixed in the wall during the laying of the last row of bricks (block).
It is necessary to insert bolts into the holes in the wall, and subsequently simply put the Mauerlat on them.
The name of the structural elements of a pitched roof
It remains only to tighten with nuts and with the use of Mauerlat fastening washers.
If the Mauerlat is planned to be mounted using a wire, prudently mounted in the top row of the wall masonry, then the process is greatly facilitated. Then in the Mauerlat at a distance of at least 25 mm from the edge, it is necessary to drill a through hole parallel to the edge of the beam. The ends of the wire are passed through it and tightened tightly.
Stage 2 - Installation of the truss system
Shed roof has a fairly simple design truss system.
Shed roof truss system
As rafters, either a beam of a smaller section (up to 50 mm) or a board (5 x 15 cm) is used. It is necessary to take into account the nuance that the rafters should protrude at least 30 cm beyond the wall level. This is necessary in order to protect the walls of a private house from rain and other precipitation.
For a snug fit of the rafter legs to the Mauerlat, it is necessary to make cutouts in the rafters for the base beam. The step for placing the rafters is chosen based on the width of the heat insulator roll. The rafters are fastened with nails (10 cm).
Stage 3 - Installation of the crate
Now it is necessary to fill the boards of the crate across the rafter legs. For it, as a rule, bars of a small section (up to 5 cm) are used. The step of the crate depends on the type of roofing material you choose. For example, when using rolled roofing materials, it is recommended to make the crate solid. The installation of the crate is also carried out using nails (10 cm).
Stage 4 - Creating a roofing cake
At this stage, the main thing is to correctly follow the sequence of laying hydro-, steam- and heat-insulating materials. So, a waterproofing layer is laid on the crate, and steam and heat insulators are mounted on the inside of the roof (thermal insulation is adjacent to the crate, which is covered with a waterproofing material on top). It turns out that the thermal insulation is closed between the layers of vapor and water insulators.
Float:="" left="" margin:="">Installation of corrugated board on a shed roof
Let's start laying the waterproofing membrane. The features of its structure are such that it will not allow moisture from the outside to get onto the insulation layer, but at the same time, vapors from the heat-insulating layer will come out. The waterproofing is attached in the same way as a vapor barrier film. In conclusion, a shed roof requires the installation of a finish coating and a drain.
Roof construction is an important stage in the construction of a private house. It protects residents from the sun, cold, precipitation and other surprises of nature. When drawing up a project, it is necessary to take into account the peculiarities of the climatic zone. Its second function is aesthetic.
Who doesn't want to live in a beautiful house? A spectacular roof can become the highlight of the whole building and even a local landmark.

Roof types
The choice of roof type is significantly influenced by the climate.

A flat solution is appropriate in areas with a minimum of annual rainfall. The absence or minimal (no more than 3º) slope in areas with a large number of them will lead to the accumulation of water on the roof. Subsequently, it may begin to leak.

A pitched structure is more suitable for our latitudes. The angle of inclination depends on the amount of precipitation, usually at least 10º. In a private house, the roof device often involves several slopes.


The architecture of the house may include an attic. In this case, the roof is separated from the residential part by an attic floor. The roofless roof is at the same time the ceiling of the upper floor.

When drawing up a roof project, you need to decide how to use the space under it. The appropriate shape and design depends on whether it is planned to place a living room or a pantry on it.


Shed roof tilted to one side at an angle of 20-30º. The slope should be located towards the winds. Great choice for houses with walls of different heights. This simple design effectively uses the area, simplifies the installation of the chimney and the subsequent completion of the floors.

Of the shortcomings, one can single out not the most interesting view. An unusual approach (a combination of slopes at different levels, the use of metal tiles) will achieve an attractive result.

A fairly common option in our latitudes - gable roof. The angle of inclination varies between 25-45º, the exact value depends on the amount of precipitation in the region.

The slope should contribute to its natural purification from snow and water. This design is suitable for attic equipment, it is quickly and inexpensively mounted, and opens up wide possibilities for design.

The four-pitched hip roof looks original, protects the facade from precipitation and is not afraid of strong wind. Under it, you can equip an attic or attic, but their area will be less than in the gable version. The disadvantage of the design is the complexity and laboriousness of construction.

The original semi-hip roof combines the last two types. It has a trapezoidal pediment, due to which it is resistant to the vagaries of the weather. May have two or four slopes. Behind the spectacular appearance hides the complexity of installation and roofing.

The tent is a kind of tent or pyramid in the form of four triangular slopes. Accordingly, the house should have the shape of a rectangle or square. good option coatings will be metal or slate.


The multi-gable roof has an attractive appearance and is suitable for houses of non-standard architecture with extensions. The complexity of the design, including many slopes and angles with different slopes, makes its installation accessible only to an experienced craftsman.


A beautiful and unusual domed or conical roof will suit a round or multifaceted structure. The robust and earthquake-resistant design is not afraid of surprises presented by the weather.

The main disadvantages are the impossibility of organizing an attic and the extreme complexity of installation. Rarely used in private homes.


Roof types can be combined. The architect has ample opportunities to create a functional and aesthetic option. The flip side of the coin is that construction, design and maintenance are fraught with considerable difficulties.

The architecture of the house also plays its role in choosing the shape of the roof: for example, to a building in classical style more suitable gable or multi-gable. Photos of the roofs of private houses will help you make a choice.

Mansard roofs
In private houses, an attic or attic is often equipped. This decision is justified by a number of obtained advantages. Perhaps the most important of them is the additional area without the construction of a full-fledged floor.

A well-organized attic ventilation and thermal insulation system will improve the microclimate of the house. With the right approach, even the space between the roof and the walls of the attic can be effectively used. Windows built into the roof provide maximum natural light to the room.

Before starting work, make sure that the load-bearing walls and foundation can withstand the new loads.


The angle of inclination of the attic roof is usually 45-60º ( top part can be at an angle of 25-35º).

Material selection
The traditional roofing material is slate (asbestos-cement corrugated sheets). With reliability and cheapness, it remains quite heavy. A suitable roof slope for its use is 13-60º.

Not suitable for flat roofs, as precipitation will reduce the service life if it gets into the cracks. Bituminous slate is used starting from a 5º slope. The pitch of the crate depends on the angle: if it is less than 10º, a continuous flooring is required.

Ondulin, similar to slate, does not have the most presentable appearance. Suitable for outbuildings, can also be used in the repair of the roof of a private house. The harm to its merits is strength and durability.


Practical, inexpensive, lightweight metal profile will be a good alternative to slate. You can choose the cover of your favorite color.

Roofing material is more often used to provide thermal insulation, rather than a full coverage. Represents soft material black color.


The tile possesses high decorative qualities, reliable and easy. Produced by the most different colors. The high cost of the roof can push away from the choice in her favor. A suitable slope for ceramic tiles is 30-60º. If it is less than 25º, care must be taken to increase ventilation and waterproofing.


Perhaps the most popular roof of a private house can be called a metal tile. It can be used starting with a 15º slope.

Bituminous tiles will repeat the surface of any curvature, so it will become good choice for an unusual roof (for example, domed). The minimum tilt angle is 12º.

Photos of roofs of private houses


Each stage of building a roof with your own hands is equally important and deserves close attention. Today we will talk in detail about each stage from "a" to "z" ... So, we are building the roof of the house with our own hands.
Stages of construction work on the arrangement of the roof with their own hands
Installing Mauerlat
An obligatory stage in the arrangement of the roof in brick and stone, but not in wooden houses.
Mauerlat is the name given to the entire roof truss system. Its installation can be carried out using various methods. But, regardless of the methods of fastening, it is necessary to take into account such parameters as the size of the building and the roof load on it.

So, the rafter system can be attached to the walls by:
- wire, which is wrapped around the Mauerlat and screwed to the wall. This is the simplest and most primitive option, which is used in cases where the roof is light in weight (this method is not considered absolutely reliable!);
- staples. This option is also suitable for buildings with low loads. In order to fix the Mauerlat with brackets, wooden bars are embedded in the masonry of each of the walls. After that, each of the brackets is attached with one side to the Mauerlat, and the other - to the bar;
- hairpins. To ensure such fasteners, studs with a diameter of 10-15 millimeters are used. They are laid in the wall masonry with the points up. Next, the Mauerlat is placed on the edge of the walls and lightly tapped with a hammer until marks from the studs appear on the timber. After that, holes are made in the places of the above marks. Mauerlat is put on studs and twisted with nuts;
- anchor bolts. A concrete belt of such bolts is laid along the edge of each of the walls. In the future, the installation process proceeds similarly to the variant with mounting on studs. Most experts consider this method the most reliable, it is practiced even when arranging the roof in buildings made of lightweight concrete.
We fasten the rafters
One of the main hallmarks good roofing system - reliable and high-quality fastening of the roof to the main frame of the building.
Currently, various methods of fastening rafters to the strapping of a structure are widely used. In the case of the roof wooden house we cannot use any of the varieties of hanging structures. The rafter beams should only be inclined, and the fasteners must be hinged, due to this combination, a strong and at the same time movable fastener is provided, which is ideal in conditions of shrinkage of the frame of a wooden building.
Roofing work in brick and stone buildings suggest rigid fastening of the rafters to the Mauerlat. Here, inclined or hanging fastening systems with or without a notch can be used.

Fastening with a notch implies a tight fit of the rafters to the Mauerlat. For this purpose, truss beams are hemmed in a certain way. Elements for the removal of cornices are overlapped. Rigid fixation of structural nodes is carried out by means of staples, screws or nails.
The mounting option without cutting is more technologically simple. The density of the junction of the rafters is ensured by persistent boards and bars, and the structural units are attached using metal corners.
We strengthen the design
Installation of additional structural elements (struts, racks, etc.) is a proven way to increase reliability roof structure. However, in this context, one should not forget about the features of the layout and interior of the building. Therefore, it is important to remember the following rules:
- The struts should be placed at an angle of 45 or 60 degrees with respect to the horizontal plane.
- Support posts should not be installed on floor spans. Racks should be located on walls or beams and springs (between the walls of the house).
- In order to prevent the possible process of divergence of the rafter beams, special puffs are used.

We arrange the crate
The choice of the type of lathing is largely due to the characteristics of the material for the roof. If you plan to install metal roof, the choice of a sparse non-continuous crate will be optimal. And for a soft bituminous roof, a continuous crate is ideal.

We equip ventilation
The under-roof space must be ventilated to protect the roof from mold, fungi and other unpleasant surprises.
For the ventilation device we:
- we ensure the flow of air through the cornices, using special perforated spotlights or simply sparse boards;
- we provide a gap of two to three centimeters between the layers of insulation and roofing materials for better circulation of the air flow;
- we carry out work on the installation of a special aerator in order to ensure the release of air in the area of \u200b\u200bthe ridge.
Remember that a properly arranged ventilation system protects the roof from destructive processes.

The choice of roofing materials- one of the main points in the long chain of all the above works. At present, any serious manufacturer makes maximum detailed instructions for laying the roof for each item of material sold.

Currently at the peak of popularity are the following roofing:
- corrugated board;
- ondulin;
- flexible (soft) tiles;
- seam tiles;
- metal tile.
The roof is one of the most important parts of a house. The durability of its operation depends on how correct its installation will be. Otherwise, you will have to dismantle it after a year. A variety of materials and designs also dictates how the roof will be built with your own hands. It also depends on the house itself: its size, the design of the walls.
The aesthetic component is also important, because someone likes flat roof, someone prefers complex designs. In general, the roof of a private house with your own hands is an excellent solution in terms of budget and practicality, if you have free time for this. 
Before you decide on the materials and installation methods, you should familiarize yourself with the instructional videos “we build the roof of the house with our own hands”, which describe in detail about the specific choice and how the work is carried out, as well as see a photo of the roof of the house with your own hands. This will help you understand what to choose, and you can better prepare for the work. In general, the whole process can be divided into the following stages:
- Choice of design and materials;
- Mauerlat mount;
- Installation of the frame and reinforcement of the roof. At this stage, building rafter roof with your own hands;
- Sheathing and ventilation;
- Installation of drips and roofing;
- Cornice filing;
- Warming.
The roof can be one-, two-, three- and four-pitched. The first option is the simplest and saves on material. 
What needs to be remembered?
If you decide that the roof of the house with your own hands is quite realistic, then follow these tips:
- to begin with, a roof project is being prepared, according to which all work will be carried out;
- it is worth looking at the forums how certain materials look over time;
- it is important to choose the correct angle of inclination of the roof - with an unacceptable slope, the materials will behave differently;
- you should choose those materials for which a guarantee is provided. In other cases, one cannot count on the high quality of the erected structure.
In this article we will tell you how the roof of a private house is built with your own hands. Statistics show that almost every third homeowner built their own home. And this stage is often the hardest part of the whole process. To do this, you need to know and understand what nuances may arise, as well as successfully deal with them. Therefore, we advise you to carefully study the materials related to the device. various roofs, the technology of their installation and the order of work. Then the construction of the roof of a private house with your own hands will be easy and without any problems. 
Before designating the stages of construction, it is necessary to decide what the shape of the roof will be. She may be:
- one-, two- or four-slope;
- broken line;
- multi-forceps.
A shed roof is the easiest to perform, and will also allow you to save materials. The frame can be made independently, besides, it is quickly mounted. But it must be remembered that with this choice, the possibility of arranging the attic disappears.
The gable roof, in turn, is more popular, but it is more difficult to manufacture. Thanks to her, you can decorate the attic by placing, for example, guest rooms on the floor. four-pitched roof more complex in execution, as it has more constituent elements. 
Work order
Concerning step by step instructions to do the job, it looks like this:
- To begin with, the dimensions of the building are determined, on which, accordingly, the size of the roof also depends.
- Then materials are purchased.
- After that, a Mauerlat is attached to the wall.
- The final stage is the direct installation of the frame and roof.
It is necessary to take into account how and where the ventilation will be located, to ensure proper waterproofing: it is better to take care of this in advance so that you do not have to carry out repairs or, even worse, redo all the work. Also, before you start building the roof of a private house with your own hands, we recommend that you look at various reference materials, as well as consult with experts.
Video: Do-it-yourself roof of a private house
With this material they read the same: