How to insulate the front wall of the loggia. Do-it-yourself insulation of the inner wall of the loggia. Issues that need to be resolved before starting work on the insulation of the loggia
The notorious housing problem has been troubling us since the time when Adam and Eve were expelled from paradise. “What does paradise and balconies have to do with it?” the reader will ask. And besides, the balcony is a constructive component of our home. And the solution to the question: the better to insulate a balcony or loggia , may, in the end, bring either heavenly pleasure, or a headache due to the money, time and effort spent. After all, a properly selected insulation will turn your balcony (loggia) into additional cozy square meters, expand the space of the apartment and reduce the energy consumption of this area to preserve heat in the winter.
First, consider what types of heaters exist for balconies and loggias. Then we compare them, highlight the advantages and disadvantages, after which you can determine which insulation better fit in your case.
Common types of insulation for balconies and loggias
Mineral wool
 Mineral wool is widely used in the insulation of balconies and loggias due to the ease of installation and relative cheapness.
 Mineral wool (basalt wool, wool made from natural fibers (linen) with a polyester content (up to 15%)) - solid, modern look noise and heat insulation, used in the insulation of roofs, walls, ceilings, balconies and facades. For roofing, roll-type cotton wool with a density of 25-35 kg / m3 is more often used. But for the facade, it is better to choose a denser insulation up to 70-90 kg per meter, which will ensure minimal shrinkage of vertical surfaces.
An insulator made of mineral wool or basalt used in the insulation of loggias or balconies showed excellent results. It can also be used as protection against moisture by laying a hydrobarrier. The thickness is chosen according to the temperature indicators of a particular region, but usually not more than 100 mm. fasten mineral wool under the finishing layer (plastic, drywall) follows with the help of battens or counter-battens.
One of the disadvantages of this insulation is the wetting of the material. Only cotton wool made from natural linen provides vapor permeability and stable operation when partially wet.
Brief characteristics of mineral wool ISOVER Classic Plus 50 mm:
Depending on the manufacturers, cutting and specifications may differ.
Expanded polystyrene, extruded
 Polyfoam - universal insulation for balconies and loggias
 Expanded polystyrene extruded (polystyrene) - wide in application thermal insulation material with a homogeneous structure and closed cells. Almost does not absorb moisture (up to 0.1% per 1 meter per day) and does not react strongly to ultraviolet radiation. Styrofoam has differences in density and is mainly used in the insulation of technical rooms.
The material for the insulation of the balcony should be chosen as a heat insulator with an optimal flammability class, and better - with non-combustible additives in general. Moreover, the market offers all kinds of types and classes of insulators.
Scope and some characteristics of expanded polystyrene brand Extraplex 50 mm:
How to insulate a loggia or balcony? Choosing the right brand is simple, the main thing is to consider the criteria by which the material is selected. If you have a small balcony, materials on which you can apply a decorative layer are suitable. For example, plaster type "bark beetle". Expanded polystyrene is perfect for this, but you should remember about the "dew point" and use only high-quality adhesive for plates.
The downside of expanded polystyrene is the release of the harmful substance styrene when heated above 40 degrees Celsius. Therefore, it is best to insulate the balcony from the outside with such material.
Expanded polystyrene can also be mounted on mounting foam. Recently, this method of fastening is often used. The foam, expanding, does not leave gaps, well filling all the cracks. And when installing a warm floor, you can lay polystyrene foam under the heating element by gluing it directly to the balcony floor.
Advice: on the balcony, it is better to make a coating or other waterproofing of the walls, ceiling and all junctions (windows, doors), since usually balconies are most susceptible to leaks. You can also use a hydrobarrier as a moisture insulator.
Penofol
 Penofol is a modern insulation used for insulation, including balconies and loggias
 Penofol is a thin modern insulation, which is also suitable for warming balconies or loggias. More than three modifications are produced.
Space saving is the number two priority in all installation and finishing work. Here, penofol comes to the fore.
Type "A" - are used both in combined insulation of external walls from the inside (polystyrene foam plus penofol), and in independent version by applying material 10mm thick. The product, consisting of polyethylene foam, with a reflective layer on one side, will serve you well for many years.
Type "B"- foil material with two reflective surfaces is more used for additional floor insulation, both under a screed in rooms, and as a substrate on balconies and loggias under a warm floor. The high operational and reflective qualities of such an insulator have proven themselves well.
Type "C"- self-adhesive product, with one-sided reflective layer, easy to mount on walls and ceilings. The requirements for surfaces for such insulation are minimal: cleanliness (dust removal) and surface evenness (can be glued to concrete). Do not forget to carefully prime the places of insulation.
Type "ALP" It has both a reflective layer and a protective polyethylene membrane.
If, for example, you want to bring out additional pipes for floor heating in the loggia, the ALP type of penofol is laid as a reflective layer under the pipes and screed. The protective film of such material does not react with the wet solution during the work on pouring the screed. Then, having made reinforcement with a mesh (usually brand BP-1) and placing beacons or guides, pour the solution. Do not forget about aluminum tape for gluing seams and junctions. It is better to wrap the edges of the penofol on the walls, by about 80 mm.
Important: pipes that are laid as a heating element must be under pressure of 5-7 atmospheres when pouring. Such a measure will prevent the base from breaking in the future and relieve stress in the thickness of the material when heated (there is room for expansion). Installing a pressure gauge in the system will make it possible to monitor the indicators and tell you if there are any leaks in the system.
And it is best to glue the screens for additional batteries on the balcony with type “C” penofol, with a reflective layer inward to the battery.
Briefly about the properties of penofol:
What is the best way to insulate a balcony?
Before deciding how to insulate a balcony or loggia, you need to understand which side to use the insulation and where. At the same time, glazing the balcony is a mandatory step, otherwise, what's the point of insulating if everything is ventilated.
The balcony can be insulated:
- bottom (floor);
- top (ceiling);
- inside (walls);
- outside (also walls).
Insulation of the floor of a balcony or loggia
 The better the material for warming the balcony, the better the microclimate of the enclosed space will be preserved. In light of the latest trends, insulating the floor on the balcony is highly recommended. This will give energy-saving heat savings from 20 to 40%, depending on the type of insulation. The cost will pay off, especially if you plan to convert the balcony into an extra room.
Warming methods:
- using insulating materials;
- underfloor heating system.
Insulation materials:
Mineral wool
The advantage is low cost, ease of installation. The disadvantage is that over time it becomes caked and loses its insulating qualities. With an illiterate calculation of the heat-insulating layer (this is a completely separate topic of conversation), you can not achieve the desired effect.
Styrofoam
good, comfortable, cheap material. The disadvantage is that mice eat it. It will be necessary to take care of excellent tightness.
Expanded clay
Lightweight, cheap, eternal heat insulator, but cooler.
Penofol
Moderately costly. Combines the qualities of mineral wool and polystyrene. It can be laid on an imperfectly flat surface. According to experts - one of the best heat-insulating materials for warming balconies and loggias.
Penoplex
Also moderately costly, a good heat insulator, but requires a very flat surface.
Underfloor heating system
There are three options:
water floor
Connecting to the system central heating. If you do not have individual heating, then this option is not suitable due to the lack of permissive legislative acts.
Electric
- Cable.
- Cable with reinforcing mesh.
Electric floors are effective together with self-leveling floors and tiles.
Film (infrared)
Fits without capital repair work. A technically simple solution.
Attention: the film floor cannot be used under tiles and screed. It is possible under linoleum or laminate.
Insulation of the ceiling of a balcony or loggia
 It makes sense to insulate the ceiling on the balcony if your balcony is located on the top floor.
To insulate the ceiling on the balcony, the following materials are used:
- drywall;
- Styrofoam;
- penofol;
- penoplex (foamed polystyrene foam).
Do not forget that when insulating the ceiling, a decrease in the ceiling space is inevitable.
If you do not want to do capital insulation of the ceiling, then you can get by with decorated foam tiles. In this case, there will be two advantages: an elegant ceiling with a small layer of insulation.
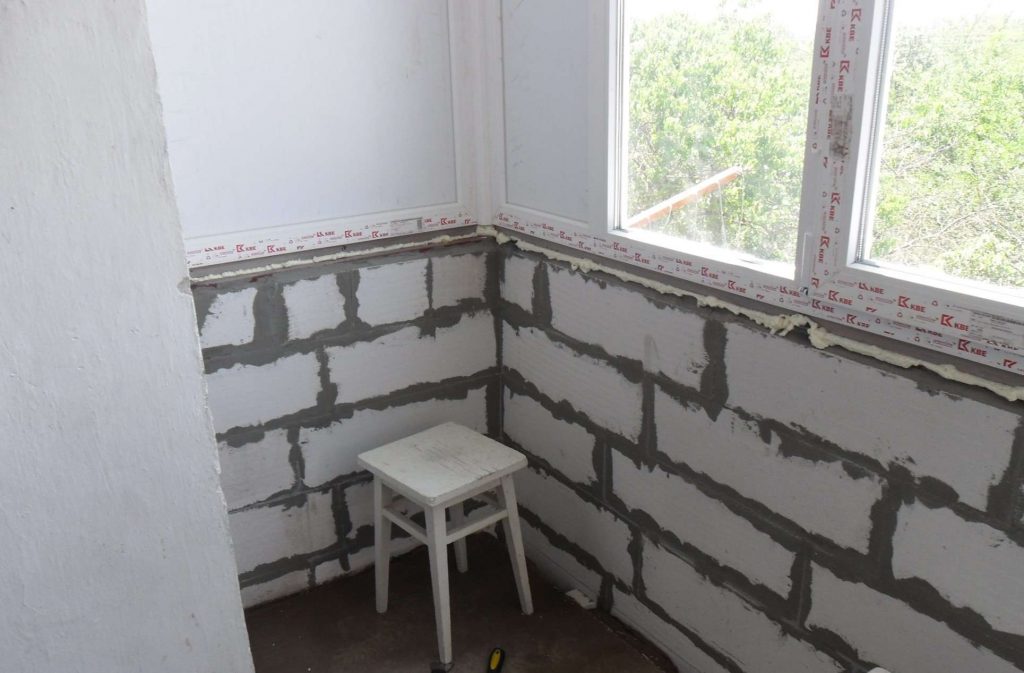
Insulation of the walls of a balcony or loggia
 Before insulating the walls of the balcony, it is necessary to close up all holes and cracks. Neglecting such a trifle as a gap in cold windy weather will result in loss of heat and lack of comfort.
Balcony insulation materials are the same as for floor insulation. This is:
- expanded polystyrene;
- penoplex;
- penofol;
- mineral wool.
You can add stuff like isover.This is a more modern mineral wool based on fiberglass. Available in rolls or sheets.
Another option is styrodur is a green extruded polystyrene foam.
Wall insulation can be carried out from the inside and outside. In the event that it is necessary to save the usable space of the balcony, it is recommended to carry out insulation from the outside, and only finishing work inside.
As in any other case, the choice of insulation from the outside has its advantages and disadvantages:
It is not easy to choose which insulation suits you, how to specifically isolate a particular room. the best way insulation will be combined.
Example: it is better to insulate the ceiling of the loggia and all walls with basalt wool mats, the floor with polystyrene foam, and use penofol as an additional sound-absorbing and heat-reflecting layer.
When choosing a material, remember that the flammability class and environmental friendliness are perhaps the most important criteria.

So, taking into account the plans hatched for the further use of a balcony or loggia, time and financial possibilities, taking into account the recommendations received, you can now make a reasonable balanced decision on choosing a heater for your balcony or loggia.
Reading 7 min.
With the help of insulation, you can turn the balcony into a cozy living space, and this stage is mandatory. There are several types of materials for insulating a balcony from the inside. Each of them has its own application features. Knowing the nuances will help you choose the best type of insulation for each specific case.
Criterias of choice
The main technical characteristics that you need to pay attention to when choosing thermal insulation materials for balconies and loggias:
It is also worth considering the features of installation - the simplicity of the process is especially important if the work is planned to be carried out independently without the involvement of specialists.
Styrofoam (expanded polystyrene)

The most common sheet material for warming balconies. According to its composition, it is a frozen foam, in the closed pores of which air is enclosed. For insulation, foam is usually used with a thickness 5 cm, for more severe climate it is recommended to choose thicker sheets up to 10 cm.
The material has a number of advantages that led to its popularity:
- low coefficient of thermal conductivity, which provides high thermal insulation of the room even without the use of other materials;
- high rate of water absorption, which allows not to lay an additional layer of waterproofing;
- sufficient strength makes it possible to use dense and heavy finishing materials;
- environmental friendliness - no dust is generated during operation, no harmful substances are emitted during further operation;
- hygiene - mold and fungus cannot form in the foam;
- ease of use and ease of installation - the sheet can be cut into parts of any size;
- low cost compared to other heaters;
- service life up to 30 years, subject to the installation technology.

The main disadvantages of foam:
- low air permeability - when insulating a loggia with this material, it is necessary to provide additional ways ventilation, otherwise it will not be possible to provide a comfortable microclimate in the room;
- poor soundproofing properties;
- insufficient resistance to certain types of drying oils, varnishes and other chemicals based on petroleum products and alcohols - this requires special care when choosing finishing materials;
- high flammability and, accordingly, a fire hazard.
To insulate the balcony, it is necessary to choose a construction foam produced by extrusion, with a density 35-40 kg/m3. Species with less than 25 kg/m3 are packaging materials and are not suitable for construction works. To determine the quality of the material, break off a piece from the sheet and look at the structure. Construction foam has cells in the form of polygons, packaging foam consists of easily detachable balls.
Read also: Calculation of the thickness of the foam for wall insulation

Penoplex (extruded polystyrene foam)

Penoplex is a close relative of polystyrene, but with much better properties and characteristics. The special production technology of this material makes it possible to obtain a porous, almost homogeneous structure with a uniform distribution of air in isolated cells. Due to this structure, the material has a lower thermal conductivity compared to conventional foam and other heaters. This is the main advantage of foam, in other respects the material is close to foam.

There are several types of penoplex on the market, which are labeled in accordance with the purpose:
- "Foundation" - designed for warming buried in the ground building structures; characterized by exceptional strength and ability to withstand high pressure soil after backfilling;
- "Wall" - used for insulation of external walls, partitions located above the ground level;
- "Roof" - a special type for attic space; with a high thermal insulation index, it is a rather fragile material, therefore it is not intended for areas with increased load;
- "Comfort" - the optimal variety for insulating the walls of balconies and loggias; balanced technical indicators for internal use.

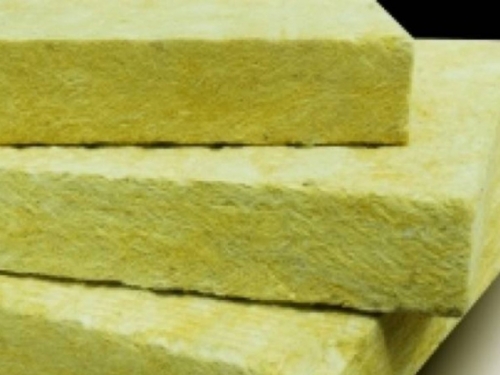
Mineral wool

There are several types of this insulating material. For a balcony it is better to choose basalt mineral wool as the most environmentally friendly type with the best technical and operational characteristics.

The material has an impressive list of advantages:
- low coefficient of thermal conductivity (only slightly higher than that of penoplex);
- hydrophobicity - basalt mineral wool does not absorb moisture, other varieties (glass wool and slag wool) get wet and change their characteristics;
- good air and vapor permeability - unlike foam plastic and foam plastic, this insulation does not interfere with the natural movement of air, due to which a comfortable and healthy microclimate is formed on the closed balcony;
- fire resistance - the melting point of basalt mineral wool is about 1100 degrees; such thermal insulation can stop the spread of fire;
- good sound insulation - mineral wool has a chaotic structure, the air between the fibers effectively absorbs sound waves and significantly reduces the penetration of noise into the room;
- sufficient strength of the sheet allows the use of any finishing materials, some types of mineral wool are suitable for floor insulation;
- resistance to chemicals;
- environmental friendliness and hygiene - no harmful substances are emitted during use, no biological life in the form of fungi, mold, insects or rodents is born inside the thermal insulation.
Minvata also has its disadvantages:
- work must be carried out in protective clothing - when cutting sheets, dust is generated that causes skin irritation;
- high material cost.
Penofol
 This is a versatile material with moisture, sound and heat insulation properties. It is a thin layer of foamed polyurethane with an aluminum coating, which has the ability to reflect heat. Available in roll form, easy to install.
Most apartment owners use the balcony as a place to store rarely used things. If you want to get additional living space and turn it into a place for relaxation, a flower garden or an office, you can do it without involving specialists. We will describe in detail how to reliably insulate the balcony from the inside with your own hands.
What is the best thermal insulator to use?
Read also: How to insulate a private house with your own hands: roof, walls and foundation, description of thermal insulation materials offered on the market (Photo & Video) + Reviews

To finish the balcony, you can use both rolled and tiled materials that provide reliable thermal insulation:
- Styrofoam: an inexpensive tiled material with sufficiently high thermal insulation properties has two significant drawbacks; the first - a large thickness of the sheets, when using it, the already small area of \u200b\u200bthe balcony will be significantly reduced; the second disadvantage is high fire hazard; to ignite it, a lit cigarette accidentally thrown from the top floor is sufficient; therefore, for cladding a balcony, purchase class G2 material that does not support self-combustion
- penoplex(extruded polystyrene foam): in composition, this material is similar to polystyrene, but due to a special production method with equal thermal insulation properties, it has a smaller thickness, greater mechanical strength; however, the cost of penoplex is higher; since the material has a low water absorption coefficient, in order to avoid condensation, the balcony will need to be regularly ventilated; about how to insulate the balcony with penoplex from the inside, we will tell a little lower
- "Penofol": foamed polyethylene, protected on both sides with aluminum foil, which serves as both wind and moisture protection; a significant plus is the minimum thickness, for insulation it is enough to use a material several millimeters thick; Izolon, Penolon, Teplofol, Energofol have similar composition and properties; disadvantage - high price
- mineral wool(glass, slag or basalt wool): the undoubted advantage of all these materials is high heat-insulating properties; some experts believe that the increased moisture permeability of the material in the case of balcony insulation is only a plus - absorbing excess moisture well, the material will protect the room from condensation on windows and walls; however, over time, mold can form in mineral wool, so it must be reliably protected from moisture penetration from both sides with the help of hydro and vapor barrier
It is undesirable to use heat-insulating materials having a significant mass (for example, brick) for insulating balconies. After all, the bearing capacity of the balcony slab is limited. With excessive load, such a design simply may not withstand the additional weight.
The use of expanded clay for floor screed is also not recommended. Its main disadvantage is the ability to absorb moisture. As a result, its mass increases significantly.
Required Materials
Read also: Secrets of soundproofing walls in an apartment: we use modern materials and technologies (25+ Photos & Videos) + Reviews
The use of penoplex
To finish the balcony you will need the following materials:
- gas silicate blocks 80-100 mm wide for erecting a parapet
- glue based on cement for their laying
- slab or roll insulation
- wooden slats for the manufacture of lathing and installation of a rolled heat insulator; their thickness is selected so that it is equal to the width of the heat insulator
- self-tapping screws for mounting lathing with a diameter of 3.5-4.8 mm
- when using sheet material (foam or polystyrene) as a heater, special glue for their fastening
- polyethylene film or membrane material to create hydro- and vapor barrier
- polyurethane foam, mastic (for example, "Germabutil", "Germaflex" rubber-based) or silicone sealant for sealing joints, cracks
Where to begin? Inspection and repair of balcony slabs
Read also: Self-leveling floor: device, recommendations and step-by-step instructions on how to do it yourself (50 Photos & Videos) + Reviews

The condition of balcony slabs is not always satisfactory - over time, they can partially collapse. Therefore, before proceeding with the insulation of the balcony, you should check how strong and reliable its base is.
Minor and medium repairs are allowed to be carried out independently. If significant cracks appear, or even more so if reinforcement is exposed, fragments of the slab collapse or move away from the wall, specialists should be called.
Remember that major or emergency repairs must only be carried out by qualified installers management company. If the reinforcement is severely corroded, it may be necessary to reinforce it with steel beams. In case of severe destruction balcony slab can be completely cut off.
To repair damaged concrete sections:
- All unnecessary is removed from the balcony, and all debris is completely removed, as well as the remnants of loose concrete
- If the reinforcement is exposed, it is cleaned of rust. A reinforcing mesh is laid on top. So that it does not rust over time, it must be completely drowned in concrete. To do this, it is necessary to leave a gap between it and the plate.
- Formwork is placed along the perimeter of the balcony slab
- After pouring the concrete solution, the screed is ironed - sprinkled with dry cement, then rubbed into the dry mortar
- To protect against moisture from below, the balcony slab is primed and then plastered. On the sides, a galvanized steel outflow is mounted
Read also: [Instruction] Do-it-yourself laminate on a wooden floor: a complete description of the process. Laying schemes, what materials should be used (Photo & Video) + Reviews
Filling the floor screed on the balcony
After the reconstruction of the slab, it is desirable to waterproof it.. For these purposes, roll materials or bitumen are used. Modern waterproofing materials include penetrating impregnation of the Penotron type. It is better to apply it in 2 layers.
Repair may also require a balcony railing. New structural elements in the form profile pipes fasten on an anchor or by welding.
The choice of glazing methods
Read also: What to do if plastic windows in a house or apartment sweat? Causes of condensation. Ways to solve this problem (Photo & Video) + Reviews

If your balcony has conventional 1-chamber double-glazed windows, they should be replaced. Otherwise, you will waste a significant part of the energy resources spent on heating the room. A warm balcony requires 2- or 3-chamber double-glazed windows. In the conditions of the Far North, they can be 5-chamber.
Balcony glazing is more difficult than the usual installation of double-glazed windows in windows. In this case, the installation of additional components is required. Therefore, be sure to invite proven masters of high qualification.
It is undesirable to use wooden double-glazed windows for glazing. Due to the accumulated condensate, over time they will begin to rot. Plus, the weight of such structures saturated with water will be significant. If for some reason you decide to stay on wooden products, do not forget to treat them regularly with an antiseptic and paint.
Reduce heat loss by 30% using the latest technologies– glazing using I- or K-glasses. The first option - I-glass with a multilayer coating, which includes a small percentage of silver - can reflect up to 90% of the outgoing heat. Since such surfaces can be easily scratched, they are installed with a coating inside the room.
Non-ferrous metal oxide is applied to K-glass, due to which heat is reflected from the batteries into the room. Such a coating is less afraid of damage. Although the prices for both glass options are the same, the degree of heat reflection in K-glasses is less and amounts to 30%.
Read also: Plastic windows in a wooden house: a description of the main characteristics, how to install it yourself, photo and video instructions

Poor quality profile may turn yellow over time, so pay special attention to certificates of its quality. Choose profile systems from trusted manufacturers. If you want double-glazed windows to last longer, do not save on fittings either.
A more economical way of sealing windows is ordinary polyurethane foam. But it will be better if all the cracks are sealed with a sealant that has water-repellent properties. You should not refuse to install flashings - they not only look decorative, but also protect the room from drafts.
You can order for balcony windows blinds or covering with a special opaque film. It will protect the premises from prying eyes.
Balcony insulation step by step
Read also: Foundation: description of the device, types, complete step-by-step instructions for bookmarking with your own hands (Photo & Video) + Reviews

It is necessary to sheathe with a heat insulator not only the walls, but also the floor and ceiling, otherwise the insulation will simply lose its meaning. After all, reinforced concrete slabs freeze through during the cold season.
Preparatory work
Read also: Making and laying paving slabs with your own hands: step by step instructions for dry and wet mix. Making a mold, vibrating table (Photo & Video) + Reviews
Before starting work, carefully inspect the balcony for cracks. If any are found, carefully fill them with sealant or mounting foam. Their excess must be cut off. After all, when installing the skin, they will interfere with its alignment.
So that at the end of the repair you do not have to wash dusty, dirty windows, attach a plastic film to them. If you plan to lay communications on the balcony (wiring, sockets, tubes for air conditioners), it is more convenient to do this in advance.
Read also: The blind area around the house: views, device, schematic drawings, instructions on how to do it yourself (30 Photos & Videos) + Reviews

Both foam and aerated concrete are able to reliably store heat, so they are often used to insulate balconies or loggias. However, since aerated concrete is able to absorb water, it is better to focus on foam blocks. Their air cells are completely closed from moisture penetration.
When using aerated concrete, you will need additional finishing for protection from rain and snow.
- If there are significant differences in height or potholes on the concrete slab, it is leveled with cement mortar
- Work on laying foam blocks is started a week after concrete has been set of sufficient strength.
- If the free area allows, it is better not to remove the metal fence. You can win 15-20 cm of usable area if you strengthen the masonry with reinforcement with thick metal bars
- With the help of fittings, the parapet must also be additionally attached to the walls of the house. She is walled up between rows of foam blocks
- It is better to lay the masonry not with an ordinary concrete solution, but with a special adhesive designed for cellular blocks. It will help reduce the thickness of the seam to 3 mm, protect against the loss of the solution and the appearance of cold bridges. Its cost is fully compensated by reducing the thickness of the seams
- To lay out the first row, the glue must be diluted a little thicker - so that the spatula installed in it does not fall on its side
- The place for masonry is marked in such a way that the center of the bricks falls on the attachment points of the window frame, that is, the distance from it to the edge of the balcony slab is 5 cm
- To save space at the docking points with the parapet, the blocks are sawn
- The wall must be strictly vertical. Therefore, the location of each row must be verified by the building level
When laying window frames on foam blocks, double-glazed windows must be additionally fixed to the walls of the building using a channel. Otherwise, with a strong wind load, the double-glazed windows may fall down.
Wall and ceiling insulation
Read also: [Instructions] How to make beautiful and unusual wall shelves with your own hands: for flowers, books, TV, kitchen or garage (100+ Photo Ideas & Videos) + Reviews
How to properly insulate a regular or brick balcony?
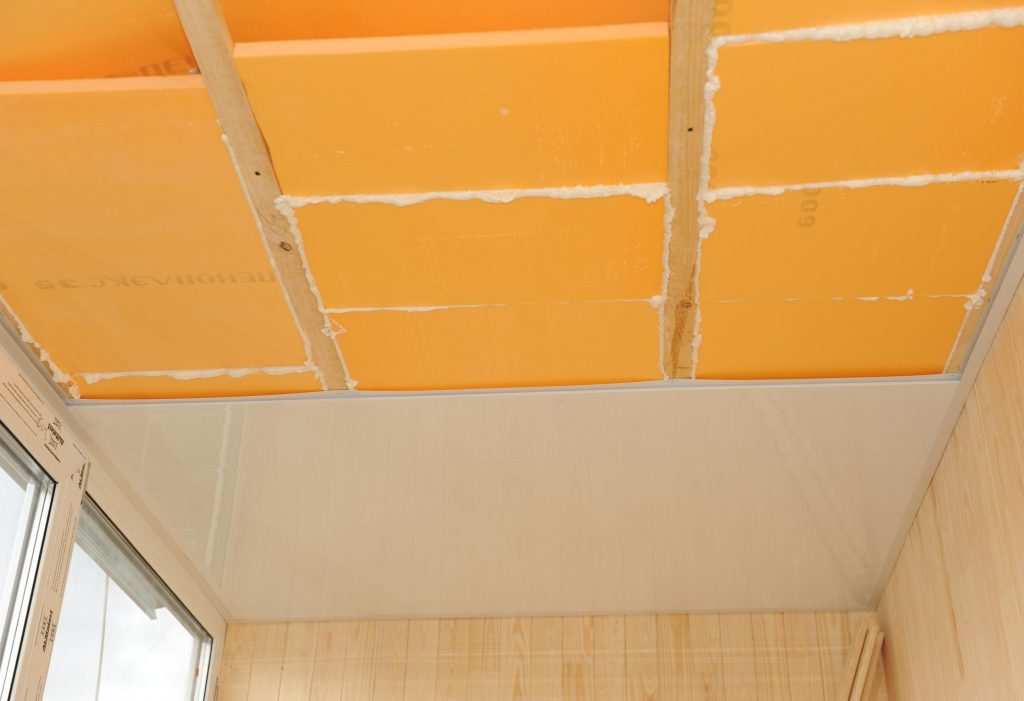
Installation of insulation is better to start from above, from the ceiling:
- First, a waterproofing film is laid in such a way that overlaps form. It is necessary to fasten the strips together with construction tape or a stapler. It is also necessary to make an overlap of 15 cm on the walls
- When laying rolled heat insulators, a preliminary installation of a wooden crate will be required. Sheet insulation can be mounted directly on the glue
- Since the main load will fall on the crate (it must withstand the weight of the insulation, as well as facing material), wooden bars should be fixed to the ceiling with self-tapping screws of sufficient length
- So that the laths of the crate do not deform during temperature changes, leave a gap of 5-10 mm between them and the walls. It is mounted to the ceiling with self-tapping screws. For this, holes are pre-prepared in it.
- Plates or roll material should fit tightly, without gaps. The pitch of the crate should be slightly larger (10 millimeters) than the size of the insulation sheets. Otherwise, you will not be able to lay the material evenly.
- A more reliable option is to combine penoplex with penofol with an air gap between them of 2 cm in size.
- All gaps between the insulation boards are filled with foam
- The next layer is a vapor barrier made of polyethylene film or special membrane materials. It is not necessary to use it only if foil materials are used for insulation.
- Next, a second layer of 10 mm crate is laid, on which it will be attached finishing material. Such a gap will serve as additional protection against the accumulation of condensate.
- Even moisture-resistant drywall on the balcony can warp over time. Therefore, use gypsum boards for sheathing. Moreover, they cost no more than drywall. You can also sheathe a balcony from the inside with plywood or clapboard
- Laying insulation on the walls differs little from installing insulation on the ceiling
Floor insulation
Read also:

Since insulation under the screed significantly increases the weight of the structure, the most common way to insulate the floor is to insulate the joists.
So detailed step-by-step instruction:
- After installing the waterproofing layer to concrete floor fastened wooden beam(the size of its section is 50x50 mm). The width of the bars is selected depending on the thickness of the insulation
- The tree is pre-treated with a primer with an antiseptic or coated with drying oil
- The logs are placed across the balcony in such a way that a distance of 50-70 mm remains from the walls. Such a technological gap will not allow the bars to warp during temperature changes and changes in linear dimensions.
- To ensure normal water flow, the balcony slab is always made at a slight slope. . Therefore, the lags must first be aligned. To do this, thin wooden bars or pieces of plywood are placed under them. To obtain a strictly horizontal surface, the floors are leveled with a building level.
- alignment concrete screed having a significant mass, in the case of a balcony it is highly not recommended . After all, this will require a significant amount of solution
- A layer of heat insulator is tightly laid between the lags. When using foil materials, they are placed with the foil down.
- The next layer is vapor barrier. She is spread with an overlap on the walls
- When laying underfloor heating, a small layer of cement screed is poured over the film
- If warm floors are not provided, a layer of chipboard is laid on the floor in a checkerboard pattern (with offset seams), and then flooring, for example, ceramic tile, laminate or linoleum. It is better not to lay plywood on the floor, as over time such a floor will begin to creak strongly

At the end of the article, I would like to give a few the most important tips professionals.
- Do not try to bring central heating radiators to the balcony. This is strictly prohibited. If such a violation is detected, you will be forced to dismantle them. Use only for heating electrical devices: oil, infrared heaters or underfloor heating with electric heating
- It’s not always worth listening to the advice of programs like “Repair Schools”. When combining a balcony with a warm room, disagreements with regulatory organizations may arise. If they consider that in this way you have worsened the heat supply of your neighbors, you can be forced to bring the apartment back to its previous form, as well as pay a hefty fine.
- Legally demolished balcony door, the window unit is considered a redevelopment, therefore it requires special permission. But, since the interpretation of the law in this case is ambiguous, in some cases it is still possible to obtain such permission with high-quality insulation of the balcony
- fashionable last years frameless glazing outwardly looks very decorative, but it is not suitable for warm balconies, loggias. Use thermally insulated double or triple glazing or lift-slide windows for insulation
- Close the joints carefully before insulating walls, ceilings, floors, as well as gaps with mounting foam or polyurethane sealant
- Be sure to treat any wooden cladding elements with antiseptics and materials that protect them from moisture
- Installation of insulation start from the ceiling, then proceed to the insulation of walls, floors
- The ideal option for thermal insulation is a two-layer cake with an air gap. Use materials of small thickness for this (foam or penofol)
- Polyurethane foam under the influence of ultraviolet light quickly darkens, becoming unusable. Therefore, protect its outer layer with sealant, putty or paint.
- Gypsum putty is afraid of moisture, therefore it is not used for sealing seams
- To protect the room from the formation of condensate, take care of reliable waterproofing. In its absence, fungus and mold will certainly appear in the skin.
- To demolish a balcony door, you will need a special permit.
And in the end, we invite you to watch a video about the complex insulation of the balcony
PHOTO GALLERY
8.3 Total Score
Balcony insulation from the inside
For us it is very important Feedback with our readers. If you do not agree with these ratings, leave your rating in the comments with the reasoning for your choice. Thank you for your participation. Your opinion will be useful to other users.
Ease of implementation
Convenience
This will interest you:


Many tenants apartment buildings face the problem of lack square meters. An excellent solution to this issue can be self-insulation of the loggia. This is a painstaking task, requiring certain construction skills and time from the performer. However, the end result is worth it. A warm balcony expands the possibilities of using the space, “ennobles” the living space and can become the pride of the home master.
The need for insulation of the loggia
Each apartment owner decides for himself how to use the additional square meters of the loggia. Some equip a pantry or workshop on the balcony, others operate the premises more rationally - they create " winter Garden or a private room. The insulated loggia can be converted into a cozy place to relax, work, a compact gym or an area for children's creativity.

In addition, the insulated balcony solves a number of problems:
- the heat loss of the room and the cost of heating the apartment are reduced;
- reduces the risk of mold on the walls of the balcony.
You can perform external or internal insulation. Obvious advantages of the external method:
- the usable area is not “eaten up”;
- simplification interior decoration walls.
Significant advantage internal insulation- the ability to perform work independently, without hiring employees.
The choice of thermal insulation material
As a heater, various thermal insulation materials are used, ranging from traditional, inexpensive, to modern high-tech ones. To insulate the loggia from the inside, it is better to use thin, lightweight materials. Thanks to their small width, it will save usable space.
Consider the characteristics of the main heat-insulating materials for warming the loggia / balcony.
Foil polyethylene foam - a layer of foil is applied on one side of the polyethylene, which reflects the IF radiation and "casts" heat flows back. Insulation characteristics:
- roll width - 1 m, thickness - 2-5 cm;
- ease of installation - the polyethylene foam sheet is easily cut with a knife;
- laying method - end-to-end or overlap;
- the efficiency of thermal insulation is almost doubled;
- the material is used to insulate the ceiling and walls.
Loggia insulation: step by step instructions. The use of penofol
Mineral wool has good thermal insulation qualities and affordable cost. However, experts do not recommend using this material for warming the loggia for a number of reasons:
- poor moisture resistance - mineral wool absorbs liquid, so you will have to further strengthen the waterproofing;
- when using mineral wool, arrangement is required natural ventilation- a gap must be left above the insulation, which “hides” the area of \u200b\u200ba balcony a little;
- for facing the loggia, it will be necessary to reinforce the wall and carry out additional measures.
Styrofoam - foamed plastic different density. The bulk of the material is gas. Polyfoam has the following characteristics:
- plate size - 1 * 1 m;
- insulation thickness 2-10 cm;
- foam density - 15 or 25 kg / sq. cm;
- durability.
Extruded polystyrene foam (penoplex) is a modern heat insulator that resembles polystyrene, but has a stronger structure and functionality. Expanded polystyrene properties:
- plates rectangular shape 1200*600mm;
- thickness - 2-10 cm;
- foam density - 35-45 kg / sq. cm;
- vapor tightness;
- frost resistance;
- plates have a chamfer for more dense laying;
- light weight and easy installation;
- flammability class - G-1;
- the material is not used in open places where UV rays penetrate.
Do-it-yourself loggia insulation: step by step instructions. Photo of installation of penoplex

Methods for fixing insulation
The choice of insulation method, first of all, depends on the heat-insulating material used and the further wall decoration.
Insulation under putty and plaster is suitable when using foam or polystyrene foam. Thermal insulation panels are glued to the base tile adhesive. Plates are additionally fixed with dowel fungi. You can start plastering / puttying the walls or ceiling one day after the installation of the insulation.
Foiled polyethylene foam is laid under the base of the frame. It does not matter how the profiles are attached - to the wall or by means of U-shaped fasteners. Penofol sheets are applied to the ceiling / wall of the loggia and fixed with rails. In this case, overlapping is acceptable, and the connecting strip can be glued with adhesive tape.

Insulation under the base of the frame is possible only when using a thin insulation up to 20 mm thick. Pressing a thicker heat insulator will affect the stiffness of the rails and fasteners
If it is planned to decorate the balcony with plasterboard or PVC panels, MDF, then it is advisable to lay the heat-insulating material in the cells of the frame. 15th density foam or mineral wool is used as a heater. The disadvantage of this technology is an increase in the thickness of the heat-insulating "pie".
Options for arranging a "warm" floor
The technology of floor insulation on the loggia is somewhat different from the thermal insulation of hay and the ceiling. Excessive requirements are imposed on this element of the balcony.
There are several basic options for arranging a "warm floor":

Do-it-yourself loggia insulation: step by step instructions
Below is a step-by-step instruction for warming the loggia with penoplex.
Tools and materials
For work you will need:
- foam boards;
- building level, clerical knife, marker;
- PVC pipes for cable laying;
- capacity for mixing glue;
- construction mixer;
- trowel;
- polyurethane foam;
- mounting gun;
- grater for grinding heat-insulating sheets;
- plastic smooth grater for grouting the floor;
- metal grid;
- sand concrete M300 coarse-grained;
- polyurethane adhesive.
Loggia insulation: step by step instructions. Photo - diagram of the heat-insulating "pie".

Preparatory work
First of all, on the loggia it is necessary to install energy-saving plastic windows. It is not worth saving on glazing - it is better to choose double-glazed windows and fittings from firms that have proven themselves in the "window" market.
If high-quality windows are already installed on the balcony, then you can proceed to the insulation of the balcony.
Preparatory activities:

Ceiling insulation

Installation of heat insulator on walls and parapet

Insulation of the loggia floor with penoplex: step by step instructions
Consider the stages of creating a "warm floor" using foam and cement-sand screed:

- If it is necessary to install a supporting frame, it is better to use a galvanized metal profile. Unlike wood, it does not rot and is not heavy.
- Thermal insulation work should be carried out in dry weather. Many adhesive mixtures and primers have features of application in conditions of high humidity.
- Slots on the loggia are treated with foam that is resistant to low temperatures.
- The wood used must be dried, and then treated with means against fire and decay.
Do-it-yourself loggia insulation: step by step instructions. Video.
A loggia is a few square meters that can serve a variety of purposes. To use this space all year round, you need to provide there comfortable temperature. Every home master can turn it into a cozy, useful and well-equipped space.
Are you going to start arranging these additional square meters, but do not know how to insulate the loggia with your own hands and what materials will be needed for this? We will help you deal with all the questions - our article provides recommendations for choosing a heater and provides step-by-step instructions for thermal insulation of walls, ceiling and loggia floor.
You should start, of course, with planning. You should decide on the functional purpose of this small room. If it is supposed to be used as a warehouse for things that are not too necessary, then warming does not make much sense. But the loggia can be turned into an office, a small gym, a winter garden, etc.
There are also restrictions. For example, a loggia cannot be used as a kitchen room, i.e. install a stove, sink for washing dishes, etc. there. Carry out a system to this area district heating also prohibited.
There are a number of other restrictions that may be related to the architectural features and fire safety of the building. This may be a ban on glazing above a certain floor, on changing the appearance of the building, the height of the fence, etc.
As practice shows, many manage to somehow get around these standards and arrange a loggia to their liking. Before starting work, it does not hurt to coordinate your plans with supervisory authorities or prepare for problems after the alteration is completed.
The installation of electrical wiring, lighting and underfloor heating during the insulation of the loggia must be thought out in advance so that damage to the heat-insulating material is minimal
But under no circumstances should openings be made in bearing wall, only holes provided by the original design are allowed. Even a window and door block removed from the loggia can be dangerous.
To keep the loggia warm, you need high-quality glazing. It is better to order it from a reliable company. Double-glazed windows will do the job perfectly.
Part of the space will be "eaten" by a layer of insulation. These centimeters will have to be sacrificed in order to reliably protect the house from the cold. Loggias, which are located on the lower floors, are most often insulated from the outside. O the best materials for external wall insulation, we
From the very beginning, you need to consider options for heating this space.
There are not so many of them, because only suitable for the loggia:
- electric TP;
- portable heater.
Considering that the installation area is small, you can spend money on such convenience as TP. Cable systems are easy to install, all work can be done independently. IR floor is more difficult to lay, it requires almost perfect level ground, but electricity costs during operation will be moderate.
But most simple solution will be used, especially if the loggia is not used every day, but only from time to time. Installing a warm floor will require more costs and effort.
The choice of materials and options for warming the loggia with your own hands is quite wide.
Among the most popular it is worth noting:
- mineral wool;
- Styrofoam;
- polyurethane foam;
- expanded polystyrene;
- penofol, etc.
Mineral wool has a low price, but this is almost its only advantage. To lay such material, you will first need to arrange a crate. Mineral wool is sensitive to moisture; when wet, it loses its beneficial features, therefore, it is not always suitable for a loggia.
You need to provide a place for installation in advance. Usually a niche is made on the wall for these purposes. right size. Among the turns of the cable TS, a temperature sensor is placed, which is placed in a corrugated tube. It will also need to be connected to a thermostat.
Conclusions and useful video on the topic
A detailed video guide for warming the loggia with your own hands:
Balcony floor insulation:
Modern materials and technologies make it possible to insulate a loggia really reliably and quickly. In any case, when doing installation work follow the requirements of the technology and manufacturer's recommendations. Then the result will fully meet expectations, and the insulation will remain effective for many years.
Are you planning to do your own warming of the loggia, but do you still have questions after reading our material? Feel free to ask our experts for advice - write questions in the comments block.