Flowerpot from the block house. Where to put the old tree, pvc pipe trimmings in the country? How to make a flower bed out of blockhouse scraps
Our country cottage area- forest with four huge hundred-year-old oaks. The house is finished with a block-house from the outside. For flowers, we build various containers from the remains of a block house and the trunks of fallen trees, which can be found in abundance behind the fence of a holiday village.


Flowers like to grow in wooden beds more than just in the ground, where the trees take all the moisture and nutrients from them and block out the sun. So, we make a mold from oak and a block house.


We will need:
Materials:
block house trimmings;
parts of an oak fallen trunk;
self-tapping screws.


Instruments:
chainsaw; jigsaw;
electric planer; screwdriver;
axe; metal brush.


Flowerbed from the block house
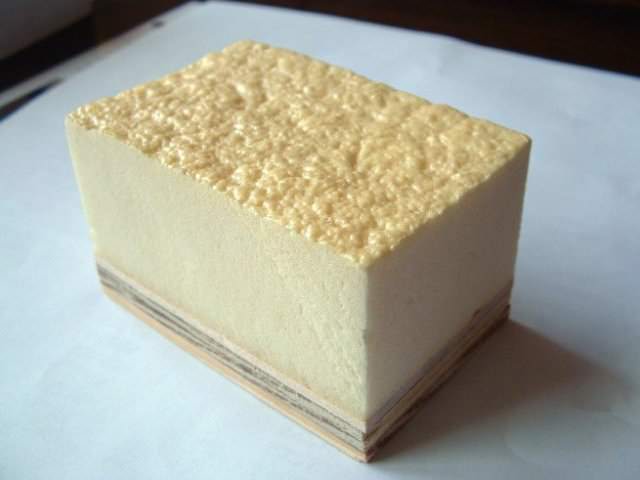
We select pieces of the block house that are suitable in size for the walls of the "flower girl". For two planks, we round the edges under the profile of the block house using an electric jigsaw. We fasten the walls of the box together with self-tapping screws. We grind the end irregularities, remove the defects of the block house - in our case, this is a wane. We make the bottom from improvised materials, for example, from leftovers plastic panels. Also for these purposes, you can use galvanized iron or any plastic. We fasten plastic panels with self-tapping screws with press washers. We drill small holes in the bottom of the "flower girl" to drain water. To achieve greater strength and stability, we make two planks-legs from the bottom of our flower bed. To ensure durability and good appearance, we paint the container with impregnation of the “oak” tone to match the color of the house and other garden structures. Now you can place the earth in the "flower girl" and plant any annuals.
And don't forget to make drainage holes in the bottom.


"Flower" made of natural oak
First you need to go to the forest, choose an interesting and suitable stale oak and cut a blank out of it. Bring or bring a hard oak ridge to the site. Cut off all excess with an ax. Remove loose layers with an iron brush. Seal the ends with the remains of oak boards.
Now you can fill the flower bed with earth and plant flowers.
Alexander and Grigory Isakovsky
Photo by Grigory Isakovsky
Among other profiled lumber, which are intended for finishing, the blockhouse is rightfully considered the most difficult in terms of installation. The problem lies not in some special technology for attaching planks and not in unique frame configurations - everything is standard here (which you can read about in our other article).
For most inexperienced users, difficulties arise with the implementation of high-quality joints and junctions. Proper docking is not only beauty. Excess cracks and gaps cause wall structures to blow through, the inner layers to get wet, weathering of insulation, and a decrease in the strength of the cladding ...
Therefore, we decided to devote a separate publication to this issue.
Tool for cutting and fitting block house
Hand saws won't work and chain saws won't. the best way. It can be unequivocally said that for cutting a block house (as well as lining, imitation of a beam or a floorboard ...), a miter saw is an ideal tool. This is not about the usual "circular" or "parquet", but about a device with a bed and a movable cutting part.
With the help of such a tool, it is possible not only to clearly trim the lumber (and the block house in particular) at a right angle, but also to make a cut at almost any required angle. When you need to revet a house with a bay window, you immediately understand the full value of such an opportunity. By the way, the selected angle is fixed and you can repeat it as many times as you like, or quickly change / adjust as needed. For this reason, these devices are often called "electric miter box".
Interestingly, if you have to work with a wide block house of 240 mm, then the diameter of the saw blade may not be enough. For such conditions, there are models with the so-called "broach".
The most important advantage of trimmers is the high rotation speed of the tooling. If everything is done correctly, then a special carbide-tipped wood disc does not even leave behind a raised pile. Moreover, high speed makes it possible not only to saw, but also to “hang / adjust” the already sawn edge a little. For example, a jigsaw cannot do this at all.
Electric jigsaw
A jigsaw on an object with a block house also has the right to exist. It is usually used as an additional option in a pair of trimming, or as the only alternative.
The jigsaw is ahead of the rest when you need to make a curly cut. If the lamellas of the blockhouse on adjacent walls are spaced apart, then it is precisely in the figure that the junction has to be cut.
Also, a jigsaw is good when you need to make an L-shaped and U-shaped cut. You can’t do without a jigsaw when you need to cut a block house longitudinally (the beginning or end of a plane), or when you need to trim a log imitation in place (for example, on slopes).
- Cut from the front.
- Use "clean cut" files with teeth pointing down.
- Use a support pad with a plastic protector to avoid scratching the wood. If the protector is not supplied, then the area must be pasted over with masking tape.
Once trimmed properly with a good power tool, sanding as such is not required. But with the help of emery, you can quickly and fairly accurately run in articulated parts that will be used in visible areas. This is especially true when the task is to remove a few millimeters on the figured end of the blockhouse already cut with a jigsaw.
Among various kinds grinders, the most useful will be a belt one, equipped with emery consumables of medium and coarse grit.


Do I need to somehow modernize the frame in the docking area of the block house?
Carpenters and finish builders in general have the main (let's call it FIRST) unwritten rule, which roughly sounds like this: "edges should never hang." This means that in the zone of mutual junction of the lamellas or in the zone of adjoining the lining from the blockhouse to other surfaces, there should always be a frame element well fixed to the supporting base. For example, on a long wall (where the block house needs to be connected longitudinally), it is necessary to install an additional rack clearly under the junction of the planks.
Rule TWO: "if possible - always do a dressing." The concept of dressing is not at all limited to the “chessboard order” of the arrangement of some elements, although this is also important.
Let's imagine that we have a wall 9 meters wide. We could make one line of articulation (let's say on the right) that would go from the plinth to the roof overhang. But it is much more reliable, and sometimes much more aesthetic (since it is also less noticeable) - to separate the joints of each next row in different directions. For example, in the first row, we place a whole plank 6 meters long on the right, and a 3-meter additional one on the left. The next row is the opposite.
Ligation consists in joining mating boards on one beam of the frame. This is much more reliable than if we put, even if side by side, two separate support beams. It is for this reason that racks with an increased width are often used to end connect a blockhouse on a flat area. For example, you can use a 40X40 bar for the entire wall, and for the joint you need to take at least 60X40 mm lumber so that there is support for two boards.


Similar story with the outer corner. The surest way to make it stable, even and reliable is to set the rack at the very corner (instead of two located at the edges of each of the walls), so that planks from one and the other wall are attached to it.
Note that if a board is used as subsystem elements, as in frame houses, then a board is also used on the corner. It is impossible to change this corner post for a beam, because then instead of insulation in this frost-prone area there will be too much solid wood and little insulation.
The inner corner is tied differently. To do this, it is recommended to sheathe the walls not with a “well”, but separately, one by one. First, we completely sew the blockhouse onto the first plane, then we assemble the frame of the adjacent wall, while we attach the extreme vertical bar of the frame perimeter to the already finished cladding.
The massiveness of the block house board allows you not to install a mortgage rack inside the frame, but when plasterboard or thin clapboard is being sheathed, then an additional element must be placed in the corner or T-shaped junction area.
Fitting connections and decorative tricks
Is it necessary to make a fine fit or can the joint be made relatively rough and covered with something?
Of course, it is not necessary to be limited only to trimming. What's more, many homeowners like the look of a house sheathed in a blockhouse and complemented by various moldings. The building really gets appearance, shall we say, "finished". But you can also highlight the additions a little by color.
But it is very important that there are no critical gaps under the additional elements that will degrade the insulating ability. building structures. And this decision, of course, does not cancel the requirements for the power organization of the frame in the joint area.


Among the moldings on the facade, external wooden corners are most often used (usually the widest), and sometimes they are replaced by a combination of a pair edged boards. To close and emphasize the joint on the plane of the wall, as well as to arrange the junction, a flashing (“layout”) is used.
In rooms, they try to avoid the use of corners and flashings. In some cases, by analogy with the arrangement of a log house, a jute rope can be laid in the inner corners along the joints of the blockhouse (for decorative reasons).
How to trim a blockhouse if there are no extensions?
Option one (suitable for connecting planks on the plane and in the corners). It consists in pre-installation in the frame of the docking bar. The bar is mounted so that its "front" face is approximately in the same plane with the resulting lining. The boards of the block house then face at a right angle, which greatly facilitates the work. Another thing is the aesthetics of this solution, not everything is so smooth here.
Option two (suitable for outer corner and inner corner). It is also called "on the mustache." The essence of this solution is to cut the parts to be joined at an angle. Usually blockhouse planks are cut at 45 degrees, but do not forget that there are also indirect angles in houses, for example, on bay windows - then the mustache cut will be different.
Option three (used for the inner corner, if the rows of the blockhouse on adjacent walls are shifted relative to each other by half the width of the board). In this case, for a tight fit of profiled materials, it is necessary to perform a figured cut. It's actually not as difficult as it seems.

You can refuse to use a template, and instead outline the necessary contour directly on the board.
How and by what principle to fix the block house at the joints?
If the rule “edges should not hang” is observed, then it is always possible to install fasteners here. And he is definitely needed.
Hardware can be used the same as on the entire wall - both finishing screws and nails will do.
When making a connection without corners or layout (flashing), the option of hidden fixation is selected. That is, a kleimer is nailed near the edge of each plank, or a nail is installed at an angle through the body of the block house spike.
If a flashing or a corner is still used to mask the joint, then it makes sense to fix the blockhouse through the body, but not in the lock area, but through the front visible surface. 2 (sometimes 3) cloves / self-tapping screws are placed on each plank. This option is certainly the most reliable.
As a conclusion
Describing the technology for arranging corners, joints and junctions of a blockhouse, it is extremely difficult to formulate a single universal instruction. Since users set somewhat different tasks for this material, they practice different (but having the right to exist) approaches to installation, they need to arrange different, sometimes completely unique structural units ...
We have tried to present the main principles in the form of questions and answers. Use them flexibly, and everything will definitely work out.
In our article, we examined in detail the differences in block house varieties and learned how to choose quality material. Let us dwell in more detail on the intricacies of installation: the arrangement of the crate, the choice of insulation and antiseptic impregnations.
Block house sheathing - reliable and eco friendly way finishing new and repairing old facades. However, do not forget that wood is a rather capricious material that requires a special approach. Therefore, even before the installation of the block house, several points should be taken into account:
- The smaller the closed area, the smaller the diameter of the selected block house should be. Wide boards visually reduce space, especially indoors.
- To achieve a high-quality result when sheathing a new wooden building, you should wait until the house stands and shrinks. It usually takes about six months from the moment of assembly and installation of the log house - otherwise, during the drying process, the block house may come apart at the seams and it will be necessary to completely redo all the work.
- The purchased material should be kept for several days in the room where the work will be carried out (if it is planned to cover the facade, then under a canopy). Block house must acclimatize - gain humidity and temperature environment- only in this case there will be no problems during subsequent installation and operation.
Stage 1 - preparation for installation
Before starting the installation of the block house, you need to carry out a number of preparatory work:
- Prepare the base - treat the walls with antiseptic impregnations ( wooden house) or by washing off efflorescence and impregnation on stone (brick or block house), putty chips, potholes and crevices.
- Seal the crowns of the log house (in log house) - caulk them with tow, jute or linen fiber. To seal the seams, you can use special sealants for wood. But this method is less reliable and durable - the putty composition sooner or later collapses and loses its properties, unlike jute sealants, the fibers of which practically grow together with the tree.
- Process the block house intended for installation - the surface of the tree is impregnated on all sides with compositions with fire and biological protection, if necessary - tinted with stains or colored wood impregnations. It is extremely important to apply the first layer before installation on the walls - this way you can process all hard-to-reach places (thorns and grooves) and avoid streaks and streaks.
Stage 2 - installation of the crate
The main purpose of the crate is to level the wall and create additional space for laying insulation (if provided). For the installation of a block house, a vertical crate is most often used - the boards fixed on it imitate the surface of a rounded log. Occasionally when interior decoration baths and saunas use a non-standard horizontal crate, sewing a narrow block house on it like a lining.

To receive level ground under the block house, you must first mark the walls using a level and a plumb line:
- According to the level, pull a horizontal fishing line along the longest wall - first along the top, then along the bottom.
- In the corners, using a plumb line, pull and align the vertical fishing line (so that the wall is not littered).
- Repeat the procedure around the entire perimeter of the building.
The first plank of the crate is attached along a vertically stretched fishing line, all subsequent ones are aligned horizontally and vertically. Rails are mounted on the entire surface of the wall, including gaps between windows, door frames and cornices. The usual spacing for purlins is about 60 cm (in areas with strong winds- no more than 30 cm).
Most often, a dry bar or a galvanized metal profile is used for the crate for a block house:
| metal profile | wooden block | |
| Dimensions | 60x27 mm, 50x50 mm (with insulation) | 20x50mm, 30x30mm, 50x50mm and others as per size |
| Fastening | With the help of additional fasteners - direct hangers - on self-tapping screws | Galvanized nails or screws |
| Lathing step | 35-50 cm | 30-60 cm |
| Possibility to adjust the size | Length only | Can be processed from any side |
| Load bearing capacity | Medium | High |
| Additional processing | Not required | Fire retardant wood impregnation |
| Geometry | No complaints | Depends on the method of production and drying, may have all the defects inherent in wood |
| combustibility | Incombustible | Highly flammable without impregnation |
| Strength and durability | High | Subject to decay and attack by wood bugs, can break in places where knots fall out |
| Reliability of fastening to the wall | Medium | High (for several turns of a self-tapping screw) |

Despite some advantages of a galvanized metal profile, in arranging a crate for sheathing a block house, it is much more often used wooden block. Wooden material is cheaper by about 25-30%, and with proper processing, it is practically in no way inferior to metal. In addition, such a crate can be easily adjusted even in ready-made- the bars can always be trimmed a little or, on the contrary, built up with the help of thin dies.
Stage 3 - insulation and hydro-vapor barrier
Often, along with the installation of a block house, additional work is carried out to insulate the facade of the house. Laying protective films and a layer of thermal insulation requires adjustments to the process of installing the crate:
- A sheet or roll vapor barrier is attached to the facade. For example, you can use the protective film "Isobond B" - a two-layer material that prevents the accumulation of condensate and protects against fungus and corrosion. The insulating material is laid with an overlap of 100-150 mm, the joints are fixed with adhesive tape.
- On top of the vapor barrier layer, a crate is sewn from a bar with a thickness equal to the thickness of the selected insulation. In this case, the step of the crate should be a couple of centimeters less than the width of the insulation - this will avoid unnecessary gaps.
- Insulation is mounted in the crate, which is additionally attached to the wall with dowel-nails.
- A layer of a wind and moisture protective membrane is attached over the insulation using a construction stapler - for example, Isobond B, which provides additional protection from atmospheric precipitation.
- To create additional ventilation, additional rails are added to the main crate, to which the block house will be mounted.
Types of heaters are most suitable for sheathing with a block house, the comparative characteristics of which are presented in the table:
| Glass wool ( mineral wool) | Basalt fiber | Styrofoam | Ecowool | |
| Thermal conductivity, W/m⋅°С | 0,044 | 0,039 | 0,037 | 0,037 |
| Density, kg / m 3 | 9-13 | 35 | 25 | 35 |
| Environmental friendliness | Contains phenolic resins | Contains phenolic resins | Polystyrene Granules | Wood fiber, natural materials |
| Biostability | Rodents won't start | Rodents won't start | Rodents start up | Rodents do not start, stops the growth of fungi that has already begun |
| fire safety | Non-flammable, but phenolic binder burns, releasing toxic combustion products | Flammable, when heated from +80 ° C, emits toxic smoke | Flammable, does not emit harmful substances when burning | |
| Soundproofing | Low | Medium | Medium | High |
| Condensation | Formed, requires the use of additional vapor barrier | Formed, requires the use of additional vapor barrier | Not formed. natural humidity |
When choosing a heater, special attention should be paid to its density - thermal insulation with a density below 30-35 practically sticks together after several years of operation, completely losing its protective properties.
Stage 4 - installation of the block house
At the moment, when installing a block house, several technologies are used that differ in the type of fasteners:
- Kleimer - a special bar that is inserted into the groove of the board and with the help of a self-tapping screw fastens it to the crate.

- Self-tapping screw or nail - can be fastened in two ways: either with the cap recessed into the groove of the block house, or at an angle of 45 degrees. Both options require a lot of experience and skill, as they are fraught with chips and cracks in the board.

- Using a drill, mounting holes for self-tapping screws or nails are drilled. After fastening, the hats are sunk and closed with special wooden corks planted on glue. This is the most reliable and inconspicuous mounting option, but at the same time the most painstaking.
For the installation of a block house, it is best to use galvanized or anodized fasteners - this will help to avoid metal corrosion and wood decay in the future.
According to the rules, the installation of a block house starts from the bottom up, while the spike of the board should be on top - in order to avoid excess moisture during operation. It is necessary to leave working gaps for shrinkage and ventilation - 5 cm along the upper and lower borders of the facade and a few millimeters between the panels.

During installation, the board is inserted into the groove with a spike and additionally tapped along the entire length for a better connection. After docking, the top panel is attached to the wall.
To build up the block house along the length, special layouts can be used - thin wooden planks covering the joints. At the corners, the panels are joined either using a 45-degree cut, or using decorative external and internal corners.
Stage 5 - processing and protection
After the initial treatment with impregnations and installation of a block house, like any other wooden material, needs constant protection from the influence of many factors: rotting, woodworms, precipitation and ultraviolet radiation. The choice of means and the frequency of processing the finished wooden facade is determined by the climatic zone. In central Russia, it is enough to update tree protection at intervals of 3-4 years.
Now, universal antiseptics are widely represented on the building materials market - protecting and at the same time tinting wood. They are made on a water or acrylic basis. In addition, protective compositions can preserve and emphasize the texture of wood (azure) or completely paint over it (paints).

For optimal protection of the facade sheathed with a block house, it is best to use tinting protective compositions with the addition of acrylic lacquer. Such impregnations are widely represented by trusted manufacturers, such as Tikkurila, Neomid, Texturol. Buying cheaper water-based products is like throwing money away: their protective properties “disappear” in just a year.
Related videos
Country construction, repair and decoration are processes that take up a lot of free time and finances, and when, after completing useful deeds, you notice a lot of remnants of various materials, it becomes a little insulting for the money spent. But we will not be upset, because all the leftovers can be used with benefit, it is not necessary to throw them away ..
Never rush to throw away construction debris and leftover building materials. Everything that was not included in the main work can still be useful for giving.
Drywall crafts
A truly versatile material can also come in handy in the form of scraps and broken pieces.

From drywall, you can do the following:
- Small vases for dry bouquets, one has only to cut the GKL into even pieces and fold it into shape using a mounting profile;
- Various geometric figures for room decor country house, gazebos and patios;
- Is there enough interesting solutions and for miniature pieces of furniture in the nursery. For example, the same shelves, racks, different decor.
If you can’t use drywall anymore, give it to the kids, because with any piece of damaged material you can simply draw on asphalt or slabs, using the material like chalk.
What can be made from pieces of tin
This material is very practical, because it, like pieces of stainless steel, can be bent into any shape. This makes it possible to create the most unusual crafts for giving.

- First of all, this original lamps, which, with the help of scissors for metal or a grinder, acquire bizarre shapes;
- Also, from a similar material, thin steel or tin scraps, you can make small country bins and ashtrays;
- If the pieces are large, they can make good containers for flowers, even hanging ones;
- You can also use stainless steel and thin steel for more useful things, for example, put patches on cracked linoleum, connect the joints of the floor covering with strips of tin country house, make clamps for bolts and nuts, cut washers, tighten wooden buildings and fences with pieces of material, install them as a lining when tying large tree branches so that their bark is not crippled with a rope.
Useful use of leftovers and scraps of boards
Almost anything can be made from wood, within reasonable limits, of course. Naturally, we are talking about garbage residues, because from solid lumber we already create many useful things in the country.
- So, if a thin rail remains, it can go to the boxes, as, in principle, a small-sized board with a bar;
- trimmings furniture panels, for example, from a press, will be excellent containers for vertical gardening;
- Larger boards can be sanded and cut into kitchen utensils - planks for cutting and cutting, coasters for hot;
- Naturally, if there are good quality materials, they will always fit for country furniture - shelves and racks, small stools and chairs, shoe stands, etc.;
- It is worth noting that sawdust also brings benefits in the country, but all our readers know this very well.
A lot of interesting things can be made from wood, and therefore you should not throw away any of its remains.

If among the readers there are masters of wood carving, they will find another original use for all materials!
Useful scraps of OSB boards and plywood
Construction debris obtained from these materials will be a godsend for people with imagination.
But whatever you come up with, we also have ideas:
- Birdhouse and - the first thing that comes to mind!
- Further, and even for animals, where the material will serve as the base of the roof;
- OSB and plywood scraps can turn into pretty good boxes for storing food and non-food products, a variety of bulk;
- An interesting idea is the use of pieces of plywood and slabs to create formwork in the construction of small architectural forms;
- Such garbage can also participate in the production of country furniture, along with lumber, which was discussed above;
- If a jigsaw is available, you can always cut original garden figures or their fragments.

Using old polyethylene
In addition, anything can be covered with old film ... the same heaps of sand for construction, stacks of bricks or decorative tiles for arranging summer cottages, bulk materials, feed. One has only to fold it several times, and even an old and worn plastic film will become a good protection against moisture.

It will also find excellent application in capital construction. The film can cover foundations and only flooded areas so that the concrete does not dry out and crack in the sun.
In the issue with the film, we have moved a little away from the main topic of crafts and the remains of building materials, but now we are returning to it.
Foamed insulation: using scraps in the country
Most often, such materials are applicable before the New Year holidays, since snowflakes and stars of various shapes can be easily cut from them. But often they can be used for standard room decoration.
One side of such material is foil or coated with a reflective material. I mean, she's shiny. This makes it possible to create bright figures that will transfer sun glare to walls, floors and ceilings. Such crafts look especially interesting in limbo, on a fishing line or thread.
Most often, all work on thermal insulation, where such materials are used, occurs with insulation foiled on one side. But if you want the object to be double sided, you can cut out two mirrored shapes and glue them back together. Then the star, snowflake or figurine will shine on both sides.
Savvy summer residents also find many other uses for penofol, for example, they additionally insulate greenhouses on the sides, make small ones with their own hands. portable refrigerators by simply sewing the material inside onto the walls of a small box. But the most fun use is the sewing of children's costumes and their various elements from the material.
DIY crafts for giving (video)
Remains of plastic, polycarbonate, acrylic
- First of all, various flashlights come to mind. We have studied with you a lot of lighting options for the garden and the dacha area, and therefore it will be easy for you to come up with lanterns and lamps made of plastic and polycarbonate, especially if the trimmings of the materials are colored;
- Colored plastic and polycarbonate with shades in the decor of the fence look very good. Somehow we have already raised a similar topic and even showed you photos of similar fence decorations;
- Small scraps of acrylic can be used to make boxes and chests that can perform both decorative and household functions;
- In addition, these materials can fully participate in the production of garden figures. Combining wood, steel, plastic and other materials, you can make garden gnomes, fairy-tale castles, and various animals with your own hands.

Remains and brick fight
We use construction waste of a similar plan as a filling of the territory and materials for leveling pits. But today we propose to think about more useful structures.
- These can be the same fabulous castles of a decorative nature, located in the garden, in which the brick will act as a base;
- In addition, small lamp columns can be built from bricks;
- Application construction material will also find it in the production of heavier and more solid furniture, for example, as a base for benches or even under a table in a new gazebo.

What to do with PVC plastic panels
Sheathing of walls and ceilings, various buildings outside and inside with plastic is a fairly popular process for ennobling a summer residence. But, in view of the low cost of the material, or for reasons of incorrect calculation, we often buy PVC panels with a margin. Then, when the material remains, we think for a long time where it can still come in handy.
We have previously mentioned certain options, but there are more interesting ideas:
- A miniature fence made of PVC panels will last for several years until the material deteriorates due to the influence of atmospheric phenomena;
- The material is also excellent for delimiting garden beds, flower beds. It turns out a multi-colored and very colorful decor;
- If we return to country crafts, then plastic can become the roof of small garden buildings, be used as gutters for collecting rainwater, even represent simple, but quite attractive shutters for the windows of a country house, if you combine panels with wooden beams.
Bulk mixtures and the use of their residues
It can be either a few scoops in a bag, or a whole bag of material. Naturally, such material will not disappear in the country - grease, repair cracks, repair garden paths And so on.

But you can use mixtures for decorative purposes, for a wide variety of crafts.
- We have already talked about how to produce decorative blocks for walls with the simplest, even home-made forms;
- Also, they told you how to make a cement drinker, quickly and quite simply;
- But you can turn on your imagination, pick up special molds and pour out whole figures for the garden, which can easily last up to ten years even under the worst conditions on the street. It is only necessary to process the finished crafts with protective paints, which will give a brighter look.
Remains of ceramic tiles and mosaics
They say that materials of this kind in the country are indispensable, but mainly in economic terms.
- The rest of the tile can be used to trim the basement of the house to protect it from external influences;
- The same material can cover a new blind area;
- If there are very few tiles, and it represents a battle, then it, like a mosaic, should be moved to the garden. Here, with pieces of multi-colored, glossy and with various patterns of material, you can decorate garden figures. For example, you are making a garden gnome ... so now it is not necessary to paint it, you can decorate it with tile pieces. The turtle from the leftover cement in the garden will receive an exclusive shell in the same way. Tiles or mosaics will serve as an unsurpassed finish and a small decorative pond in the country.

We have hundreds more tips in our arsenal, but we just can't put them all in one article. We have mentioned almost all the popular materials used in the country, and now you just have to focus on the fact that not everything should be immediately thrown into the trash, because any piece or scrap can be useful.
Crafts from building materials and the beneficial use of construction waste are interesting and popular topics. Thousands of summer residents across the country every day come up with incredible decor from metal and wood, the remains of foam and paint, polyethylene scraps and dry mixes. So why don't we give it a try? We are sure that with our experience crafts will turn out no worse!
Block house is a popular material used for wall and facade decoration. various buildings. technology internal and exterior finish has no significant differences. Traditionally, a block house is made of wood, but there are also more budgetary counterparts from other materials. However, if you have an affordable budget, it is recommended to give preference to wood panels - they are environmentally friendly, durable and most beautiful. With the installation of a block house, you can do it yourself without any problems.
Before starting work, you have to buy a block house. When choosing a material, carefully study its external condition. Usually the slats are packed in polyethylene at the factory. If possible, such packaging should be opened.

Boards with the following defects will not work for you:
- rotten knots;
- cracks;
- plaque of rot and mold;
- bluish spots.
The size of the pitch should not exceed 8 mm in width and 2-3 mm in depth.

Be sure to pay attention to the features of the placement of annual rings. It is better that they fit together as tightly as possible - this arrangement indicates a high density and, in general, good quality wood.

What do you need to work?
Installation of a block house does not require any highly specialized accessories. In most cases, self-tapping screws are used to fasten the panels. An indispensable assistant in this matter will be an electric drill.

Also, clamps are often used to fasten the block house. For the manufacture of these products, galvanized iron is used, which makes the fasteners as resistant to corrosion as possible. Kleimer has the form of a flat plate with a tongue and pre-prepared cuts for mounting screws. The tongue will hold the panel of the block house. The height of this fastener element should be at least 6-7 mm.

Ceteris paribus, preference should be given to clamps, and not to self-tapping screws. Clips allow you to fix the panels without the risk of cracks, deformations and other defects. In addition, the use of kleimers allows installation with almost imperceptible joints, which makes the appearance of the cladding much more aesthetic.

For 10 m2 of sheathing, about 200 kleimers will be needed. Such an expense should not alert you - fasteners are sold at a very affordable cost. In addition, the use of clips instead of self-tapping screws will allow you to significantly reduce the time spent on installation work.
In the process of sheathing, it is often necessary to cut the panels into smaller pieces. An electric saw will help you with this. If the amount of work to be done is small, you can do without a saw, using an ordinary hacksaw with small teeth to cut the skin elements.

It is also possible to use a circular saw, however, in this case, the cutting disc should not have carbide tips capable of violating the evenness and cleanliness of the cut.
Buy a heater first. Mineral wool and other heaters based on it are characterized by good heat and sound insulating properties.

Styrofoam should be avoided if possible - this material is very poorly combined with wood due to its low vapor permeability and, among other things, supports combustion.
Select the beam for assembling the crate, taking into account the dimensions of the insulation boards.

Buy steam and waterproofing materials. The vapor barrier will protect the insulation from condensate, and the waterproofing will protect it from external atmospheric moisture. For vapor barrier, you can use a membrane material, perforated film or ordinary glassine. Polyethylene film does an excellent job of solving the issues of waterproofing walls.

Preparatory stage

Before starting work, all wooden elements must be impregnated with a high-quality antiseptic. Also, materials are recommended to be treated with a flame retardant. Thanks to this treatment, the wood will become much more resistant to mold and fire.
In the case of using budget imitations of a block house made of plastic, vinyl or metal, it is not necessary to perform preliminary protective treatment.
First step. Attach the selected vapor barrier material to the walls. Fasten with a 10-15 cm overlap, horizontally. For fixing, it is most convenient to use a construction stapler and staples.

Second step. Attach the battens over the waterproofing. The crate is recommended to be done horizontally. For fixing the beam to wooden base You can use nails or screws. If the wall is made of bricks or blocks, fix the bars using frame dowels. In this case, you will have to pre-drill holes in the wall to accommodate the fasteners.
Choose the step of fastening the timber according to the width of the insulation boards.
Third step. Lay the thermal insulation material in the cells of the crate.

Fourth step. Lay a waterproofing film over the insulation and attach it to the crate using a construction stapler with staples.
Fifth step. Fasten to the main frame another layer of the crate, already vertical. You will attach the panels of the block house to it. Mount the second crate with a mandatory level check.
Panel mounting

Proceed to sheathing the surface with a block house on a pre-installed crate.
Start installing panels from the bottom corner. The block house can only be mounted horizontally. Some home craftsmen choose the vertical method of placing panels, but it has many disadvantages.
Fix the panels with clamps. Attach the clamps to the crate using self-tapping screws and insert the first sheathing panel into the tabs of the fasteners, placing it with the groove down.

Slide the groove of the next panel onto the tongue below the installed cladding piece. Continue to work in the same way until you veneer the entire wall.
If you decide to give preference to self-tapping screws and abandon kleimers, start the installation with preliminary preparation of recesses for placing self-tapping screws at the bottom and top of the board. Place the fasteners in increments of a little more than 40 cm. Screw the self-tapping screw into the spike at an angle of about 45 degrees.

After fixing the main part of the skin, you will need to mask the screws so that the finish looks as beautiful and attractive as possible.
You can hide metal heads of self-tapping screws in one of the following ways:
- using the remains of the block house panels. Make corks from scraps according to the size of the holes and fix the plugs in the recesses with ordinary PVA glue. Grind irregularities with sandpaper;
- with pre-made plugs. Sold in specialized stores. You can easily pick up plugs to match the color of the main coating. Use PVA glue to attach the plugs;
- with wood paste. For its manufacture, use PVA glue and sawdust. You need to get a fairly thick composition. Fill the existing holes with the finished mass, let the composition dry, and then sand the surface. The method is simple and least expensive, however, the attachment points may not match the color of the main wood.
How to draw corners?

Finishing the corners when sheathing with a block house causes the most difficulty for beginners. To complete this stage of work, you can buy "boats" for decoration internal corners and special elements for finishing external corners.
The finished plinth will fit snugly against the block house only at the top point, as a result of which large open gaps will remain in the skin, which is a huge drawback and is generally unacceptable.
It is much more expedient and easier to use a planed beam with a section of 5x5 cm for finishing the corners. It should be fixed before the sheathing begins. As a result, you can attach the block house boards to the timber, and the finish will look as aesthetically pleasing as possible. The method is suitable for finishing external and internal corners. If desired, you can round the outer part of the bar to an oval shape.
Cashing out installation

Also, novice craftsmen have difficulty framing door and window openings. To decorate these building elements, special boards, known as platbands, are used.

The main task of the platbands is to hide the cracks and block the way for cold street air, precipitation and various debris.
If you wish, you can buy decorative platbands with various carved patterns and ornaments - at this point, be guided by your own preferences. The platbands can have a semicircular, figured and plain flat shape. Choose to your taste.
In accordance with the method of installation, cashing elements are classified into telescopic and overhead products. Telescopic architraves have special protrusions that must be inserted into a slot in a window or door frame.
The invoice cashing is simply attached to the surface with the help of nails and self-tapping screws.

In general, when choosing platbands, be guided by your personal preferences, the design features of the house and the whole site.

Thus, the installation of a block house without any problems is done by hand. Having understood the main features of the work, you will cope with the decoration no worse than a professional master and, at the same time, you can save significant money. Follow the instructions and everything will definitely work out.
Successful work!
Video - Do-it-yourself block house installation