How to make holes for pipes in the wall - tools and rules for performing work. Drilling a concrete wall Drilling holes in a wall
When making repairs in an apartment or house, the question always arises of drilling a wall. You can use different tools depending on the purpose of the hole and the material from which the surface is made.
When working with each tool there are nuances, especially when drilling a wall. How to make the right hole, and what recommendations to follow?
Drilling holes in the wall correctly: general rules and recommendations for drilling
In order to properly drill a wall, you need to take into account the material from which it is made, based on this, you need to choose a tool.
- when working, hold the tool correctly. For example, a drill in the hands should be straight, and enter the surface in a vertical direction;
- for convenience, use an additional handle;
- Depending on the material of the surface, select the necessary drills.
The material of the tool used to work must be harder than the surface to be drilled.
Tools for different surfaces:
- concrete, stone, brick wall - use a carbide drill, more often victorious;
- metal - drill for metal;
- tile, ceramic tiles - special drills for these materials, sometimes it can be replaced with a drill for concrete with surfacing will win;
- Chipboard, wood - for holes smaller than 10–12 mm, a drill for metal is suitable, for larger ones, special drills for wood are used.
Work Tools
For work, they use different tools, the main ones: a drill, a puncher, a screwdriver. When using each, there are nuances.
Drill
 The tool is suitable when you need to make several holes. You can use a regular drill. When plunging a drill bit into the body of the wall, sometimes it is necessary to break concrete with a punch that matches the diameter of the hole. This is necessary when the drill starts to get stuck in the surface, bumping into too dense areas. The process is quite labor intensive.
For greater efficiency, you can use universal drills that have a diamond coating. They are installed only conventional drill or on an instrument where the vibration function is disabled.
For large-scale work, an impact drill and drills with victorious tips are used. They are designed for holes up to 12 mm. The drill is suitable for work with metal, concrete.
To prevent the tool from overheating, periodically moisten the drill with cold water.
Perforator
 The perforator is a versatile tool. With it, you can make a hole in the wall of wood, tiles and concrete.
The tool has several functions - drilling, drilling with impact and impact mode. To make a hole, you need to select the desired drill depending on the surface and work by selecting the mode.
screwdriver
A screwdriver is one of the most popular tools for repair and construction work. With it, you can twist and unscrew self-tapping screws, drill wood, metal, chipboard, plywood, tiles, plywood, lightweight concrete.
What nozzles to choose
 For each material, a specific nozzle is used:
- concrete, brick, stone - a drill with a carbide plate or a drill;
- tiles, glass - conical drills with diamond coating;
- metal - a spiral drill with a cylindrical cone;
- wood, drywall - for holes of different diameters, drills are used: feather, ballerina, screw, saw bits for wood;
- foam concrete - victorious drills.
Is it possible to do without a drill and puncher
Make a hole without a drill and puncher, but not in a concrete wall. To do this, you need a bolt or punch.
A bolt is a pipe with teeth at the end. The punch has an end in the form of a bison or a tetrahedron.
The working end of the tool is applied to the place where the hole will be. On the opposite side of it, you need to strike hard, rotating the tool after each turn.
How to drill without dust: options, the better
 Construction work is always accompanied by dust and debris, but with some recommendations and tips, it can be significantly reduced:
- perforator during operation leaves a slight dust, so that it does not scatter around the room at the same time use construction vacuum cleaner. Some brands of tool have a built-in vacuum cleaner, which makes the task easier;
- using a drill, it is best to either make a jig at the end or a bag, or make an envelope under the hole so that debris falls into it.
How to drill holes in a brick wall: the choice of tools and nozzles
To make a hole in a brick wall, a puncher with a drill or an impact drill is suitable, most often the latter is used. Its power should be at least 600 watts, the minimum number of revolutions should be from 2500 per minute. It is best to use a drill with smooth power adjustment and quick clamping function.
Using the hammer drilling function, the drill becomes identical to a hammer drill. Increased speed and ease of operation. To make a hole in a brick wall, you need to use the punch method of a dynamic nature. Without this, the drill will not be able to catch on the inside of the brick.
Drills must be victorious. If through drilling is necessary, then a drill is used.
How to drill a load-bearing wall in a panel house with a puncher
 In most panel houses, the walls are made of concrete; in order to make a hole with a perforator, you need to use drills.
In addition to them, you can use special crowns. They have soldering around the circumference. Applying them, you need to turn off the percussion function of the perforator.
Specialists use diamond drilling, this requires powerful equipment and skills.
How to drill reinforced concrete under a pipe with an impact drill
Using an impact drill for reinforced concrete, you need to use the "perforator" mode and the drill bits. First, the hole is made smaller, then larger. The drill needs to be cooled down periodically.
Important! When working with concrete, you must not get into the reinforcement, otherwise the drill will break. With the help of a special device, you can check where it is located.
How to make a hole in a concrete wall with a drill
It is difficult to drill a concrete wall with a conventional drill. It is necessary to install victorious drills and select low speeds. A dowel is inserted in the right place to help the tool break through the surface. Further, drilling must be alternated with blows on the dowel.
The drill must be constantly cooled, otherwise it will burn out.
If the drill does not have speed control, then it will not be possible to make a hole.
How to make a hole in a concrete wall in an apartment with a drill
For a small hole, you can use a punch. It will make, most conveniently, from a drill, diameter 8 mm. The end is sharpened sharply. The drill is placed in the right place, rotated, while hitting it with a hammer. Periodically moisten the drill so that it works longer.
 When working with tools, you must follow the safety rules and general recommendations:
How to fix a large drilled wall
 You can close up unnecessary holes in the wall using a special building mixture. It provides strength and durability. The composition should be selected depending on the area and type of defect.
With the help of putty, you can level the surface, including concrete. There are several types of putty:
- cement - used in outdoor and interior decoration suitable for concrete. Durable and moisture resistant. Dries for a long time and often with a mesh, which requires re-application;
- gypsum - used in dry rooms, not resistant to water and afraid of temperature changes. It does not crack when applied, so it can be applied immediately in a thick layer;
- acrylic - finishing. You need to apply a thin layer, so it is suitable for small defects.
 None of the mixtures are used for sealing through holes.
Polyurethane foam is a versatile material. It happens one-component (used without preparation) and two-component (when used, a construction gun or mixer is used).
When applied, the foam expands in volume and fills the desired space. Hardens and gives high-quality density. Deep holes can be sealed.
Suitable for removing large defects. It has good adhesion, frost-resistant, strong and durable.
Having decided to make a hole, carefully read the rules and recommendations. Choose a tool, depending on the composition of the surface, and a drill. If you are not confident in your own skills, then entrust the work to specialists.
Useful video
The master has to make holes in the wall, as in the case capital construction as well as in everyday tasks. Much in this matter depends on what material the base plane is made of. The diameter of the future hole also plays a role. Therefore, the material of manufacture of the drill plays an important role - it must be selected correctly. The difference can be significant - any professional will confirm this.
If it’s quite simple, then: a drill for holes in a brick will definitely not cope with concrete - it will burn out in the process. How holes are made different materials– this needs to be discussed in detail. Let's take a look at the different tools and guidance on when to use which one.
Device for deepening in the wall surface - which is better
How to drill a hole in a wall - this question often arises before a beginner. Today it is not difficult to cope with such a task. If a person has at least minimal experience and uses modern electrical tools in his work, he will definitely cope.

So that after all the work the room remains clean, it is worth using a conductor - thanks to it, you can drill with a minimum amount of dust and pollution.
A puncher is perfect for creating holes in the wall, if, for example, (or for other purposes) - professionals advise using it. This technique can easily cope even with high-strength materials; nothing better than a puncher for holes in the wall has yet been invented. But quality tool is expensive for home use almost never buy it. Another option for making holes in the wall is an electric drill, which has a punch effect.
It is the drill that is most often used for cutting holes in the walls. Such a tool is available in almost every family. Some advice from experts will help to significantly expand the scope of use of a conventional drill - there is nothing complicated here.

When choosing a drill, it is important to read its technical description carefully. The recommended power of the appliance is at least 600 W, suitable revolutions are not more than 2500 per minute (it is desirable that there is a function for their adjustment).
And now in detail:
- The presence of a reverse is mandatory. It is this function that allows you to change the rotation of the drill - counterclockwise and clockwise. A model with a keyless chuck is a great choice, because then you don’t have to waste time looking for a key with which to change the drills in the device;
- The impact function of the device is also welcome. It is needed so that the device can easily make holes on any wall surface. It is easy and pleasant to work with such a drill. The bottom line is that certain materials (concrete, cement, bricks and not only) are quickly destroyed by dynamic influences (we are talking about impacts). That is, when a drill does not have this function, it can take a lot of time to drill a hole in the wall. The drill clings to the composition, heats up quickly, but this is of little use. Impact drilling will radically change the approach to business - you get something in the style of chiselling, speed is guaranteed.
Choosing the right drill - how not to make a mistake
Perhaps everyone has seen with their own eyes an impressive range of drills in hardware stores and other retail outlets. It's time to talk about which drill is better to use in certain situations.

Foam concrete, plasterboard, wooden surface can be easily drilled with the simplest drill - there is nothing complicated in this process.
At work with concrete, stone, brick everything is different: here the drill is specially chosen, carbide products are the preferred solution. Unlike a simple one, such a drill is equipped with cutting blades - welded elements are visible, just look at the product.
Every home should have at least a couple of these drills. Common sizes are 6-8 mm. There will always be a use for these products, you can not worry about this. With their help, at any time you can drill a hole in the wall up to 20 cm deep.
Bur - great choice to make a big hole. These products are able to cope even with a dense surface. A meter deep is not the limit for them. But a drill is no longer suitable for such work - you need to choose a hammer drill and work with it.

Details about the drill and its use:
- Boers usually have tails that are 15 mm or more in diameter. There are grooves - they are designed for fastening. However, if the drill is working in hammer mode, they are clamped well in the chuck. On the tail of the drill are its characteristics;
- If the task is to drill a solid surface, the process is usually divided into a number of stages - then drilling is carried out as quickly and safely as possible;
- First, a drill is selected: the recommended length is up to 200 mm - it will easily reach a depth of 150 mm;
- Then choose a long drill, designed already for 350 mm;
- Drilling is completed with a product whose length is 500 mm. You can't do without a high power drill. But, as mentioned above, such a technique is not designed for heavy loads - except perhaps in certain situations;
- When buying a puncher is not possible for some reason, it makes sense to rent it for a couple of hours - today there are services that provide such a service.
If you need to punch a hole in the wall with a diameter of 150 mm or more, a drill will be the best tool. They are distinguished by reliable fastening in the cartridge, have an impressive length.
Safe drilling of walls with your own hands

You can get a hole in the wall yourself. It is important to do the job safely, but at the same time efficiently and quickly. For different wall materials there is own instruction for the performance of work - these rules must be observed.
The master before drilling should carefully examine the surface of the wall. In the place of the future deepening there should not be cables - electrical or any other. If you rush to this stage– You can seriously damage the wiring. Moreover, even the master's own health may suffer due to such carelessness. Fortunately, it is possible to bypass cables while drilling.
How not to get caught in the wire when drilling walls

On the walls are usually located sockets, switches. They must be examined carefully. It is from such nodes that network wires diverge vertically. They go to the junction box.
If this is the case, then this is an ideal situation, which is rare. As a rule, electricians do not follow the recommendations in all cases and go straight ahead - to save the cable. That is, diagonal wires in houses and apartments are located everywhere.
Detailed guide:
- Usually, in order to check whether there is a cable on the wall section or not, devices are used. They are not expensive and locate the wiring accurately;
- If such a device is not at hand, it is worth understanding that the wire is usually placed at a depth of up to 1 cm in the wall surface. To find out whether it is there or not, you can carefully make a small hole using some blunt tool. If there is no cable, you can safely drill. Experts say that the recess can be made up to 2 cm - to make sure there is no cable;
- The drill does not need to be pressed too hard against the wall. Every few millimeters, the master must inspect the hole - is there any wiring there. The wire electrical network can be found with a special device - it is presented in almost all specialized stores. When buying such a product, it is worth clarifying whether it is of high quality. It is worth choosing the best - after all, the health of the master depends on his testimony. Such an apparatus will show the places where reinforcement lies in concrete surfaces - this is also important when drilling;
- Copper electric wires searched faster - if they are no further than 1 cm in the wall. And the search for aluminum wiring can only be done with a device with a metal detector function. In the process of searching, you need to look at the indicator constantly - it is made in the form of an LED light bulb. However, he also emits a signal, so you need to watch out - the "assistant" will definitely inform you if he finds something;
- If the metal detector mode is on and something is found, the diode will start to glow, the master will hear a continuous sound. In any modern device there is also a sensitivity regulator. The finder feeds on a standard "Krona".
Any builder who installs tension and suspension structures on the ceiling surface cannot do without such a unit. Systems on the ceiling are most often fastened with self-tapping screws - this is where all the electrical cables run. In a word, you can’t do without insurance - you need to use the device.
Drilling holes in brick or concrete surfaces

Hot topic - how to make a hole in a brick or concrete surface. For a brick, a victorious drill is enough.
A conductor is attached to the place where the work will be carried out. A slot is being drilled - in the process, the revolutions of the power tool should not be high: the drill should not overheat.
If the surface of the ceiling or walls is made of high-strength cement, drilling may be difficult. Usually 400 brand material is used here - if so, then there will be no problems during operation. And if the building was erected a long time ago, the concrete there is very strong and it will be difficult to drill.
Besides:
- Today, manufacturers are investing iron fittings in wall blocks and panels - to improve quality. These are rods, the thickness of which usually does not exceed 2 cm. Crushed stone can also be found here. You can't take all this with a Pobedite drill;
- But there is a way out. If the drill hit the rebar, you need to put an ordinary drill. If in right moment it was not there, the place for deepening is moved slightly down or up diagonally;
- Drill blows can crush crushed granite in the wall. During this work, the tool often jams. To simplify your task, the mechanism should be rotated 4 turns;
- When the obstacle is passed, the master continues drilling with a drill bit. The drill and the puncher will cope with the problem of such a plan instantly, the worker will successfully get what he wants.
Holes in tiles

What if you need to drill a tile? For this work, a drill with welded protrusions is chosen - outwardly they resemble teeth. It is these elements that are commonly called a crown for drilling tiles.
But if you need to get a small hole, you should not use a crown. Then a mark is made in place. Further work is carried out as follows:
- To make a mark on the tile, a core is used. When such a tool is not available, you can take a simple self-tapping screw or a thick nail with a sharp tip. The glaze from the tile is carefully removed where the hole should be. Small revolutions are set on the tool - the same as when working with bricks;
- Once the glaze is removed, a hole is made with a small drill;
- Then it is expanded to the required diameter - a thicker drill will help with this.
Large recess in the wall

When the installation is done ventilation systems, wide recesses are usually made in the wall - 20 mm or more. A meter is also often placed in the wall (the one on which the electricity indicators appear) - in this situation, you will have to make a niche at all. A carbide drill will help solve the problem in a private house.
You have to act like this:
- On the wall, mark a place for deepening - with a simple pencil. From the outside, holes are drilled on the wall; drills with a diameter of at least 5 mm are selected for work. A distance of 1.5 cm is maintained between the holes;
- To go deeper into the surface by 20 cm, it is necessary to make about 30 revolutions with a drill. Only after that, materials are removed from the wall with a hammer and a chisel - in this case, a niche of the required dimensions will be formed. If drills of a smaller diameter are used, the edges will come out neat. But you have to make more holes to achieve the desired result.
A common situation: the wall is made of solid material, so it is difficult to get a through recess. In this case, the work is carried out in several stages..
Namely:
- If a surface can be drilled on both sides, it is first done on one side, after which a through full recess is already performed. The steps taken are repeated until the result is satisfactory;
- When it is not possible to drill the surface of the wall from one side and the other, the processes are done in turn, the work is not done at once, but in several steps. From the mark made earlier, another line is drawn. As soon as the unnecessary material is removed, you can deepen the drill into the niche - you do not need to touch the edges on the wall in the process. A long drill at the beginning of work will greatly facilitate the work.
In fact, drilling a hole in the wall is not as difficult as it seems - including, get a precise, neat recess:

- A sheet of sandpaper is glued with glue or tape on the side of the conductor. The size of the element depends on the area where the hole is located. Due to such a simple manipulation, the adhesion of the device and the wall surface will increase, the master will accurately make the perfect hole where necessary. Stationary limiters are also used frequently. The cost of the product is quite moderate, in retail trade everyone will be able to find it;
- Sometimes a hole needs to be drilled under the dowel. As you know, they can have different diameters, but most often - up to 10 mm. It all depends on what you plan to hang, the weight of the product also plays a role. The density of the wall material must be taken into account;
- To get a universal conductor, several holes of the required size are made in it with a simple drill - so that the device can be hung without problems;
- Often a plate is attached to the conductor. Thanks to this, the shelf reliably protects the wall surface finish from debris and possible dust. Such a device is also used for drilling holes;
- Places of the required sizes are measured on the conductor - from the shelf at the required height. Next, holes are drilled. To get the optimal recess, the shelf is laid on the floor - the slots will come out exactly in size, at the required height. When performing installation, it is worth acting in stages, following the rules. On the floor surface the plinth will lie correctly - there is no doubt about it;
- Sometimes you need to hang one or another on the wall decorative element- a frame for a photo, a picture or something like that. It can not be done without an auxiliary conductor. The bottom line is that the holes should be located at a clear distance between them. It is worth considering your wishes and making sure that the work is done in the same style as the entire room.
- In order to make a conductor with your own hands, which will help you drill holes as correctly as possible, a metal sheet or plywood is selected. Marking is performed on this element, then the required number of recesses are made with a regular drill.

It is worth considering options when parts need to be mounted on several screws, and not on one:
- On the wall, the first hole is drilled, the second is made with the same size as the self-tapping screw. The conductor will help to get the exact recess. After the dowel is hammered into the hole;
- The conductor can be screwed to the wall surface with a self-tapping screw and a dowel. Alignment is carried out with a water level - this method will help to get even recesses and they will all be located on the same horizontal line, which is required;
- With help simple conductor(which you can do yourself) you can get recesses with a drill - they will be at the distance from each other that is planned;
- This technology will help the master to make holes even at large intervals. First, holes are drilled for this, as mentioned above. Then the conductor is screwed on with screws on both sides. The drill makes other recesses and the result is perfect.
If you plan to pass the cable through a hole in the wall, it should be made more by 20%, because it should not be pinched. The main rule for cable in the wall is freedom.
Results

This is what the answer to the question looks like - how to drill a large diameter hole in the wall. Everyone will cope - the main thing is to act without haste, to apply the markup correctly.
Video on the topic will help to realize the plan:
Limiters will help to drill the wall to the desired depth, with the required diameter. Working with brick is not as difficult as working with concrete - but accuracy in the process does not hurt, as in any other business - it is important not to forget about it.
How to drill a hole in a wall
It would seem that it could be easier than drilling holes in the walls. However, if you look at the issue more broadly, it turns out to be multifaceted and very extensive. Firstly, what size hole should be, secondly, what material the wall itself is made of, thirdly, what tool are you going to do it with, and so on. Today we will talk about the topic how to drill a hole in a wall. We will share interesting information that can be useful both during repairs and just in everyday life.

Wear protective clothing
- Performing any installation work, especially with power tools, always wear at least gloves.
- In order not to breathe the dust thrown into the air, it is worth putting on at least a simple medical mask for 2 rubles. A hat will also help, especially if you are drilling at a height and debris can fall on your head.
- During drilling, the tool must be held firmly and evenly. There are cases when the drill wedges in the hole, and the punch can be pulled out of the hands, which is fraught with injury. The drill should enter the wall only perpendicular to it (unless special devices are used), any distortions can cause part of the wall to crumble.
- It is very convenient when an additional handle is installed on a perforator or drill - this way it is easier and more reliable to hold the tool.

The master holds the punch firmly with both hands
Prices for popular models of rotary hammers
Perforators
The mode of operation for the tool is selected depending on the type of surface you are dealing with. The size of the drills or crowns is selected according to the size of the anchors and other equipment that will be installed in the hole.
The basic principle used when drilling is the material with which you do it, must be stronger than the material of the wall, that is, with a drill for wood, which does not have any additional spraying, you cannot drill concrete in any way, so it is so important to choose the right tool.
Find out and also read the step-by-step instructions and photos in a special article on our portal.
Concrete drilling – simple and professional

Professional machine for drilling large holes in thick walls
So, we may need holes in the walls for different purposes, respectively, its diameter and depth will depend on this. The photo above shows how a special water-cooled installation bites into the thickness of concrete with a powerful crown - such large holes are needed for the construction of communication lines, ventilation, sewerage and other things. The need for tools that can cope with such a task has recently increased many times over, since now almost everything is built using monolith technology. For brick walls this is also sometimes required, for example, the builders did not provide for an exhaust hood, or you need to make a neat conclusion from the boiler.

Drilling through a brick wall
This approach makes it possible to solve the problem in shortest time, plus the strength of the wall is not violated. Only a few can afford such equipment, and there is no point in buying it. Only specialized organizations are engaged in professional drilling. We will not describe the process of diamond drilling in detail, but we will go through the main points to broaden our general horizons.
Table 1. Instructions for drilling concrete.
| Steps, images: | Description |
|---|---|
| Step 1. Drilling a hole for the bed.
Drilling holes for the bed | Good equipment has a bed along which the cutting crown moves in the right direction. In order to qualitatively fix the frame on the wall, it will be necessary to make a hole in it strictly perpendicular to it. |
| Step 2 Fixing the bed.
We fix the frame | We fix the bed with a powerful metal anchor. Now the tool is ready to work. |
| Step 3 Machine setup.
Setting up the car | Then the operator sets the value of rotation speed and axial load. It is very important to choose correct settings for a specific material, otherwise the drilling process may take several hours, and the hole will not be even. |
| Step 4 drilling.
| We start drilling and do this until the crown goes through the entire wall. As a result, we get a perfectly even hole, a minimum of dirt and dust. |


Interesting to know! The cutting tool must be constantly cooled. If the hole is large and the wall is thick, organize the supply of water through special hoses. This measure allows to achieve less dusting.
Now from professional tools let's move on to more mundane ones, to those that we constantly encounter in practice. Concrete - very hard material. Inside it, in addition, reinforcing rods made of steel or fiberglass can pass. A tool with an impact function can cope with its drilling - the impulse from the drill will more effectively destroy the material. Do not use a simple electric drill. No, you will make a hole, but spend on it not 10 seconds, but about 10 minutes. Agree, the difference is huge.
Interesting to know! If the hole diameter is less than or equal to 13 mm, then an impact drill is enough for the job. Large ones are made only with a perforator.

A screwdriver can only handle light concrete, and even then not everyone
Prices for popular models of screwdrivers
Screwdrivers
Concrete walls also include lightweight concrete - foam blocks, gas blocks. These materials are not very dense, so even a screwdriver can be enough for work if it has a revving and powerful electric motor.
Video - Diamond drilling holes in concrete and reinforced concrete walls HD 1080
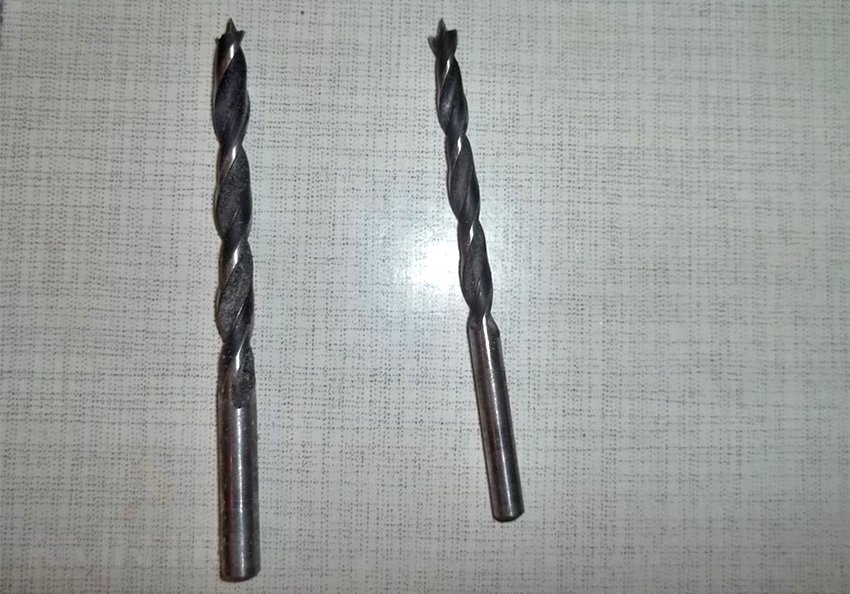
Next important point- this is the selection of a drill. Concrete and other hard materials, such as brick, can only be drilled with carbide tools - Pobedite drills. A very strong one will win, a drill tip is made from it, after grinding which, the device becomes unusable.

Drill tip victorious
Advice! When trying to use such drills on wood, you will get ugly ragged holes. Wood is too soft for him.
Prices for a diamond drilling rig
Rig for diamond drilling
Having prepared everything you need, you can start work:
Step 1. First we need to do some preparation. The main problem may be the presence at the drilling site electrical wiring or pipes for water supply and heating. To avoid an accident, you need to make sure that you do not fall into them. A metal detector can help in this matter or special device, which reacts only to wiring. Pipes inside the walls, if they are made of polypropylene and other polymers, the metal detector will find only if they have metal reinforcement. Otherwise, you need to look at the drawings or photographs of the communication lines.

Wall metal detector
Step 2 Before drilling, you need to mark the entry point of the drill, for this you can use a pencil, marker or punch, if you need not only marking, but also a pothole so that the drill does not slip. Usually, when you start drilling concrete or brick, the drill does not move much to the side, but still it can lead, and the hole will move a little. In some situations, this is not critical, while in others, on the contrary, it is unacceptable, for example, you need to screw on a bracket that has a strict arrangement of holes for the anchor.

Punches of various sizes
If the wall surface is finished with ceramic tiles, then it is even more difficult to start drilling without a center punch, especially if this tile is glossy - the drill will slip over it even more, leaving scratches. If you do not have such a device at hand, then you can replace it classic dowel, which will not bend from hammer blows, or start drilling at the lowest speed, and only after making sure that the drill goes as it should, accelerate the tool.
Step 3 Small holes are used mainly for plastic dowels and metal anchors - in the first case, it is recommended to make the hole a little deeper than the length of the element, literally 3-5 mm. If this is not foreseen, it may not go all the way, it will remain protruding above the plane of the wall, or it will completely break. This feature is typical for dowels because of their shape.

This is what the depth gauge looks like
Step 4 There are very thick walls, and the depth of the hole will not play a special role for them, especially if the dowel has a limiter cap that will prevent it from slipping inside. And there are thin partitions, where busting is fraught with damage to the finish on the other side, falling off of the plaster, and so on. In such a case, it is necessary accurately determine the depth of the drill. For this, limiters in the form of rods are used, which are fixed in a special device on the additional handle of the perforator. Reliable and accurate, but not always.
There are such tool models in which the fixation of the limiter rod is poorly thought out. It can slip through the hole, making it risky and inconvenient to use. In such case you can use folk method drilling depth markings.

Homemade tape limiter
Take a piece of electrical tape and wind it right on the drill at the right level. If you need to make a lot of identical holes, then make sure that the edges of such a mark do not crumple, since after several drill entries into the concrete, it can give an error. You can also make a mark on the drill with a marker, but it won’t last very long either, as it will quickly be erased and become hardly noticeable, especially in the debris that comes out of the hole.
Step 5 When drilling concrete, a lot of drilling waste, or in a simple way - dust, is released. When you work in a house that is just under construction, this does not create any interference, but if the premises are already inhabited, everything is equipped with furniture, and you don’t want to get anything dirty, it becomes more difficult to drill a hole in the wall neatly. But we wouldn’t be us if we didn’t come up with ways to deal with such a trifling problem:
- The photo below shows a rotary hammer equipped with a vacuum cleaner and a dust bag. It is a pleasure to work with such a tool - with a good retracting power, garbage will practically not get into the room. It is especially convenient to use it at a height.

Hammer drill with vacuum cleaner
- Such equipment costs a lot of money, so less drastic measures can be applied. For example, use a home vacuum cleaner. It doesn't need to be attached to the drill - just have someone hold the tube under the hole while you drill it. The effect will not be worse.
- In some situations, dust collectors, which are available in the form of plastic or rubber bowls, help. It is convenient to work with these devices when drilling the ceiling, but they are not so well suited for walls, since when the drill is removed, debris can spill out.

Tool with dust collector
- The easiest method is to use a damp cloth. While you are drilling, the assistant holds it from below, and then gently removes it. The remaining particles of debris on the wall are wiped with a clean rag.
- If there is absolutely no one to help you, then you can make such an envelope-garbage container, as shown in the photo below. To do this, you will need an old newspaper and masking tape, which, when peeled off, will not leave marks on the wall. It is glued just below the drilling point, and all waste will fall inward.

Garbage bin from an old newspaper
If all the dusty work has been completed and you need to prepare the wall for painting, then it will be very useful for the reader. In this material, we will consider in detail the main types of putties, the tools that will be needed in the process. As well as step-by-step instruction putting putty on the wall.
How to drill ceramic tiles and porcelain stoneware

Perfectly even hole in ceramic tiles
If you have ceramic tiles glued on the wall, then the process of drilling it will become somewhat more complicated, and will consist of two stages. Let's describe them in order.
To get started, you will need to prepare all the tools: masking tape, pencil, marker, diamond crown, pen drill, as shown in the photo above, and an electric drill. Ceramic tile very durable material but she's fragile. If she gets hit, she breaks apart, so it is forbidden to drill it with a blow. However, it is very easy to drill it even without this function - rather high revolutions and a special drill.
Table 2. Instructions for drilling ceramic tiles.
| Steps, photo: | Description: |
|---|---|
| Step 1. Tile marking.
Marking up | The first step is accurate markup. It can be done with a marker, but in the heat of work, the cap from it is constantly lost, which is why it soon dries up and stops writing. Also, its tip is frayed, which will prevent accurate marks. In some situations, a pencil helps out, but it writes poorly on glossy tiles, and it is almost invisible. Masking tape comes to the rescue in such a situation. We stick it on the intended drilling site and make a drawing of any complexity. In addition, this method allows you to add a small comment to the markup if necessary. |
| Step 2 drilling.
| We clamp the pen drill in the chuck. It is very convenient to use a second tool for this, in addition to the puncher. A screwdriver will suffice. Interesting to know! Masking tape not only allows you to make accurate markings, but also with high precision drill the first millimeters of the tile surface - the drill will not slip on the glossy surface. We start drilling at low speeds, and as soon as we realize that the drill has begun to enter, we squeeze the maximum out of the tool. If you feel that the drill has fallen under the tile and touched the concrete, stop working and remove the tool. |
| Step 3 We drill concrete.
| It is impossible to continue working with a pen drill, as it will become dull very quickly. To go deeper into concrete or brick, we will again need a hammer drill. Since the tile has already been drilled, we cannot damage it with a blow of the tool, the only thing is that small chips may form along the edges of the hole. We delve into the wall to the desired level and the hole is ready. |


The larger the hole, the harder it is to drill.
When you need to make holes in the tile, and even in the concrete itself, holes for sockets, diamond-coated crowns are used. They do their job well, but there is one thing important rule, which must always be observed, namely - cool down the cutting edge. If the tool is allowed to overheat, it can burn out and lose all its properties, therefore, at some intervals, work should be suspended and immersed in a container of cold water.

Cooling the drill while drilling tiles
Also, the water supply can be arranged directly to the drilling site - for this you need a special water pump or an assistant who will add it as needed.
Often the right tool not at hand. In such situations, alternative devices or original folk methods can help out.
- If you don't have center punch, which, well, is simply desperately needed when drilling porcelain stoneware, for example, it can be replaced with such guide pads as in the photo. You can buy them in a store, or make your own from a piece of plywood or similar material. It is enough to simply hold such an overlay with your hand so that the crown cannot move anywhere. As soon as we let's go through the first millimeters, it can be removed to the side.

Guide pad for crown

Homemade analogue from plywood
- There are situations when you need to drill a tile at an angle of 45 degrees. How is it even possible to do this without damaging the surface? For this, special guides are sold. The principle of its operation is as follows - first a perpendicular hole is made in the usual way, then the emphasis is immersed in it, after which the drill is transferred to the inclined guide. Naturally, different guides are used for drills of different diameters.

A set for drilling porcelain stoneware with crowns will be needed for smaller holes
- What to do if you need to drill a hole for an outlet, but apart from a drill, there was nothing at hand. Don't worry, they can do the job. To do this, on the wall you need make an accurate marking of the contours of the hole. After that, you need the entire circle drill with minimum pitch as shown in the photo below. Further inner part knocked out with a spatula with a perforator or a chisel and a hammer.

Drilling a large diameter hole without a crown
- If during drilling you come across metal, then you won’t be able to take it with a concrete drill. Here you need to act differently - either move the hole a little to the side, or overcome the obstacle with the right drill, cut it down with an engraver, a grinder, and so on.

annoying nuisance
- Look at the photo below and appreciate the way the master came up with. He simply assembled a corner from the Lego constructor, put it in the right place, pressed it down and did exactly all the work. We develop the idea - so that such a device does not slip on glossy ceramics, you can stuff plasticine or mastic inside, for example.

Human resourcefulness knows no bounds
- From DIY back to professional equipment. It is very convenient to use suction cups. They are securely fixed on ceramics, but only with a flat surface, so it will not work to call such a device universal. The photo shows a model with adjustable indentation.

Professional drilling set
Find out with your own hands in a special article on our portal.
Video - Door travel limiter or how to drill a wall without dust
Today we talked about drilling solid walls, but they can also be made of wood, or drywall and other materials. Unfortunately, there is no time for these topics now, but the principle of work will be similar. At the same time, drilling such bases is much easier, it is enough to use a tool for cutting wood.
When preparing for repairs in the house, you need to be prepared for the fact that you will have to drill the walls. For example, to fix a profile for drywall sheets. At this stage, some difficulties usually arise, since in many houses the walls are made of concrete. In addition to high strength, the material can be combined with reinforcement, which makes the work doubly difficult. To drill a concrete wall with a conventional drill, you need to familiarize yourself with all the nuances of the workflow in advance.
drilling bearing walls and partitions made of concrete - not an easy task. To get the job done quickly and efficiently need to know some secrets and tricks. It also does not hurt to listen to the opinion of experienced craftsmen who advise:
How to choose a tool
Most often, a hammer drill is used to drill concrete. It has several advantages over a conventional drill.
These include:

In spite of listed virtues, such a tool is not always suitable for the job. In some situations, its use is simply impractical.
The perforator will not work in the following cases:
- when shallow holes (10–12 mm) are needed in the wall;
- when working with a foam block (otherwise the material will crumble);
- if the required number of holes does not exceed 15 pieces.
Based on this, we can conclude that a conventional drill is more suitable for home use. To purchase such a tool for drilling walls, you need to consider a number of important points.
The drill must meet the following requirements:
- It must be impact, since this type is most effective when drilling concrete walls. In a hammerless drill, the bits and chuck will fail too quickly.
- It is better to buy nozzles for it with victorious ones, with a purpose for concrete work. And the tip is coated with durable alloys.

You can also choose a hammer drill. True, such a tool is more expensive than a conventional model. But on the other hand, it has increased power, which can be adjusted at your discretion.
What nozzles are better
In order to be able to drill a concrete wall with a drill, you must first select the appropriate nozzles. They must exactly match the design.
The following types are suitable for work:

Before using any nozzles, it is necessary to check the wall for the presence of cables and wires, as well as fittings (if there is a device for detecting metal). This will help protect the wall from major damage, and the tool from breakage.
First you need to prepare a drill, nozzles and other related items. Then in the process of work you will not have to be distracted and waste time looking for the right things.
Drilling is often necessary in cases where:
- rough finish;
- wiring;
- plumbing installation;
- concreting communications.
 At the same time, the concrete wall (if it is drilled correctly) should remain without severe damage and large chips.
When working with a drill with a pobedite nozzle, sometimes you need to use a metal punch. It is selected according to the size of the hole. This tool makes it possible for the drill not to jam when the drill is deepened. To do this, the punch is driven into concrete and hammered to break apart a solid obstacle. This process can take quite a long time, so it is better to use a diamond crown. In addition, a drill with such a nozzle will never get stuck in concrete.
Drilling sequence:
- Inspect the tools carefully. The drill must be in good condition, and the drill must be intact.
- Start carefully drilling a hole in the concrete with a drill, stopping the continuous operation of the tool after 10 minutes from the start of the action.
- You can continue the process only after the motor has cooled down.
- Before drilling the next hole, it is necessary to moisten the nozzle with water. This will protect the metal from warping.
In such simple ways, you can drill a concrete wall without a puncher.
 Sometimes there are cases when the drill gets stuck in the wall. It is not desirable to use force in this case, otherwise it will break off, and the edge of the nozzle will remain in the concrete. To free the drill, you must first disconnect it from the drill, then put on a smaller diameter crown and remove the stuck part.
To perform drilling yourself and at the same time avoid various injuries and unpleasant incidents, you need to follow safety precautions and follow the recommendations of specialists.
You can easily drill a wall or prepare a through hole by choosing the right drill for the equipment used, whether it be a drill or a puncher. For any purpose, the hole should be with smooth edges and the right size. Accuracy is fairly easy to achieve. let `s talk about right choice drills and features of drilling walls.
You need to select the type of shank (hex, cylinder or SDS mount) suitable for the selected tool, and the working part, based on the material of the wall.
In the store, the color of drills and drills will definitely catch your eye:
- Faded gray color - drills for metal or wood with additional hardening. Benchmark strength and durability.
- Black metallic color - the drill was treated with superheated steam at the last stage of production to form an oxide protective film. Increased durability, but strength depends on the choice of steel grade.
- The bright gold uniform color of the entire drill is the result of applying the stress relief technique within the drill material.
- A yellowish tint (golden) in the main only of the working part of the drill is a protective coating based on titanium compounds, which increases the strength of the cutting edge and the entire working part.

Concrete, brick, stone
You will need a drill with a carbide insert. The plate is welded at the end of the working area of the drill, made of an alloy of cobalt, tungsten carbide and a number of other elements, which together give it strength and resistance to abrasion. The name of the alloy is “win”, firmly entrenched in everyday life and the technical environment.

When choosing a pobedite drill in a store, you should pay attention to how smoothly the nozzle is welded. Often there are drills from nameless manufacturers with poor centering, which is easy to determine even by eye.
The process of drilling holes in concrete or stone is based on a crushing process, so that a hammer drill is used as the main tool. An impact drill is suitable for bricks. Depending on the selected tool, the type of drill shank is determined.
For perforator:
- SDS, SDS-plus - fastening with a diameter of 10 mm and a part inserted into the chuck of 40 mm for a quick change of drill used in rotary hammers. Drill diameter 4-26 mm, length from 110 to 1000 mm.
- SDS-max is a mount for large drills used with powerful rock drills. Shank diameter 18 mm, used for concrete drills with a diameter of more than 20 mm.

For an impact drill, the shank is cylindrical. Drill diameter - 4-11 mm, length - up to 110 mm.
For drilling holes with a diameter of 4-10 mm and a depth of up to 100 mm for a dowel or anchor, drills with an SDS-plus mount or drills with a cylindrical shank are suitable.
For holes with a diameter of up to 42 mm and a depth of up to a meter or through holes for laying communications, pipes or connecting an air conditioner, drills with an SDS-plus, SDS-max shank are used.

When drilling deep holes with a diameter of more than 10 mm, it is desirable to perform the work in two or three passes, selecting drills from a smaller diameter to a larger one, the same applies to the length of the drill. Initially, short 110 mm drills are used, and then half a meter or meter are already used to reduce the risk of damage to the larger drill and ensure a smooth edge at the hole.
To drill holes in the wall with a diameter of more than 42 mm, crowns are used, for example, to install a socket box. This is a cutting tool with an annular cutting edge, often mounted on a cylindrical base with an SDS-plus, SDS-max shank. The cutting edge is formed by a row of teeth made of a win or diamond-coated alloy.

Tiles, glass
For drilling small holes of 4-25 mm, special cone-shaped diamond-coated drills are used. The main task is to go through the surface of the tile and its base. After that, you need to switch to a drill suitable for the material of the wall, and continue drilling with it (it will win, a drill for metal or wood).

It is especially difficult to start drilling in a strictly defined position. It is necessary to stick adhesive tape over the mark or mark the point along the mark, carefully knocking off part of the glaze or polished surface so that the drill does not “walk” on the surface.
Holes of large diameter, under the socket, are drilled with a ballerina drill. It has a coated support cone on the main axis. An adjustable shoulder with a fixed cutting tip is retracted from it to the side. It is better to start at low speeds until the surface of the tile is passed. When the surface has been passed by 2-3 mm, it is necessary to move on to the crown for the corresponding wall material.

Metal
Drills for metal have the most familiar appearance. This is a spiral working part and a cylindrical shank. Sharpening is cone-shaped without a sharp tip with an angle of inclination of the cutting edges from 90 to 140 degrees. The spiral is formed by two protruding parts and twisted at an angle of 27 degrees. On the outer edge there is a cutting edge along its entire length, due to which holes in soft metals and wood can be expanded with lateral movements of the drill, like a milling cutter.

Depending on the specific metal, the angle of inclination of sharpening at the tip of the working part is selected:
- for most steel grades used in construction - 140 degrees;
- duralumin, bronze and brass - 110-120 degrees;
- copper, aluminum wood and plastic - 90-100 degrees.
Universal drill sets contain metal drills, mainly with an average sharpening angle of 110-120 degrees, which is enough for most tasks.

When drilling walls, metal drills are needed if there is reinforcement or profile frame elements inside the base material. It is impossible to pass these obstacles with a drill with a victorious tip, both the tool and the already passed section of the hole will deteriorate. It is necessary to switch to a conventional drill with a drill for metal, pass an obstacle, and then continue to work with a drill or drill on the selected material.
Wood, drywall
A distinctive feature of a drill for wood with a diameter of 2 to 16-24 mm from a similar one for metal is the presence of a sharp tip in the center of the main sharpening at the end of the working part. This is necessary for the normal centering of the drill in relation to the hole and for an easy start. The tip easily enters the wood fibers in a strictly marked place and no longer allows the drill to come off.
For drilling wood, drywall, metal drills are suitable, but often the holes are uneven, especially if you do not choose the right drill speed depending on the type of wood. In soft rocks, the fibers will diverge along the edges of the hole, and in hard rocks, a split is possible if the drill moves.
For large diameter and / or deep holes, use:
- Feather (feather) drill.
- Ballerina.
- Screw drill.
- Saw crowns for wood.

The spade drill is a flat plate with two sharpened edges and a point for determining the direction. Fixed spade drills help to drill holes with a diameter of 8-45 (60) mm. However, without rigid fixation of the tool and the base, the shape of the hole is unlikely to be even, and due to the absence of lateral cutting edges, the walls of the hole are more often obtained with broken fibers.
Ballerinas on wood help to drill holes of large diameter, but only in the base with a thickness not exceeding a certain threshold, for example, up to 50-70 mm.

Screw drills are optimized for removing wood chips, they are a direct analogue of large concrete drills. Used for drilling holes up to 45 mm in diameter and up to a meter deep.
Saw crowns ream the material around the circumference. A frequent file is formed along the edge of the crown. After that, you need to use a chisel to select the material inside if you need to make a non-through hole.

foam concrete
For foam concrete of durable grades over M800, the same methods and tools are used as for concrete or brick. For lightweight foam concrete used for wall insulation below M600, it is enough to use methods and tools as for wood, only preference is given cutting tool coated with titanium base.