If the old floor creaks. Ways to eliminate the creak of a wooden floor. How to make the floor in the apartment so that it does not creak
Every resident of an old house has faced the problem of a creaky wooden floor. The reason for this are many factors that are easy to eliminate by independent forces. It is enough to have information about why the wooden floor creaks, what are the causes of this problem and how to eliminate unpleasant creaks.
Reasons for the appearance of a creak
Plank wooden floors lie on logs, which become loose with time and when walking, so they begin to creak. The problem becomes especially noticeable at night, when it is necessary to quietly walk around the room, and as a result, all household members wake up.
In order to start repairs and perform the work correctly, it is necessary to analyze why the wooden floor in the apartment creaks. Most often, the answer lies in the design itself, since several options were used to lay the wooden floor in old houses.
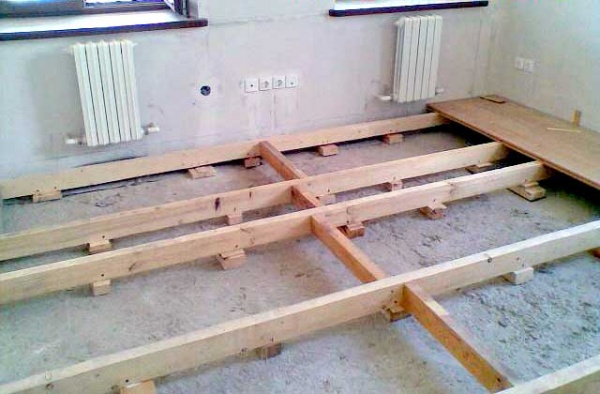
The first option provides for wooden bars or logs that were laid on concrete surface, and the distance between wooden products was 40 cm. Plywood or chipboard was used for flooring, and additionally, fiberboard sheets.
The second option involved mounting wooden boards on top of the logs, which were attached to the concrete floor.
What unites these two options is that wooden crafts lay in a horizontal position and were bars, no more than 4 cm thick. Their main function is to serve not only as the basis for sheathing, they also create an indent from the concrete slab wall so that the floor can “breathe”. The top layer of the floor with internal wooden beams was connected with the simplest nails, which loosen over time during operation, and the fastening ceases to be tight, the floor begins to creak.
Why does a new floor or parquet creak
Both the old floor and the new flooring can make squeaky unpleasant sounds. The main problem with a newly installed wooden floor is that a flat surface is not maintained and the internal structures begin to move. This is very easy to check, and for this it is enough to put a perfectly flat surface on the floor. wooden detail. If gaps appear, then the reason is precisely in them, and you need to work with them, from there a creak is heard. In this case, to get rid of the sound, the floor board and lag are drilled, the hole is clogged with glue wooden beam and the place is polished. For the entire area of \u200b\u200bthe wooden floor, this method is not suitable, but for one or two times it will be an excellent solution.

The main reasons for the appearance of a creak in expensive parquet are incorrectly performed work, poor quality wooden material, which could also be raw. But this is not a problem, it can be fixed.
Mistakes that can increase creaking

Many masters believe that it is easy to eliminate the creak of a wooden floor, just nail it. This method will ensure silence for no more than a month or two. Then the sound will appear again, but few people worry about it.
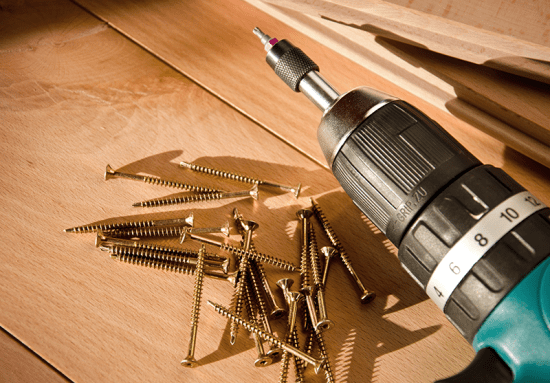
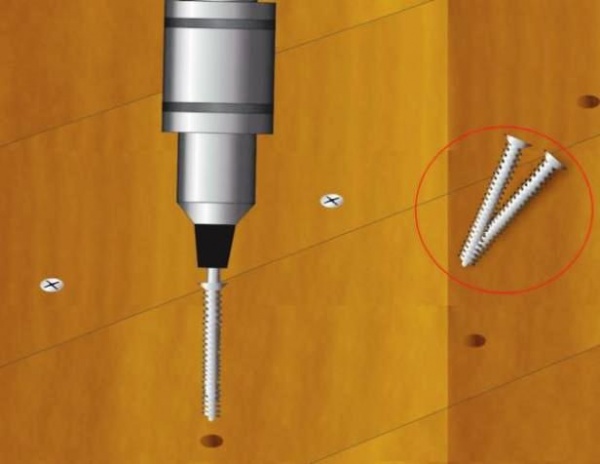
This is explained by the fact that in places of the floor where there is a strong tension wooden lag the nails swing in and out. Therefore, if there is little time for repairs, the best option is to use long screws.
Another big mistake is made when chipboard sheets are laid on an old wooden floor.
Important ! This solution will also help only for a while, but when the squeak returns, it will become even stronger, and it will be much more difficult to correct such an omission.
Possible options for dealing with creaky floors
Let's start with the most radical and in an efficient way getting rid of annoying squeaking is a complete replacement floor covering. New wooden floors will perform their functions for a long period of time without requiring additional repairs, but they will cost a pretty penny. Replacing a wooden floor is a fundamental change in the apartment, spending extra money on the purchase of materials, their delivery, as well as paying for the labor of the craftsmen. Even an inexpensive coverage option requires large additional costs of an indefinite amount.
Another well-known method for solving a creak is replacing a wooden floor with a screed, on top of which you can put ceramic tiles, linoleum, laminate, parquet or wood products. A worthy solution, but when there are small children in the house, linoleum or tiles will give off cold if you do not put an additional layer or install heating. Expanded clay, GVL or extruded foam plastic can become an additional layer, the material is expensive and the installation will take a lot of effort and time.
accessible and inexpensive option the fight against creaking is the replacement of sheathing with plywood, which is fixed with self-tapping screws. But if the lags look terrible, then they will have to be replaced. The coating will still have to be completely removed, the wooden floors must be renewed, but even after that, over time, the coating will creak again.
There are several effective methods that will help solve the problem and eliminate the creak of the wooden floor. This is not such an easy task, but any beginner at home can handle it. The main task is to choose the right technology that is most suitable for a particular floor covering, taking into account the material that was used and what quality it is.
- First of all, you need to think not only about the problem, but also about the appearance of wooden boards. The squeak can be removed using graphite powder, which includes talc, by pouring it into the cracks. In addition, wedges made of wood can be hammered into slotted formations. If after the work done there is no result, then the wooden products are screwed with screws.

- A common method is to use self-tapping screws. In areas of the wooden floor where a creak is heard, holes are drilled, 2 mm in size and self-tapping screws are screwed in to the very end. Top part the screw is removed, and the place of its installation is puttied. This solution will help eliminate a slight creak of a wooden floor. In the case of a strong sound, plastic dowels with screws are used, which are deepened into concrete screed by 40 mm. Tongue boards also tend to crack and dry out over time, so for their attachment to wooden floor use screws that provide a countersunk head. The thing is that in most cases it is precisely those wooden products that creak that are loosely attached to the logs or ceiling beams. If this is indeed the problem, then this method will no doubt help.
- The third method is more time consuming and requires more effort. If on overhaul there is not enough money, then pins come to the rescue. In the place where the wooden floor creaks in the apartment, holes are drilled at the junction of the boards, 10-12 mm in diameter, leaving a distance of up to 30 cm. Using high quality PVA glue, prepared pins are pressed. After that, it is necessary to clean the wooden floor, and it will no longer creak.
- To prevent the parquet from creaking, wooden products are fixed to the logs with rounded screws, at a distance of 5 cm. An electric drill, in which the rotation speed is regulated, will help to facilitate the labor process. But if in some places the wooden floor will still creak, then in wooden planks it is necessary to make a hole with a diameter of 6 mm and pump mounting foam into it, but do not overdo it.
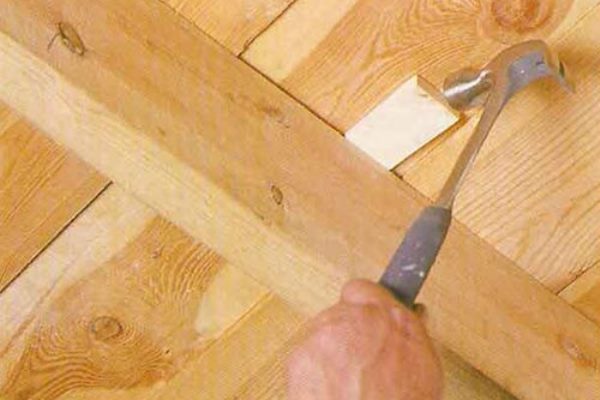
- The simplest, most cost-effective and antiquated method of eliminating wood floor creaking is to insert a wedge between the creaking floorboards. To do this, a wedge is pulled out of a suitable board, coated with glue and driven into the slot, and then the wedge is cut flush with the floor.

- There is another durable and reliable method that will 100% get rid of annoying and unpleasant squeaks. These are metal anchors. The method is very reliable, but requires investment and a lot of effort. The principle of operation is through the installation of an anchor that will pass through the wooden floor and cross beams, rushing into the concrete. A special outer shell is prepared for it, which is made of metal, thus strengthening the lag. The upper part of the anchor will not be visible from the outside, since the size of the hole is drilled from above with a larger nozzle in diameter. Experts recommend installing anchors around the entire perimeter of the room. According to the rules, the distance between products should be within 1m, but the smaller the better. The calculation will determine how many anchors will be needed.

- If the creak is bothering you on a flat surface, then you can use plywood to eliminate it. Everything is simple here. The material should not be thinner than 12 mm, it is cut into small squares and fixed on top of a dry wooden floor with screws or a special adhesive. You should leave a distance between the squares, 10 mm in size and lay them at an angle with respect to the direction of the boards.

- Replace old screws and nails. This is a fairly reliable method, but also laborious due to the fact that the old wooden floor can be modernized without completely dismantling it. It is necessary to carefully check the entire floor, each section, change all old fasteners for new parts. Of course, it is better to exclude nails altogether, because over time they will rust, and the boards will dry out, thus causing the floor to shrink, and hence its creak. Most the best way, as mentioned above, these are screws or self-tapping screws. In some cases, this method allows you to completely and permanently get rid of an unpleasant sound. Before doing the screed, you need to check all the beams and boards. If there are rotten, deformed or dry ones, they should be replaced with new ones. After the work done, in places where a creak was heard, you can insure mounting foam.
A careful and competent approach to the performance of work will make even the oldest wooden floor quiet, as if it were made of cork material.
What to do if the floor creaks in the apartment, then you have found this article. This can and should be dealt with, but here's how you'll find out in this article.
The harmony of silence when walking on the floor can be disturbed by many factors, such as: improper laying of the flooring, poor-quality materials, drying of wood, splitting of planks, uneven screed, which leads to curvature at the joints. With this problem, you need to do something immediately, because the first signs of wear on the flooring begin with a creak. As one proverb says, “A good creak will soon come out.”
First option the cheapest and easiest. You just need to replace the entire floor with a new one, maybe even best quality than the previous one. It's like an analogy with old and new cars. An old car has to be constantly repaired, and a new one drives several tens of thousands of kilometers without serious breakdowns. When replacing with a new floor, the squeak will definitely disappear, and if you replace the old floor with new cork material, then it will be much more pleasant to walk on it.
Option two simple, you need to cover the old creaky floor with a large and soft carpet. There are a lot of these carpets on the market and you can choose a beautiful carpet that matches the decor of the room. The carpet has the effect of soundproofing, while weakening the load on the floor. But such option is suitable not for everyone. the skip may remain or become a little quieter.

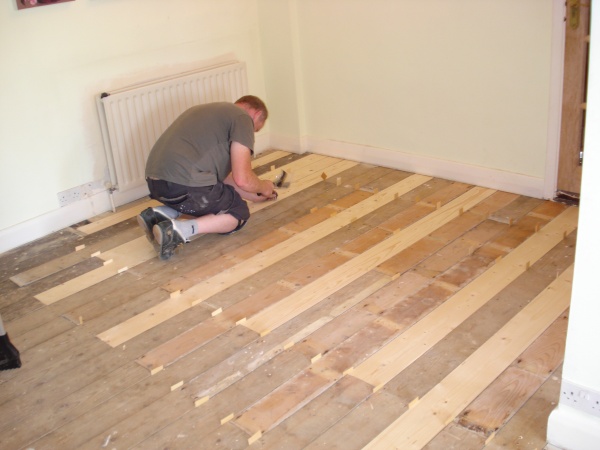
Third option relay. It consists in laying boards, but only specialists can do such work. Perhaps you once had a flood in your apartment, and the boards accumulated excess moisture, so they swelled and began to rub against each other. The drying option will not work, the boards have already parted, and the fasteners have weakened. The boards need to be removed, dried, and then re-laid with the correct fit. The process is certainly long, but effective.

Fourth option is a process of backfilling a mixture of graphite powder and talc into the gap between the boards. Thus, it is possible to reduce the volume of the squeak to a minimum, but this option will not give a complete ideal. A creak will still appear over time, this is only a temporary result.

Fifth option- this is foaming with mounting foam in order to forget such a problem as the floor creaks. Foam after drying creaks all rubbing boards. But if your floor creaks, then this is also a temporary repair option. Over time, when walking on the floor, an oscillation amplitude arises and the mounting foam will still disappear.

Sixth way. Everyone knows such a magical construction tool as screws or self-tapping screws. It can work wonders with it. So with the floor, if it creaks, you can make a strong floor with a screw and a screwdriver. In places where the floor creaks a lot, you can screw in the screws, you just need to know where the joints are.

Seventh option will not save you from the squeak that has appeared, it is intended more for preventing it. In the process of laying the floor, the fabric is laid along the entire length of the room. In the future, the fabric will dampen all vibrations and noises.

The annoying creaking of wooden floors is not at all peaceful and very rarely evokes childhood memories of summer vacations with my grandmother. Therefore, to save your own nerves, learn what to do if the wooden floors creak.
Certainly, perfect option The solution to this problem is to take advantage of the opportunity and start a long-planned repair with a complete replacement of the floors.
If such a way out does not suit you, then you will have to do the restoration of the floor. This is a troublesome business, and besides, you may not be able to completely get rid of the creak. However, it is still worth a try, since no specialist will give you a guarantee for the result or lack of it.
Causes of the squeak
Wood floor creaking occurs in two situations, which depend on the material your floor is made of:
- if the floorboards (or any other floor covering such as chipboard) do not adhere very tightly to the joists (or wooden beams);
- if the parquet does not adhere tightly to the surface of the base on which it is laid.
In both cases, there is only one way to get rid of the creak - to remove the space that has appeared between the floor covering and its base. However, in these cases, you will have to act differently.
Floor on joists

The only way to resolve the issue of what to do if the wooden floors creak when they are laid on the logs (wooden beams) is to screw the flooring to them more carefully.
For this you will need:
- long wood screws
- screwdriver or drill with a screwdriver bit.

The process of eliminating the squeak will look like this:
- Find the most creaking places on the floor (so that you don’t “lose” them later, mark them with chalk).
- Then determine where the logs (beams) in the floor go. If the floor has been repeatedly painted, the paint will have to be scraped off to find the nails that hold it to its base. In the event that the flooring is made of boards, to find the lag under them, you can remove the extreme boards (the lags always run perpendicular to the wall at a constantly maintained distance from each other). At the same time, you can look under the floor structure and see what condition the logs are in. If from under the boards you “smelled” of mustiness, dampness and mold, then instead of cosmetic restoration of the floors, you should still complete its replacement.
- Now it is necessary to screw the screws into the logs (beams) so as to press the boards (or chipboard) to them as tightly as possible. The step of the screws in this case may vary depending on the intensity of the creak, but still should not be more than 15 centimeters. Be careful not to hit the nails with the self-tapping screw, as this will break the screw and cause injury.
Parquet

No less inconvenience can deliver creaking parquet. And since in this case the creak occurs due to the deformation of its individual elements (and not the entire floor covering), then, first of all, it will be necessary to find them, since the defect will have to be eliminated pointwise.
To get rid of the squeak you will need:
- drill with a drill with a diameter of 6-8 mm,
- ordinary cement (about 20 g for each creaking bar) - if it is not available, then a mixture for plastering is suitable,
- a very large syringe without a needle.
Having prepared everything necessary for repair, you can proceed to the main action:
- Carefully drill a hole in the middle of the creaking parquet plank.
- cook cement mortar, the consistency of which should resemble ordinary milk.
- Pour the cement mixture into the syringe. Make sure you can squeeze it out so it doesn't get stuck in the syringe. If the mixture is too thick, dilute it with water. In a mixture that is too liquid, you will have to add a little cement.
- Insert the syringe into the hole and pour the solution into it in small portions. Remember that after each "dose" of the solution, another portion of air should come out from under the parquet. Take your time - neither cement nor plaster mix hardens instantly.
- The hole must be filled with the mixture until it stops accepting the solution.
- Wait for the mortar to harden and make sure that the parquet no longer creaks.
- Fill the hole in the parquet plank with a special putty (or mastic) for wood.
Do not immediately try to get rid of the creaking of all deformed parquet planks. First, it’s better to do a “trial” repair, and only after making sure that this solution to the problem helped you, continue to get rid of other creaking places. If the creaking has not disappeared, you will most likely have to re-pave the entire parquet, updating the surface of the subfloor along the way and replacing the damaged planks.
Video
Here you can see an example of the work done to eliminate the creak of a wooden floor:
Such an annoying floor defect as a creak is in any case unpleasant. Anything can be the cause of it: initially incorrect installation, poor-quality material, splitting of planks, loosening of nails, leakage, parquet drying out, uneven screed under the boards, which leads to skew at the joints. Something definitely needs to be done about this. Because not only is the creak unbearable to hear, it can also mean that the coating wears out quickly.
Anything with a wooden component will creak due to various problems. In the descending price category - this is parquet, floorboard, parquet board, veneer board, laminate. How to ensure that the floor does not disappoint, will be discussed further.
Option 1. Cardinal
Complete replacement of a wooden floor to the base is an expensive and long option, but in general the most advantageous. The creak will go to long time, and walking on the floor will bring only pleasure - physical and aesthetic. Especially if it is a soft cork floor or self-leveling floor.


Option 2. Good old
If there is no desire to waste time and energy, you can do the most in a simple way- to buy a carpet. There are a great many of them on the market - large and small, thick and thin, expensive and cheap. With the effect of soundproofing, this flooring option will slightly weaken the nasty sound. Naturally, the creak will remain, but because of the carpet it will not be heard so much.


Option 3. Switching
You can simply move the boards by doing it yourself, or, much better, find craftsmen willing to take on the task. This is especially true if the floors are swollen during a leak, the boards are swollen and rub against each other. It is useless to dry them and wait until they return to normal. The floor should be dismantled, the boards should be dried and re-adjusted, after sharpening in some places. Or replace the ones that don't fit at all. The process is long but effective.

 Option 4. Backfill
You can eliminate the creak without losing appearance boards and without serious repair work. If the boards rub against each other, then there are cracks and gaps. By pouring graphite powder with talc into them, it is possible to achieve a reduction in the level of creaking to a minimum. Another idea is to drive in wedges to close the gaps as well.

Option 5. Jellied
The space between the boards and joists can be filled with mounting foam so that the creak disappears as soon as it hardens and fixes all loose elements. But this option is very short - with a strong amplitude of oscillations, the foam is still deformed and destroyed.

