A simple folding table with your own hands. Dining folding table with your own hands - only for a large family. Extendable dining table
The need for a table that you can bring to a picnic, and then quickly assemble and disassemble with your own hands, can be great. Making a picnic table with your own hands is not too difficult, and does not take much time. This skill will come in handy in later life, since the ability to work with wood and knowledge of the basic tools are important for comfortable life. It is best to choose wood for the manufacture of the table, since this material is light, durable and environmentally friendly if all stages of its processing have been completed. Working with wood is easier than with plastic, and it is good to master the initial skills of woodworking on such simple household items.
Scheme with the dimensions of a folding table with removable legs.
Picnic table - varieties
The appearance of picnic tables differs in the shape of the tabletops - it is most often rectangular, but there are also models with a round or square, and sometimes a figured surface. Legs can be made of steel, aluminum or wood.

Most commonly folding picnic tables rectangular shape, but there are also round ones.
If the legs are parallel, it will be comfortable to sit at such a table, but the structure will become less durable. If the legs are arranged crosswise, they are very stable, but sitting at such a table is not very comfortable. For uneven surfaces, it is desirable to provide removable legs that could be adjusted in height. When choosing tables of this kind, you need to focus not on appearance and size, but on design features.
For picnics and other outings good option is a top made of lacquered plywood, as this material is moisture resistant and will last for many years. This type of material belongs to those that are easy to clean and do not absorb odors. It is convenient to provide a hole for an awning in the center of the tabletop to make outdoor recreation even more comfortable, but the ratio of the table and the awning must be well thought out so that the whole structure does not tip over from the wind.
DIY collapsible table
Tables made of wood or laminated chipboard with parallel legs look very neat. The materials and tools needed to make a picnic table with your own hands are classified as common, and you can find them in almost every hardware store. For a folding table you will need:

Drawing with dimensions of a folding rectangular table.
- shield glued from natural wood;
- beam;
- reinforced washers;
- furniture corners;
- furniture hinges;
- wing nuts;
- rivets;
- screws;
- hacksaw;
- electric drill;
- screwdriver or screwdriver;
- pencil or marker.
The picnic table, depending on the functionality, can have different sizes, but one detail is common for all folding tables.
The legs, namely the folding part, must be shorter than its height, otherwise the table will not be able to fold.
It is impossible to stand with your feet on such tables, since the folding design of the legs can withstand less weight than the permanent one. Having made a table with your own hands, you can then decorate its countertop with paints or using decoupage.
Table manufacturing procedure

Scheme of a folding square table.
The acquired timber must be cut to the size of the table, legs and crossbars between them will be made from it. You will need 4 identical pieces for the legs and 4 identical crossbars that will fasten the legs together at the bottom and at the top. You will also need a transverse beam, which will prevent the table from folding and warping its legs.
Pairs of legs are laid out parallel to each other on a table or on a workbench according to the width of the table and the crossbar. Two crossbars are placed in the upper part of the legs and the structure is twisted with screws in the corners. The diagonals of the resulting rectangle should be equal - this will ensure stability for the picnic table. After checking, the structure is twisted tightly by adding metal corners. The second rack is created in a similar way.
Furniture hinges made racks are attached to the table top. Indents from the edges are made 3-5 cm. Then a keeper tape is attached to the picnic table. It is needed to fix the legs-racks in relation to the table top. The tape on the tabletop is fixed with screws, then, having set the racks in a vertical position, cut the tape on optimal length. On the rack, the ends are fixed with rivets and in such a way that it can be detached at any time.
Folding picnic table
This design turns out to be quite light, and therefore is used in hiking, in the garden and fishing. To get started, cut out the bars, with a prudent margin of diameter. It is very convenient to cut such materials on a circular saw. For the countertop, you can choose any material, but lacquered plywood or wood covered with several layers of varnish is preferable. The saw cuts should be closed with an edge tape, and the timber prepared for the legs should be rounded off with a jigsaw or grinder.
First of all, proceed to the assembly of the legs and supports. The legs are fastened crosswise with each other using a large bolt 3-3.5 cm long. With a marker or pencil, markings for fastening are applied to the countertop from the inside. Installation of all parts takes place with the help of self-tapping wood screws. The parts are numbered, and pre-assembly takes place, after which the structure is disassembled again and all parts are varnished. After a day, for which the varnish should dry, you can practice final assembly.
Who among us does not like to go fishing with family or friends for a picnic, barbecue or just relax in nature.
However, in addition to fishing rods, food, barbecue and tents, you need at least some kind of camping furniture - cooking and sitting on bare ground is inconvenient.
And the main item needed for a picnic outside the city is a folding table.
Now it can be purchased at any travel or fishing store, but why spend money when you can make a folding table yourself. Let's find out how to do it and what is needed for this.
Design features
If you do not go into details, then you can distinguish two types of camping tables - a table with folding legs and a table-suitcase.
In the first version, when transporting or carrying, the legs are removed under the countertop. Upon arrival, simply move the legs of the table apart to put it on.
In the second version, the tabletop is like a suitcase or a chessboard - in the stowed position, the legs lie inside it, but in place they must be taken out of the “suitcase”, connected to it and put the table in the right place.
Both types have their advantages. A folding table is easier to make and only takes a few seconds to set up. At the same time, the suitcase table is more convenient to carry, takes up less space, and, in addition, you can put dishes, skewers and other necessary things in it during transportation.
Wood, plastic or metal?
What is the best material for making your own folding camping table?
If ease of creation is most important to you and you do not have a large set of tools or skills in working with plastic and metals, choose wood.
Timber, boards, chipboard, plywood - all this can be used to create a fairly simple folding table.
But a table made of wood, if you do not protect its surface with varnishes and special coatings, under the influence of dampness, sunlight and temperature changes, it will warp and lose its attractive appearance.
Both plastic and even metal can be used as a material for legs and countertops. But here you may need those tools that can not be found in every home. In addition, working with such materials is more difficult than with the same tree. But tables made of plastic are not subject to corrosion, and those made of metal are very strong and durable.
 In order to make a collapsible or folding table, you need a set of fairly simple tools that can be found in any home or garage:
- Electric jigsaw (can be replaced with a circular saw or a hacksaw for wood);
- Electric drill for preparing holes for screws;
- Hammer and Phillips screwdriver;
- Roulette, square, ruler, pencil and level.
Attention! remember, that cutting tools, such as the a circular saw or a jigsaw - sources of increased danger! Follow all necessary safety precautions when working.
Folding picnic table
 To make a simple and strong enough, you need the very minimum of materials and fasteners:
- wooden boards, 20–40 mm thick. For countertops, instead of boards, you can use a sheet of chipboard or plywood, about 10 millimeters thick;
- self-tapping screws, furniture bolts, and for each pair of legs the bolts must be of different lengths, wing nuts for bolts;
- door handles for carrying the table and hooks.
To start, cut out from the boards or sheet chipboard countertop the right sizes. If the countertop is made up of several boards, assemble them together, lay them down and measure the length and width.


Stages of work
Step 1. Making the frame
Lay the boards for the frame on the countertop, on each side the frame should recede from the edge of the countertop by 2-3 centimeters. Using an electric jigsaw, cut the boards to the desired size, then lay them again on the countertop, check the length and width of the frame according to the drawing. Outline the contours of the frame - use them to make holes in the countertop for the screws.

Important! In order to accurately maintain the dimensions of the paired parts, connect the boards together with clamps and cut them with an electric jigsaw or hacksaw together.
Step 2. Intermediate bars
Cut out the stop bars on which the unfolded table legs will rest, make four holes for the screws in them. To prevent the table legs from colliding with each other when folding, make wooden substrates for the second pair of legs, which will be located between the frame and the stop bars.

Step 3: Assembling the Frame and Tabletop
Assemble the frame elements together, fasten the stop bars and wooden substrates, make four holes for the bolts with an electric drill. Fasten the tabletop and frame with screws. 
Step 4. Table legs
Draw and cut out the legs of the table with an electric jigsaw. In the upper part, where they are fixed with the frame, the legs should be rounded, while in the lower part there should be a cut at a slight angle (15–20 degrees). Make holes for the bolts.

Step 5 Assemble the table
Connect the first pair of legs with a crossbar and secure to the frame with a bolt and wing nut. Repeat the same with the second pair. Check that the legs do not catch on each other when unfolding and folding the table. If they get stuck, treat the legs at the point of friction with sandpaper.
Folding table is ready. Additionally, you can attach a handle to it for easy carrying and hooks to hang towels or barbecue and barbecue equipment.
Table-suitcase
 To make a camping table-suitcase, you will need more materials and fasteners:
- sheet of plywood or chipboard for the lid. In case of their absence, boards can be used;
- wooden beam for legs and countertop box;
- hinges, door or suitcase handle, two latches;
- furniture bolts and wing nuts;
- self-tapping screws.
Stages of work
Step 1. Take sheets of chipboard, cut out halves of the countertop. Then saw off the frame bars you need along the length, connect them to the halves of the countertop with screws from all sides. Fasten the halves of the tabletop together with the help of loops.

Step 2 Cut off four beams, which will be the legs of our table, make holes for the bolts in them and in the frame, while indenting so that the table legs freely connect to the frame.


Step 3 Connect the legs and frame with furniture bolts and wing nuts.

Step 4 Attach the carrying handle to the frame. Don't forget to make two latches ,
so that the suitcase does not open during transportation.

Note! Before starting work, draw up a drawing of your table in several projections, calculate the dimensions of all parts and how much material you will need. So you will save yourself from mistakes, and you will not have to redo all the work again.
Protecting the camping table
 An unprotected tree ages rather quickly: dampness, temperature changes that are inevitable in nature, sunlight and many other factors have a bad effect on the material and reduce the durability of the folding table.
Therefore, do not forget to treat all its surfaces, especially the countertop, which is most susceptible to harmful effects.
For use special antiseptic compounds, stain.
Finishing with varnish or paint will enhance the look of the plywood or chipboard and make the camp table more beautiful.
How to make another version of a lightweight folding table, see the video:
It would seem that the catastrophic lack of space for free movement is a common “disease” only for apartments and private houses of the old Soviet layout, when the number of square meters living space per person or limited total area private house. However, how then to explain the popularity of multifunctional or folding furniture all over the world? The answer is simple: a person tends to be rational about the world around him, including the space of his home. Folding, resizable tables and chairs are a prime example of this.
A few reasons to make a folding table with your own hands
There are many on the market today various designs folding tables, but there is nothing complicated in their independent production. In addition, in some cases, making a folding table with your own hands is much more profitable and, again, more rational:
- The size of the table can be varied based on the size of a particular room;
- the design of the table can be chosen depending on the ease of use, at will;
- the design of the table is chosen in accordance with the interior of the room, so it does not “stand out” from the general style of the room.
An important factor is the exclusivity of hand-made furniture.
Folding table in the kitchen - the most best option in the conditions of small-sized apartments, when all family members can sit behind it (when folded). In the unfolded version, this is a full-fledged banquet table, at which twice (or even three times) more people can fit.
To make a folding dining table, it is not at all necessary to go to cabinetmaking courses: you can simply use our advice, dream up a little (in terms of design, of course), and think a little more - already on the drawings of the folding table that you need.
Materials, fixtures, fittings and tools
For work, in addition to the material (it is better to use chipboard for the table top and table box elements), you will need:
- Tools - a jigsaw (or a hand-held electric end saw), an electric drill, a screwdriver or a curly screwdriver, a key for confirmations.
- Fasteners and accessories - their number, types and sizes depend on the intended design of the table, so we will talk about them separately in each case.
Case 1. Making a folding table - a coffee table transformer
If you decide to make a folding table - a transformer for the living room, then you will need to purchase special transformation mechanisms (Fig. 1 or 2). Such a table will perfectly disguise itself as a regular coffee table, until guests descend on you and you need to set the table for several people in the living room.

Tables-transformers can have different dimensions.

Fig.1 Single transformation mechanism

Fig.2 Double transformation mechanism
Making such a table is quite simple, subject to strict adherence to the instructions and procedures.
First of all, carefully consider the proposed drawing of a folding table (Fig. 3), specify its dimensions in relation to your requests and, if necessary, make changes to your drawing.

Fig.3 Drawing of a folding table
We will need:
- LDS plate (25mm):
- For countertops - panels 750x90 mm (2 pcs.);
- in case of choosing a double mechanism (fig. 2) - one more panel with a size of 350x720mm for an auxiliary tabletop;
- in the case of choosing a mechanism from Fig. 1 - a connecting panel, the length of which is equal to the distance between the platforms of the mechanisms, the width is equal to the length of the platform of the mechanism.
For the frame:
- 2 panels 730x460mm (end sides of the table),
- 2 panels 730x150mm (side parts of the box for the mechanism, which serve as a strapping for the tabletop);
- 2 panels measuring 680x730mm (the bottom of the box for the mechanism) and 730x730mm (shelf for magazines "g").

Fig.4 Furniture corners
Important! All parts must be cut out very accurately, before final assembly it is best to “bait” the main components of the table and, if necessary, adjust to fit.
Assembly of a folding table-transformer
Process the end parts of all cut parts with sandpaper (skins), paste over with a melamine edge to match the chipboard color.

Fig.5 Assembling the base of the transformer table
If you were careful and accurate when marking out the parts and sawing them, then assembling the table will not take much time and effort.
As shown in fig. 3 and 5, first, with the help of confirmations, we connect the bottom and sides of the box for the mechanism (they are marked with crosses on the part b of Figure No. 5).
With the help of the same confirmations, at the desired height from the floor, we fasten the shelf for magazines with the end parts of the table - 2-3 fasteners per side.
We attach the box to the end legs with the help of furniture corners, for greater reliability we screw another 1-2 confirmations into the middle of the line of contact between the bottom of the box and the end plate of the table.
- With the help of card loops we assemble the countertop;
- In the drawer of the table we attach the mechanism for transformation.
We attach the tabletop to the platforms of the mechanism:
If the mechanism is single, then we attach the lower part of the tabletop to one pair, and fasten the second pair to each other with a connecting panel (on the underside of the platforms).
If the mechanism is double, then we attach the tabletop to the large arms of the mechanism, and the supporting tabletop to the smaller ones.
The table is ready. It remains only to mask the confirmers' heads with plugs and wait for the guests!
Case 2. Making a turntable folding table
If you are more interested in the idea of a swivel folding table, then you will need special fasteners for rotation (you can use the swivel mechanism for TV), but if the table is not laid out daily, you can do without it.

Fig.6 Rotary folding table
To make a folding dining table with a swivel top, we need laminated chipboard (25 mm thick) in the following dimensions:
- 770x500 mm - 2 pcs. (for a folding tabletop);
- 400x670 mm - for a false tabletop (1 pc.);
- 645x100 mm and 375x100 mm - 2 pcs. (for tying table legs);
- 4 bars 40x40mm or 60x60mm, 700-750 mm long each (for legs).
In addition, you will need 8 furniture corners for attaching the legs, 8 confirmations for the strapping box, ombre hinges for the tabletop, a swivel mechanism for TV, 4-6 wooden dowels.


Fig. 7 Scheme of turning the tabletop
It should be said that one of the most popular transformers is a book table, the drawings of which you can also find on our website.

The folding table is the perfect solution for big family or friendly company.
In the folded version, it takes up a minimum of space, and if necessary, the tabletop area is significantly increased due to additional inserts.
This design is suitable for use during the holidays to seat all guests.
A folding table can be bought at the store or made independently.
Folding table options
Folding tables can be made in various variations and different sizes: both small or and large - or
Folding tables differ in complexity designs - from very simple like folding to equipped special mechanism
materials for the manufacture of tables are also used a variety of. Table tops are made from glass, plastic, chipboard, MDF, tree.
Indispensable for some models and very practical and reliable metal folding legs for the table (with your own hands they can be made from chrome plated pipes).
How to make a table from a metal profile with your own hands:
The purpose of folding tables can be very different. Here are just a few examples:

Folding table for trade

Folding massage table

Extendable dining table
 Even a novice home master can make such a table. Despite the lightweight design, it is very strong.
When assembled, the width of the tabletop is 700 mm, the length is 1200 mm. Its area is increased due to an additional, central insert. The total length of the extended table is 1670 mm.
At such a table, eight adults can easily accommodate: one from each end and three from both long sides.
Materials and tools
In order to make a folding table with our own hands, we need the following materials:
- LDSP 25 mm thick;
- PVC edge with hot melt glue applied to it (thickness no more than 2 mm);
- aluminum corner 50 x 50 mm (500 mm) - 4 pcs.;
- telescopic guides (500 mm) - 2 pcs.;
- thick metal leg (710 mm) - 4 pcs.;
- furniture lock - 6 pcs.;
- screw M4 10 mm;
- self-tapping screws 20 x 4 mm and 16 x 3 mm;
- household gloves.
 Necessary tools for work:
- tape measure, pencil, long ruler, marker;
- clamps (for sawing chipboard sheets);
- building level;
- milling cutter;
- building hair dryer (thermal gun);
- screwdriver;
- drill and drill with a diameter of 4.2 mm;
- a circular saw.
- electric jigsaw and file with fine teeth (so as not to chip the laminated chipboard edge)
Drawing and cutting material
Before starting work, you need to decide on the dimensions of the future product and make a drawing of a folding table. In our example, the dimensions of the sliding tabletop, folded (left) and with insert (right), are as follows:

Stages of work
Step 1. To begin with, we mark out and cut out three parts from chipboard that will serve as a countertop: two identical parts 700 x 600 mm and one for insertion - 700 x 470 mm. In order to without chips make cuts on chipboard, a regular electric one will do jigsaw.
Important: if in the future the part will be processed by a milling cutter, it is worth adding a couple of millimeters to each side.
Then, with clamps, the chipboard sheet is attached to any flat surface. We set the edge of the cut with a level, we guide the jigsaw calmly and accurately.
Step 2 Finishing the edges of parts milling cutter gives a perfectly straight cut. The cutter should also be driven slowly and carefully, working through each section of the cut.
Step 3 We glue the ends of the parts edge from PVC. To do this, we fix the part with a clamp vertically on a stool or table. Cut off the necessary piece of the edge and apply it to the cut, warming up building hair dryer. All work is carried out in economic gloves. After the glue has completely dried, you can proceed .

Step 4 For safety, you can cut sharp corners on all aluminum corners and round off them.

Step 5 Now we take two corners and guide. On the outer side of one corner, mark 25 mm from the rounded edges and draw a line that will divide the side of the corner in half. We perform the same procedure with each from the rest of the corners.
Step 6 We apply parts of the guides to the corners and plan bolt holes. We knock them out a little with a nail (so that the drill does not come off) and we drill. We fasten them with bolts.


Step 7 We got two designs from the corners. I put them on even surface in this way: corners with thin guides (movable) - inside, corners with thick guides (fixed) - outside. We drill four holes in the fixed corners and four in the movable ones.

Note: all holes in the movable guides are made from the outside, in the fixed ones - from the inside (i.e., the holes should be on opposite sides of the product).
Step 8 We put two identical parts from chipboard on a flat surface, turn it over facial side down. Put both on top telescope(moving side in and fixed side out) at a distance 8 cm from each edge. The middle of the telescope should coincide with a junction of parts.

Step 9 moving side fasten self-tapping screws (20 x 4 mm) to the right side of the tabletop, motionless - to the left.

Step 10 Attached to each side of the table padlock using self-tapping screws 16 x 3 mm.


Step 11 We open locks and pushing apart countertop. Insert between them middle detail front side down. We shift tightly countertop, to form a flat surface.
Any family loves to go outdoors, and for this you need a table and chairs that are lightweight and foldable, which are easy to put in the trunk of a car.
Folding design has its advantages and disadvantages.
But, if you know how to hold a tool in your hands, then making a folding table for the street with your own hands is not difficult.
 You should start by choosing the material from which you can make this design.
If you do not have experience with metal and plastic, which require a special large set of tools, then build a structure wooden- It is easy to make.
A simple picnic table can be made from boards, bars, plywood or chipboard.
Wood has many advantages:
- naturalness;
- environmental friendliness;
- durability with proper processing;
- does not cause allergic reactions.
But there are also disadvantages:
- wood is afraid of dampness;
- it can warp from sunlight;
- it is affected by temperature changes;
- it can be damaged by insects.
For this reason, it will be necessary to carry out additional processing from decay, exposure to moisture and insects so that it does not change its appearance over time.
 Metal- an excellent, durable material that has both advantages and disadvantages.
Among the advantages can be called: environmental friendliness, long service life, aesthetic appearance.
Disadvantages:
- you need a special set of tools;
- if you choose a thick metal, then the design will turn out to be quite heavy;
- moisture can corrode the metal;
- requires some skill and additional processing.
With plastic it is much more difficult to work, but it does not have such disadvantages as metal and wood, and it does not require additional processing.

Advice. In addition, the table can be combined, for example, a wooden table top and metal legs.
It is up to you to decide which material to choose, but we will consider the manufacture of a folding picnic table made of wood. For him you need to prepare:
- wooden glued board or plywood;
- bars for legs;
- reinforced washers;
- corners for furniture;
- furniture hinges;
- nuts;
- rivets;
- black screws.
Dimensions and drawings

The table can be made in any configuration, it can be:
- square;
- rectangular;
- round;
- oval.
table can be made on a frame that folds easily, and, if necessary, is brought to the desired position.
Important. The main role in this design is played by the legs. Competent calculation of thickness and length, correct setting of fasteners will ensure ease of folding into a compact position and good stability of the table.
Create drawing You can independently, based on your needs, given the number of people who will simultaneously sit at the table.
But you can go on a simpler path - find a suitable drawing on the Internet.

Important. The folding part (legs) must be made shorter than the height of the structure, otherwise it will be impossible to fold the table.
Instruments
To quickly assemble the table, prepare the following tools:
- hacksaw or jigsaw;
- screwdriver or screwdriver;
- emery skin;
- tape measure and marker.
Advice. If you use a power tool, it will be much easier and faster to work.
How to make a folding tourist table?
To assemble a wooden, folding picnic table, we present the following instructions:

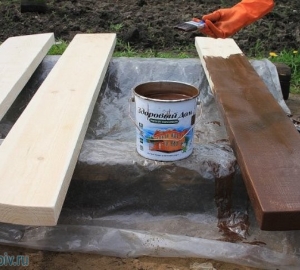
Finishing
In order for a wooden surface to serve for a long time, it must be well processed. Algorithm action is the following:

Advice. If there is no varnish and stain, you can soak it with drying oil and paint it with paint on wood of any shade.
A photo
Picnic tables can be very different. For example, as in these photos


Useful video
Another option for a folding picnic table can be seen in the following video:
Conclusion
As you can see, making a homemade folding picnic table is not difficult if you follow the instructions. It is only important to observe safety precautions when working with power tools and carefully adjust the parts.
In contact with