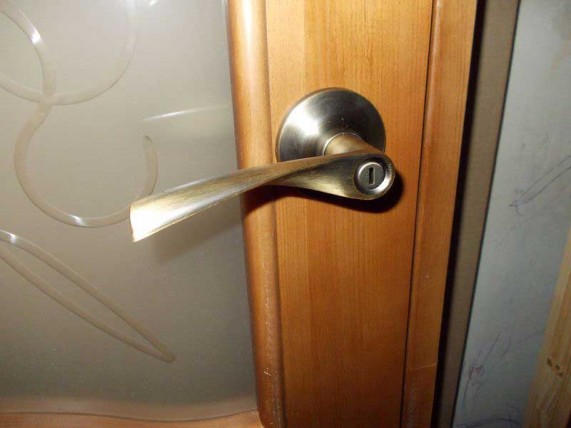
Insert handles and latches in the interior door
You bought, say, a new interior door and decided to assemble the door frame yourself and install this very door without any experience. Well, it happens that some things have to be done for the first time. The most important thing here is to take your time and be attentive to what you are doing.
When for the first time I had to install interior doors in one of the apartments, I must admit, sawing the first box, I made a mistake. As a result, I had to buy a new set of boxes. Ever since then, I have been very attentive and accurate when doing the work of assembling and installing doors.
When sawing the elements of the door frame, there is no room for error, this must be remembered. As the saying goes, measure twice, cut once!
So, the door has been brought in and is standing in the corridor, perhaps for the second week already. There is nowhere else to put it off and it's time to get down to business. A reasonable question arises. Where to start?
Marking the door leaf for tie-in
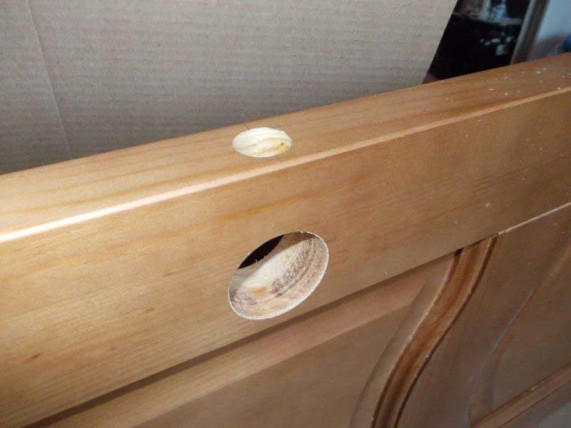
You should start by marking on the door leaf the place where it will be recessed latch handle. The door leaf is, in fact, the door itself without additional elements, boxes, extensions and platbands.
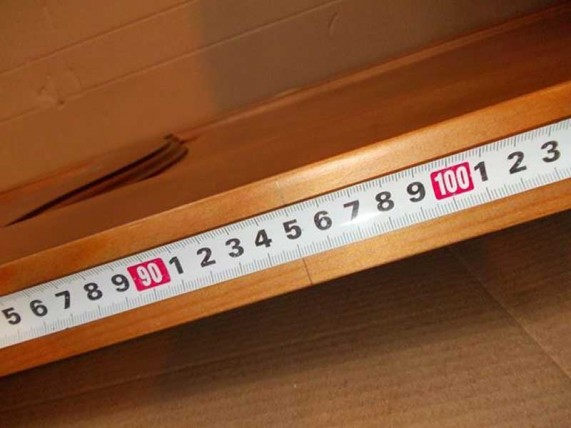
To begin with, decide in which direction the door will open, the position of the bevel of the latch tongue will depend on this. Now you need to determine the height at which the door handle will be located. As a rule, the handle is cut at a height of 90-100 cm from the floor or threshold. In rooms, of course, there are no thresholds. But in the bathroom or toilet, they are very possible.
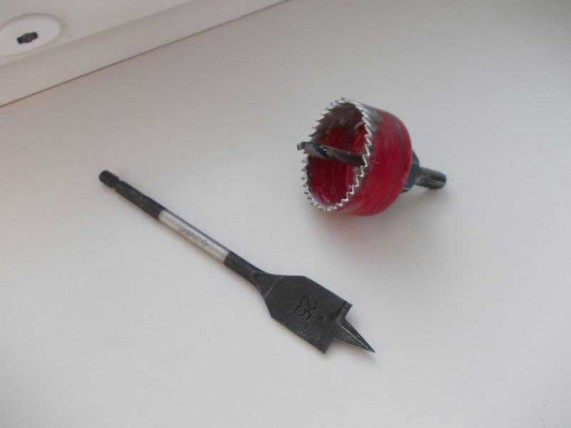
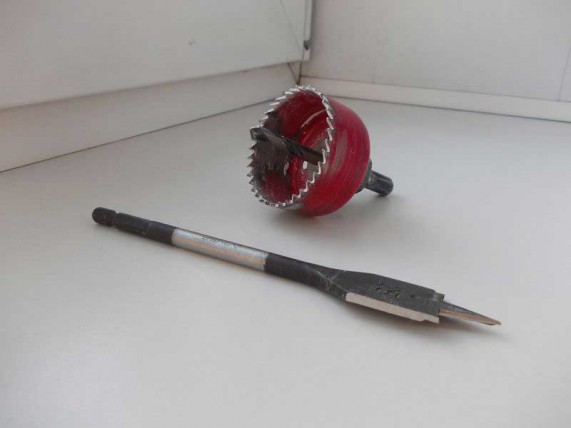
In a box with door handle, you will almost certainly find instructions with the dimensions for which you need to markup. Often the dimensions are indicated on the box itself. Ordinary handles are almost always installed in the same pattern. Construction tool stores sell special kits for inserting handles into the canvas of interior doors. The set consists of a pen drill, 23 mm in diameter. and crowns for wood, with a diameter of 50-54 mm.
So, mark a distance of 95 cm on the end of the door leaf. Using a square, draw a clear line perpendicular to the end of the leaf. Mark the middle on it and pierce it. You can pierce with any sharp object, an awl, a nail or a self-tapping screw. At this point, you will need to drill a hole for the latch. But don't rush, it's not time yet!
Need to continue pen markings, or speaking professionally, for knoba. To do this, you need to continue the line at the end further to the canvas itself on both sides. This must be done strictly perpendicular to the door leaf, using a square. It would be useful to recall that the pencil must be sharply sharpened.
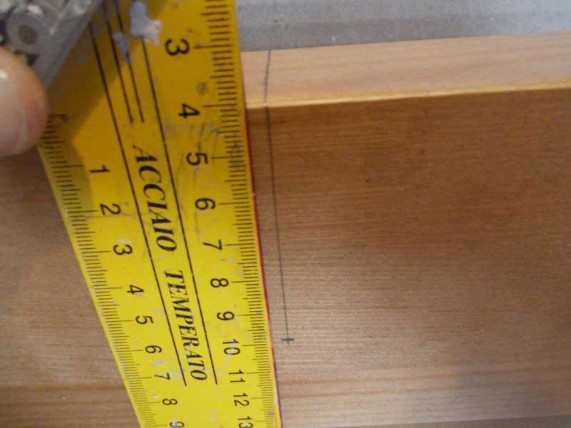
Here you should pay attention to one detail. The handle can be positioned at a distance of 60 or 70 mm. from the edge. To do this, the adjustable latch length design allows. Decide which distance suits you best, and mark the desired distance on both sides of the canvas on the lines drawn earlier.
Please note that on a blank canvas, that is, on one that does not have decorative elements in the form of planks, glasses, and other things, the distance from the edge at which the handle will be embedded is not critical. After all, the canvas is absolutely flat and smooth. But the presence of decorative inserts can limit the location of the handle. And if you decide to embed the handle at a distance of 70 mm. from the edge of the door leaf, make sure that the handle does not block the decorative elements. Otherwise, make a mark of 60 mm. from the edge.
Drilling a hole for the handle
drilled first pen hole, then for latches. It is more comfortable. Firstly, when you start drilling the end, you will know exactly when to stop, and secondly, all the chips will simply fall down when drilling the end, and you will not need to sweep or blow it out with a vacuum cleaner, which is very inconvenient.
So, take a drill, fix a wood crown (50-54 mm.) into the chuck and start drilling from one side, having previously marked the marked point. Do not try to drill through the entire canvas "in one go". Firstly, you will not have enough depth of the crown itself, and secondly, the teeth of the crown will become clogged with sawdust, the crown will get very hot and burn the tree, and the deeper, the stronger. We just needed a fire!
Having drilled 4-6 mm, without turning off the drill, pull it towards you, removing the crown from the drilled hole. There is no need to turn on the reverse and generally make sudden movements. Everything should happen smoothly, but surely.
Clean the teeth of the crown from sawdust. Be careful, it can be very hot! It all depends on the material of the door leaf and the degree of its humidity. The denser the material and the wetter, the more the crown heats up. But the crown with blunt, worn teeth is heated most of all. Never use this! Buy a new one is my advice.
After cleaning the teeth of the crown, and allowing it to cool if necessary, immerse it in the place where it was taken out some time ago, and continue this important mechanical operation to obtain the much-needed hole. As I already mentioned, the crown, due to its limited depth, will not allow the canvas to pass through. Having drilled halfway, you should go to the other side and repeat the whole operation again. Here you need to be more careful. Approaching the middle of the canvas, do not press hard, let yourself enjoy the last seconds of this exciting process! Otherwise, you run the risk of slipping through the crown and hitting the door leaf hard with a drill. And we don’t want to scratch it or leave a dent, right?
Drilling a hole for the latch
Let's move on to the next step. We take out the crown from the drill chuck, not forgetting about its elevated temperature. We clamp a feather drill with a diameter of 23 mm into the chuck. Pay attention to the photo. It shows that the size of 25 mm is stamped on the drill. But be calm, no cheating! It’s just that I didn’t have a drill of the required diameter, and I used a “perk” of 25 mm, after grinding its edges with a grinder to the desired diameter. Here's a little trick, take note.
Drilling must be strictly perpendicular to the end of the door leaf. At first it seemed to me that it was very difficult to control. I mean perpendicularity. But then I realized that this is easy to do, just watching how evenly the drill selects the circle. This is especially noticeable at the beginning of drilling, and having gone a little deeper, you can hardly worry that the drill will deviate from the set course. But this does not mean at all that you can relax and look not at the drill, but at the cat sprinkled with sawdust passing by.
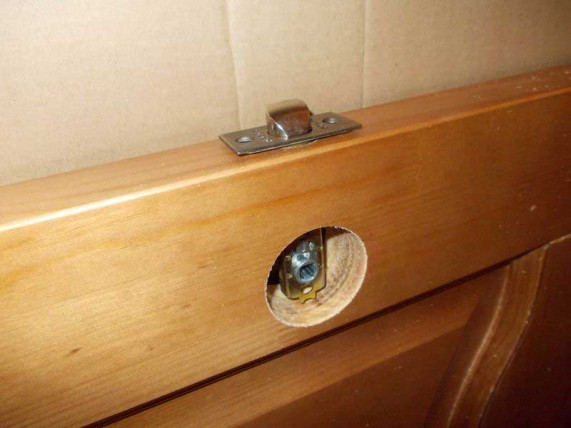
Installing a latch for an interior door
Well, what! The drilling of the holes is completed, now you need to drown the latch bar into the end of the door leaf so that it is “flush” with the plane. Professionals do this with a manual milling machine, but not everyone has one, so you have to work with a hammer and chisel.
Insert the latch into the hole and circle it with a sharpened pencil. To keep the plank in place during the stroke, I usually immediately drill holes for the fastening screws and twist them slightly, fixing the plank. After circling the bar, remove the latch and grab the chisel. Do I need to say that the chisel should be not just sharp, but very sharp?!