Inserting loops with a milling cutter without a template
Today I will show you how to cut loops with a router without a template. So let's go!
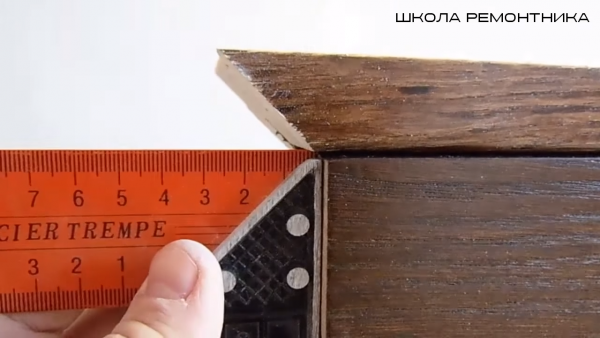
Taking measurements and marking
The first thing we need to do is to measure 20 centimeters from both ends of the canvas, in order to give us subsequent marks for inserting loops.
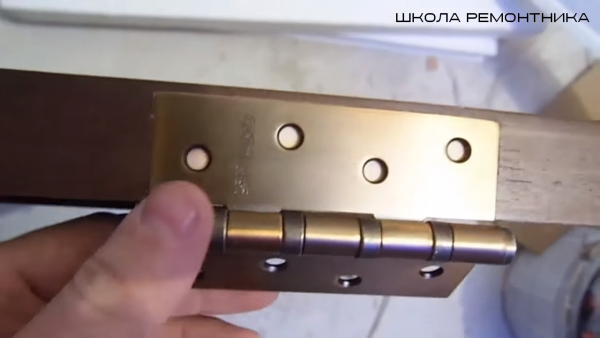
We mark 20 centimeters, put a mark with a pencil. Then we take the loop and apply it to the door. It is the upper part that needs to be applied, and not the lower one, where our first wing merges with the core.
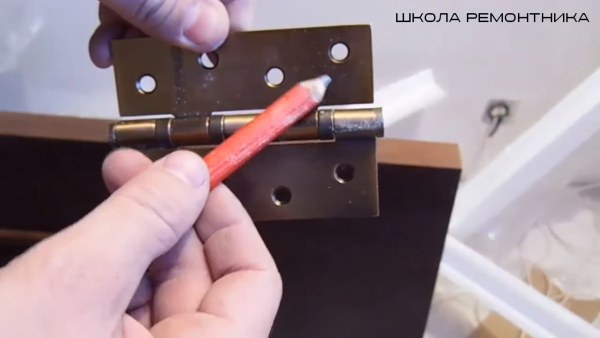
This must be done so that when we install the door, the upper wing is parallel to the canvas.
So let's add a loop.
As you can see, the loop is parallel to the canvas. We hold the loop and put marks with a knife, naturally without moving the loop.
With light movements, with a sharp knife, we make marks.
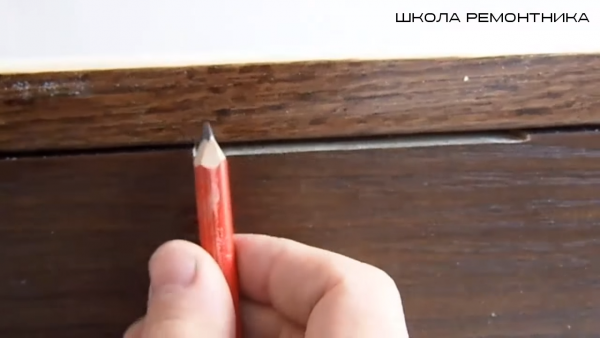
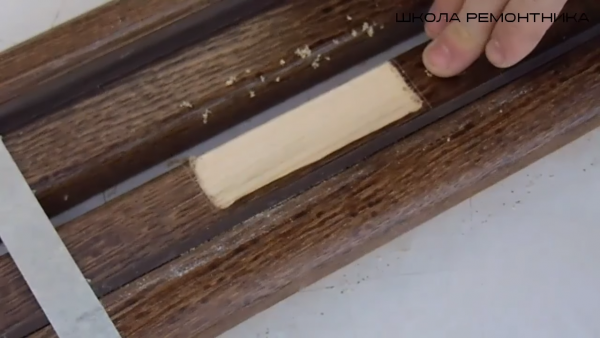
Cut a groove for a loop on the canvas
The next thing you need to do is to adjust your router to the depth of the cutter to the thickness of the loop, so that all this loop is drowned with us.
So here's my cutter. It is already set so that the cutter reaches the thickness of the loop.
But I did a little less, that is, my loop will not cut completely. After we have adjusted the immersion depth of the cutter, we go directly to the loop insert itself.
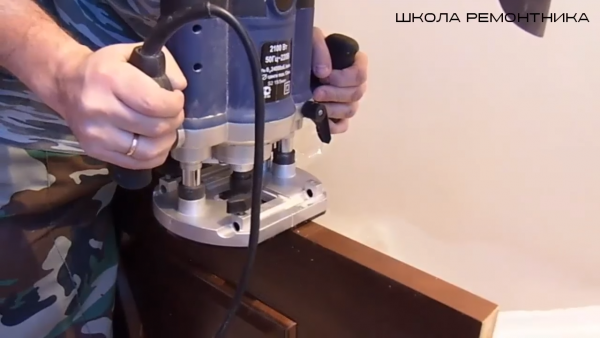
Here's what I ended up with.
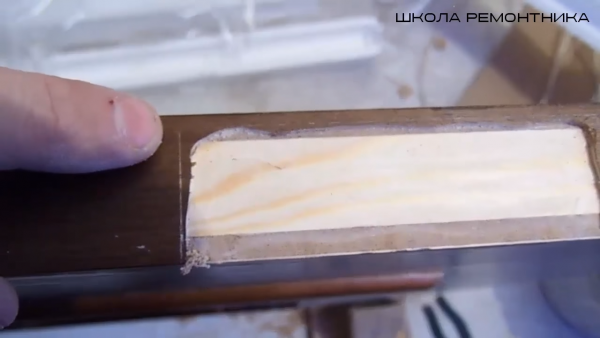
I went through the milling cutter, not reaching the line that I marked with a knife, but the point is that we will already finish this part with a chisel. And we have already cut the necessary depth, everything is smooth with us.
We continue with a chisel and a hammer.
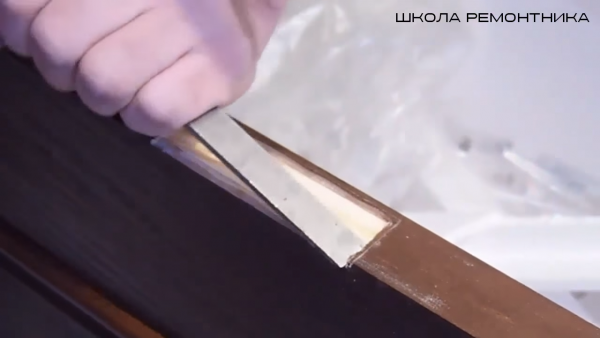
As a result, the loop is perfectly inserted with us.
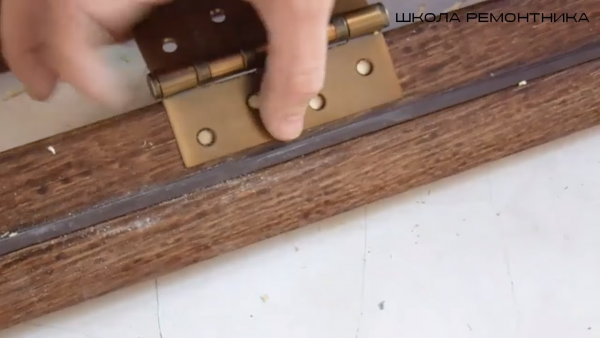
Cut a groove for a hinge on the box
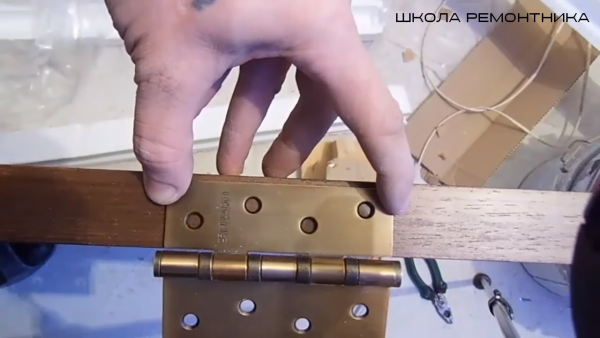
The next thing we need to do is transfer the dimensions of the hinges to the box. Usually I do it right away, and then I cut it into both the canvas and the box. But there isn't much difference.
To do this, we leave a distance of 3 millimeters from the edge of the cut (in this case, we sawed at 45 degrees).
Then we just need to make one label. Usually I do it from the side that we have closer to the edge of the canvas, and from it I later mark on the box.
In the same way, we mark on the other side exactly along the edge.
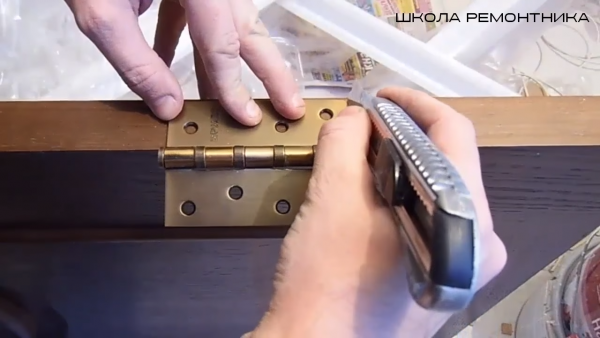
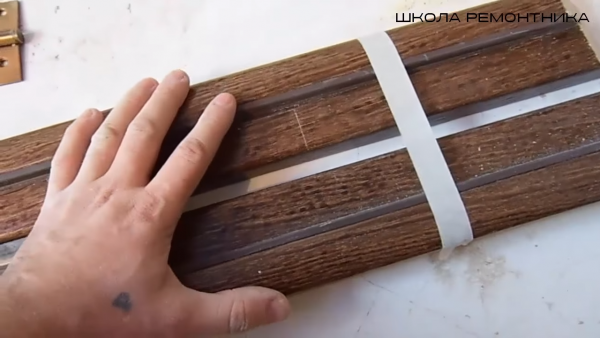
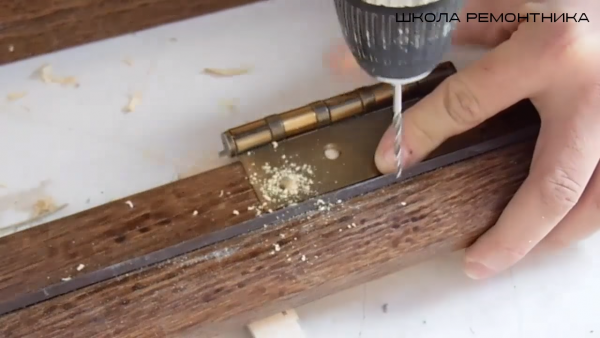
Next, we need to remove the box and also circle the attached loop with a knife. Here, in the same way, we lead parallel to the loop, you can see and adjust it very easily. Then we proceed directly to the sidebar. But here our task becomes more complicated, since simply putting a milling cutter here will not work due to differences. Accordingly, to do all this without any templates is at first glance difficult.
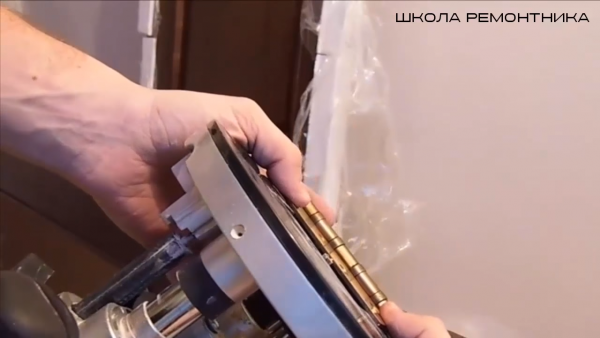
But there is one secret. And that's what it is. Nearby we apply the second rack. we put a disconnector between them and grab it with tape.
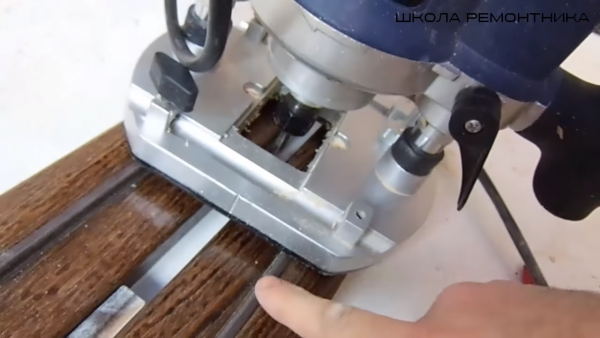
This is how the box looks like after cutting with a router.
It remains to remove the excess with a chisel and a hammer.
In just a minute, I removed everything superfluous, and the loop fits perfectly with us.
Shutdown
Since our stand is wooden, the drill can lead to the side. You can easily control it. We need to do the same on the canvas - we apply a loop and drill a hole.