Self-installation of the door frame - a detailed photo report
Greetings, friends!
When it comes to repairs, many of us often face the question of replacing interior doors. In order not to resort to the help of professionals and save a "tidy" sum - I will teach you how to correctly and correctly install the door interior frame with your own hands.
For example, in Rostov-on-Don, the installation of one door costs about 1,500 rubles. And if you need to install not one, but several of them? — the savings are obvious :) In order not to “handle” — you only need to follow a few simple rules!
By the way, the installation is carried out only after its competent assembly, and if you have everything ready, then you can proceed.
Required Tool
- Impact drill or hammer drill
- Drywall hangers, 1 mm thick
- Building level
- Self-tapping screws and plastic "plugs" to them
- wooden wedges
- Mounting foam - preferably with the smallest expansion
- Phillips screwdriver or screwdriver
If everything is available, then you can proceed.
Opening preparation
Friends, using my personal example, I will tell you how correctly install the door frame from MDF. But in order to start - you need to correctly prepare the doorway itself.
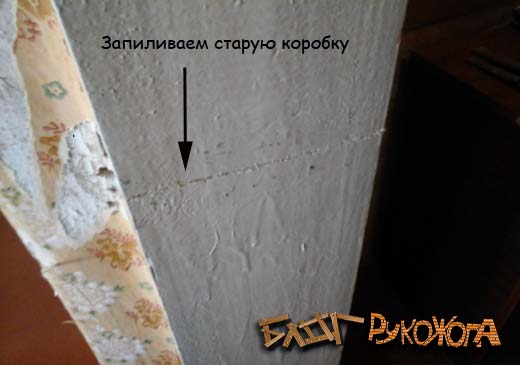
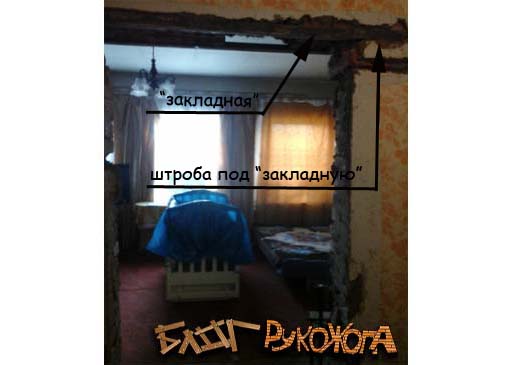
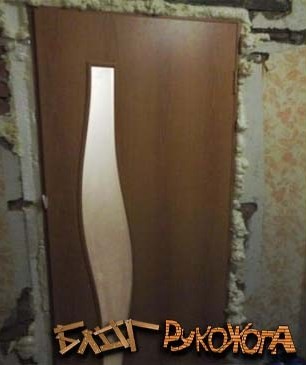
 Let's do this with my example. All crooked and oblique, made from 50th timber and 150th thick - this is the old door slit in my house. She has a height of 180 cm, and the height of a standard door leaf is 200 cm :(
This nonsense needs to be removed.
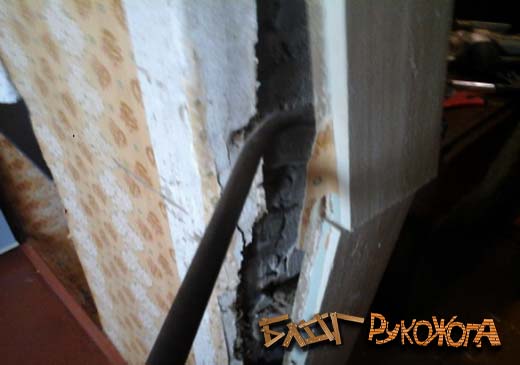
I insert a crowbar and break! (sorry for the fluff)

Usually, one cut is enough to remove the entire "loot", but in my case, the opposite part stubbornly resisted and had to resort to the help of a crowbar again.

And now the doorway is cleared
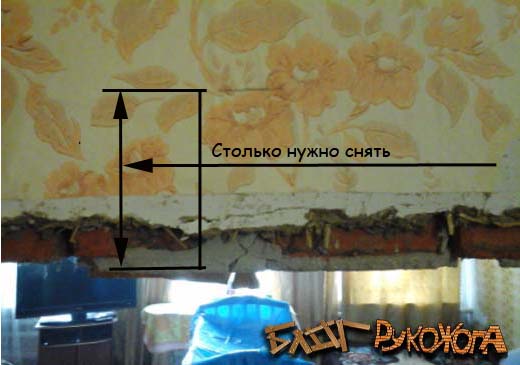
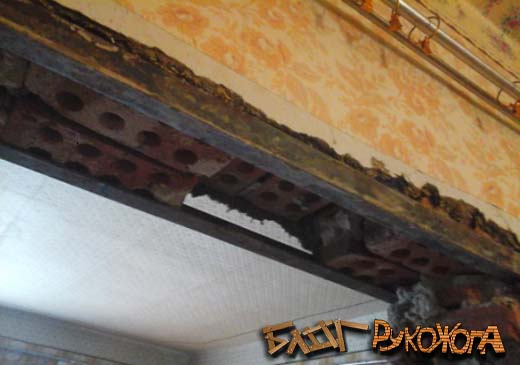
It would seem that everything is ready, but there is one small but. The thing is that the doorway is almost 15 cm lower than the required one. Since the wall is made of brick, it is required to slowly remove the “mortgages” - in our case, this is the 50th metal corner. With the help of a hammer, we remove the corners and this picture remains.The photo above shows how much I need to remove in order to install a standard two-meter canvas!
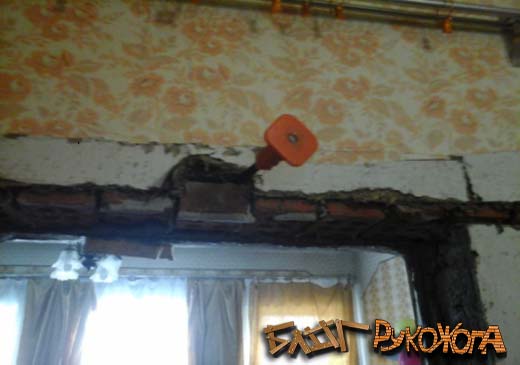
With great care, I remove the masonry with a chisel.
I make a “strobe” under a new “mortgage” and put everything in its place.
I weld the structure so that nothing “runs up”
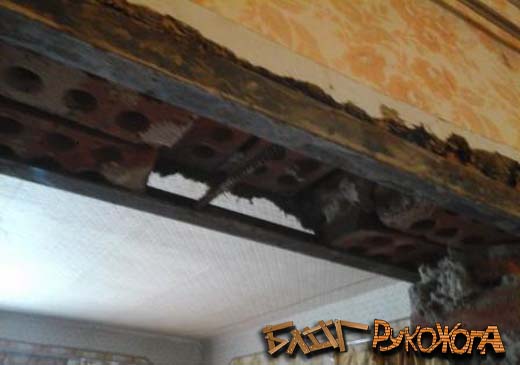
As you can see, some of the bricks fell off on their own, leaving a decent gap, but that's okay - it's a waste of invention! The main thing is that the door lintel is strong!
So, the doorway is fully prepared for the installation of the door frame - let's move on.
Installation
We proceed directly to the installation of the door frame.
We install the door in the opening and fasten it to the wedges. We are trying to achieve alignment with the walls, so that later we can easily install the cashing.
We fasten the hinged side of the box according to the level - this is the place where the hinges are installed. First you need to observe the horizontal level.

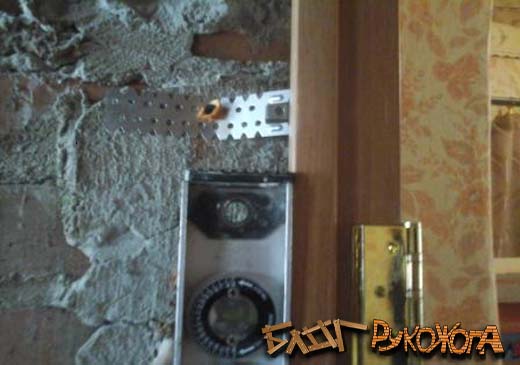
Yes, I completely forgot - I install a door frame without holes. In order to do this, I use 1 mm drywall hangers. On each side of the door frame, I fixed 3 hangers. I chose the place for fastening so that the holes that I will drill fell directly into the brick itself, and not into the mortar. If you have a wall made of foam or gas block - then it's even easier - and you don't need to drill anything - you can simply fix it with a self-tapping screw. Use press washers with a flat head for this so that the hangers do not hang out.
It is important to know!
Friends, many craftsmen use "hidden" to install a door frame without holes. That is, they drill mounting holes under the hinges and in the place where the striker of the lock fits. This method has a place to be and is in great demand, but I have a box made of MDF, 2 cm thick, which “walks” in all directions and my method of fastening gives me the opportunity to clearly set the gaps!
After you have leveled the hinged side, drill a hole and fix it.
After the doors are set vertically, you need to set the horizontal. Using the level we fix the door frame.
Thus, it turns out that the suspension, which is located on the side of the door opening, exposes the vertical, and the other side is responsible for the horizon. Nothing complicated - just try it!
The hinged side is exposed - hang the door on the hinges. Adjust the door pressure, that is, the door should close tightly against the door frame. If there are gaps, then pushing or pushing the other side - adjust the closing / opening.
Then wedged the opposite hinge side of the door and fasten it. In my case, I again use suspensions.
It is important to know!
A properly installed door should not open or close on its own.
The next step is foaming the door.
Foam should be used with an expansion of no more than 1 to 3. In the absence of a professional gun and foam, I used Titan 65 foam.
Before foaming, it is necessary to prepare for the fact that it will not be possible to use the door for 4 hours (this is how much the mounting foam needs to completely solidify at room temperature).
Before foaming the door, it is necessary to carry out a series of manipulations so that the door does not crush.
How do I do it:
- Close the installed door
- I cut thick cardboard into long strips
- I insert these strips around the closing perimeter of the door
- Penim
Especially for those who didn't understand anything⇓
How to install a door frame with your own hands - video
That's all my dear hand-assers!
I hope I was able to answer the question how to install a door frame. The next step in installing interior doors will be, which I will certainly teach you too.
Good luck with your renovation and building endeavors!