Do-it-yourself wicket from a profile pipe
Many modern homeowners, when choosing materials for the manufacture of gates, prefer profile pipes. Such pipes are made from a wide variety of alloys. Gates and fencing made of such materials, combined into one reliable design, make it possible to adequately protect the land from all sorts of uninvited guests.
Equipment and materials
 For high-quality manufacturing and installation of the gate, you need to stock up on the following tools:
- Drill and a set of quality drill bits for metal;
- Bulgarian with a special cutting wheel capable of performing the function of cleaning metal;
- Welding machine;
- A compressor that provides the necessary pressure to enable accelerated application of paint to the assembled structure;
- goniometer;
- Roulette;
- A hammer;
- Kapron thread.
Professionals provide the following list as necessary materials:
- profile pipe itself. The thickness of the metal should not be too thin and rigid enough to withstand impressive loads;
- Special liquid for cleaning metal from corrosion;
- Primer;
- Dye;
- Metal hinges for fixing gates and metal gates. These elements must withstand high loads. It is necessary to use hinges with a bearing installed inside, due to which the movement of the gate will be quite smooth;
- Lock.
After all the above materials have been prepared, you need to take a profile and accurately determine all dimensions so that they can be indicated on the diagram.
Important! In order for the gate to open and close without any special difficulties during operation, it is imperative to make the most accurate calculation.
Drawing development
The starting stage of creating a gate from metal pipes is the design or manufacture of the most detailed drawing. Only after this is the procedure for purchasing all the necessary tools and materials. A sufficiently high-quality and visually attractive gate can be created if the drawing is made as detailed as possible. If any inaccuracies were allowed at this stage, some adjustments will need to be made to the design of the product during the manufacturing process of the gate.
To create a wicket, you will need to follow these steps:
- Determine the exact dimensions of the product.
- Prepare all the necessary materials and tools.
Healthy! The top of the gate must necessarily coincide with the level of the fence. A slight deviation is permissible, but only in a smaller direction. A suitable width can be called 0.9-1.2 m.
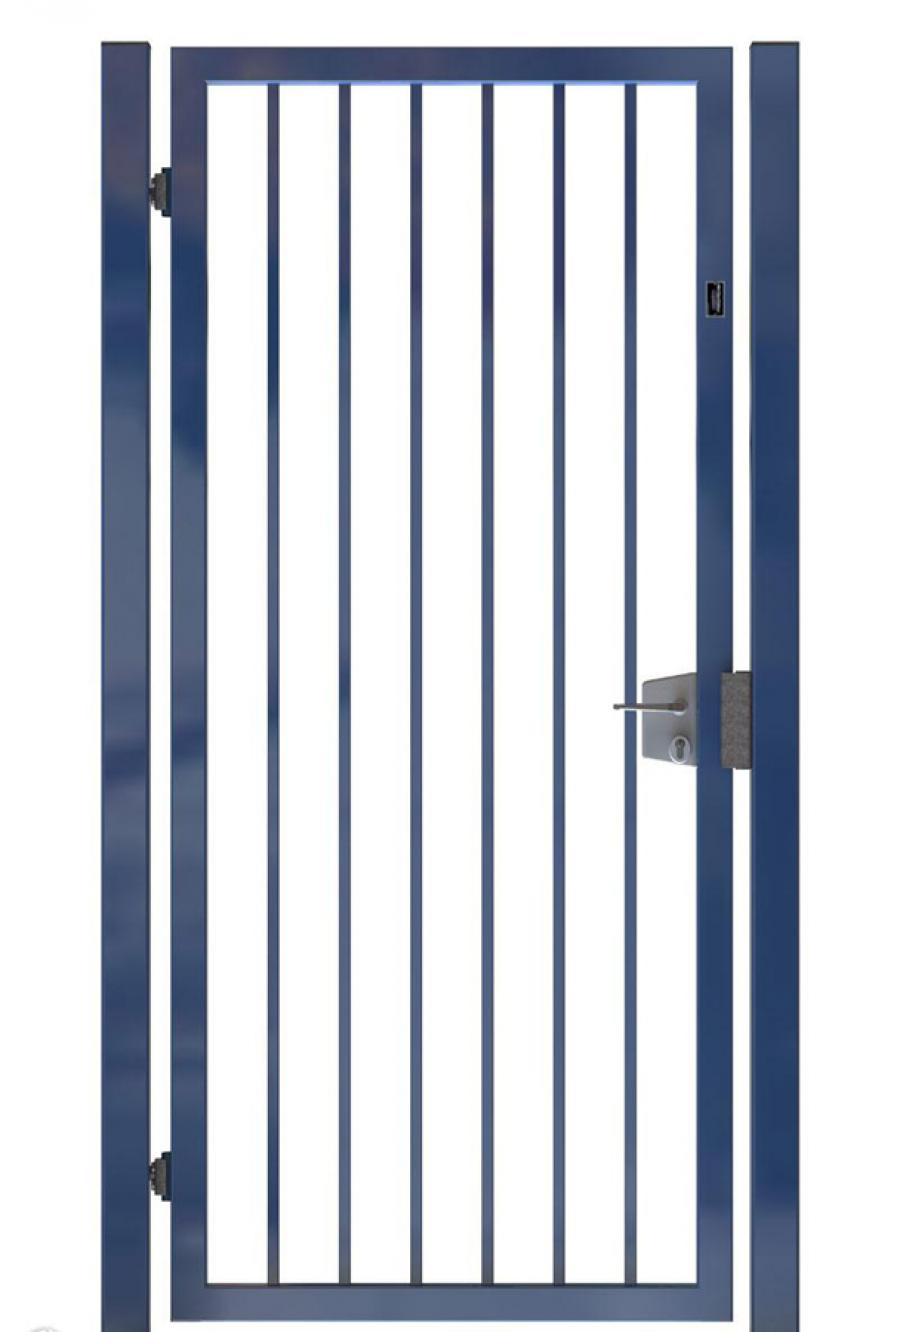
The strength of the frame for the manufactured gate will be ensured through the use of pipes with a cross section of 40x20 mm. Smaller diameter materials are often used to create decorative elements.
Let's take a closer look at the drawing of the simplest gate from a profile pipe in this photo. 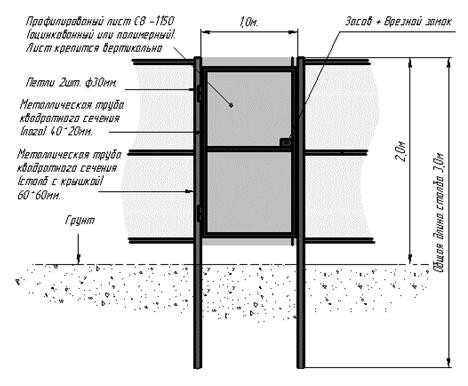
After reviewing these materials, we can conclude that the wicket scheme is nothing complicated. A drawing of a gate from a profile pipe can be quickly drawn even by a non-professional. If someone has questions during the course of work on how to weld a metal structure, it is advisable to seek the appropriate services from a professional.
How to cook?
 After determining the exact distance between the two supporting pillars, you can begin to create the wicket frame. In this article, the gate development technology is not considered. However, the basic principles are practically no different from making a gate.
All you need to do is weld the frame from a pre-purchased profile pipe. All work must be carried out only on a flat plane so that the manufactured structure is perfectly horizontal.
All actions are carried out in the following sequence:
- According to all predetermined sizes, the necessary pipe fragments are cut. The joints must be cut with a grinder at an angle of 45 °.
- All prepared constituent elements are placed on a horizontal plane, after which they are tightly pressed against it with the help of some fastener that provides maximum rigidity of fixation.
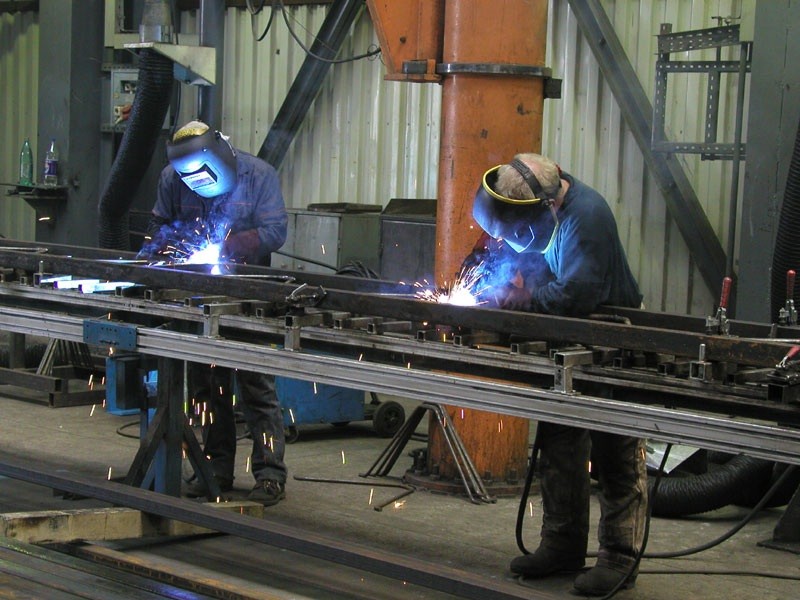
- After that, using a welding machine, the pipes are interconnected. Welding must be carried out precisely by the spot method.
- To achieve the stability of the shape of the frame, it is imperative to weld special spacers.
- After the main frame is assembled, pre-prepared swivel hinges on bearings are welded to it.
- Then the locking mechanism is welded. If you plan to use a padlock, you need to weld a special eyelet to the frame in a suitable place.
- The resulting burrs and too obvious irregularities must be carefully cleaned with a grinder.
To prevent the frame from being exposed to corrosion in the future, it is recommended to treat all its elements with a special primer solution. After the primer dries, you can start painting the gate with a spray gun or an ordinary brush.
In the process of manufacturing a metal frame for a gate, as mentioned earlier, it is necessary to take into account all its dimensions. You need to understand that the distance from the ground to such a gate should fit about 10cm. Therefore, to one it is necessary to accurately calculate the distance at which the response mechanisms of the hinges with metal pins should be located, on which the wicket frame will be put on in the future.
Such measures are necessary in order to conveniently use the gate in the winter, when precipitation in the form of snow will fall. If you have certain skills, you can weld the frame of the gate with your own hands without much difficulty and outside help.
Installation

After performing all the above steps in strict accordance with the instructions set out, the manufactured gate frame must be hung on a previously dug-in support post. To do this, you can use pipes with a cross section of 60x60 mm and a length of 3.3 m. This element is previously dug into the ground to a depth that should not be less than 1.5 m. To determine the depth correctly, you need to take into account the standard ratio, according to which 1/3 of the length of the post must be dug in.
For greater stability of the pipe, a piece of sheet metal 20x20 must be welded to it. After the required distance between the pillars is observed, you can start pouring cement mortar with the addition of large stones.
In order for the structure geometry to be suitable, it is recommended to fix the sashes by welding. The fabricated frame also needs to be welded to the pillars with some fragments of metal. Welding the hinges is considered one of the most difficult stages in the process of installing support posts. This procedure is carried out after a careful check of all the control parameters for the location of the gate between the posts.
sheathing
As materials for sheathing, in most examples, it is corrugated board that is used. The shape of the sheets should repeat the geometry of the installed frame. It is possible to install corrugated board elements both from the inside and from the outside of the gate. Sheets can be fastened from the inside in situations where decorative metal elements are welded to the frame. External cladding is recommended in situations where the frame is not decorated with anything remarkable. Installation of profiled sheets can be carried out using special screws or rivets
If a polycarbonate sheet is used as sheathing elements, you will have to call someone you know for help, since in this situation an extra pair of hands will not interfere. The installation of such material requires welding. The strength characteristics of the manufactured gates will be quite high. However, their mass will also be impressive, so you should first take this into account before installing the hinges on the gate and the support post.
Making a gate from a profile pipe on video
It's always interesting "how the neighbor is doing", because, quite likely, he is doing something wrong and can be done better. The two-part video posted by Denis Krymov is not in this category. On the contrary, the material is useful and you can use all or some of the recommendations.
Part 1. Installing fence posts.
Part 2. Gate.