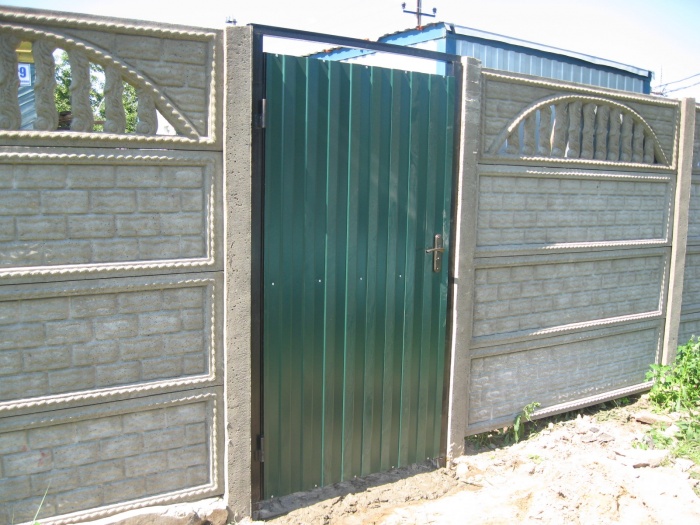
Wicket from a profile pipe
The gate is an integral part of the gate and the fence on the suburban area. Since it has a very high permeability, it must be made of strong and durable materials. For example, today a gate made of a profile pipe is very popular. Such a door will last more than one year. Moreover, in combination with other materials, the profile pipe is perfectly combined. This article describes some of the features of how to do all the work with your own hands.
Advantages of a gate from a profile pipe
There are several positive aspects of the design of the gate from a profile pipe, which is made by hand. Among other things, the following advantages stand out:
- The cost of the source material is quite understandable for every summer resident.
- Long service life of the finished structure.
- Very easy to make and install.
- The design of the profile pipe is quite reliable.
- There is always an opportunity to diversify the design, for example, to use forging elements.
Necessary materials
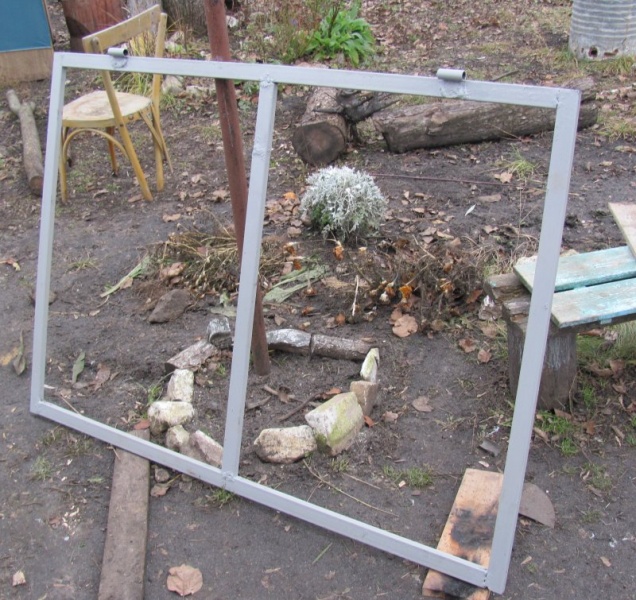
![]()
Before welding the gate, it is necessary to collect all the necessary tools and material. So, you will need the following:
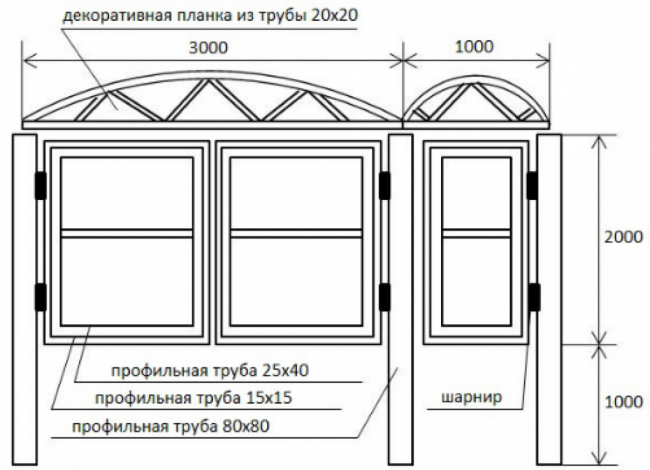
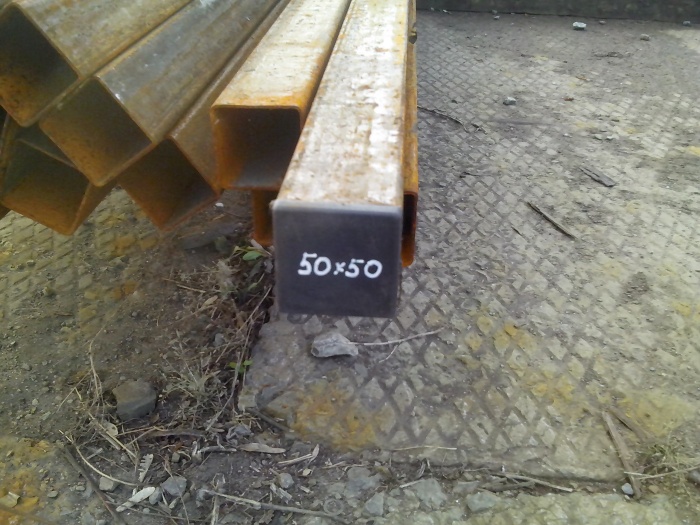
- Pillars as supports. The length of the support column is determined based on the height of the door. Also note that up to 1 m maximum the post will be buried in the ground. You can use the same profile pipe with a section of 60 × 60 mm.
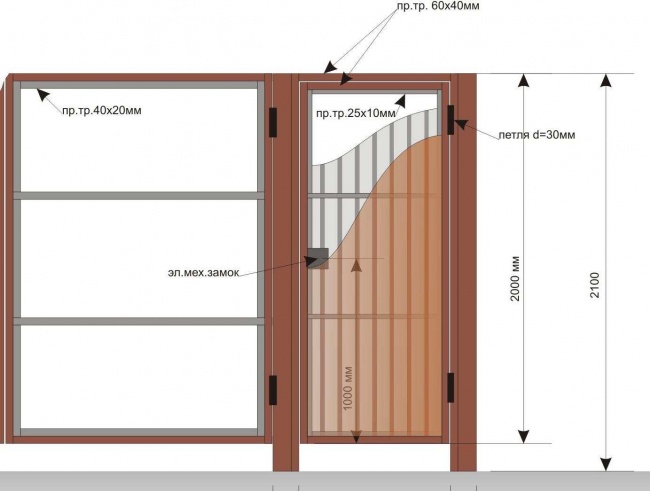
- Profile pipe for the manufacture of the frame. For the frame, a pipe with a cross section of 20 × 40 mm is mainly used.
- Metal corners with an aspect ratio of 40×40 mm. They are required for jumpers.
- Metal hinges for installation.
- Paint and primer for painting the frame.
- Lock, handle and other fittings.
- Necessary building materials for concreting pillars, namely sand, crushed stone, cement and the like.
As for the tools, prepare the following kit in advance:
- Bulgarian for cutting profile pipes and grinding with a special grinding wheel.
- Welding machine.
- Building level or plumb.
- Roulette.
- Shovel.
Manufacturing technology
Before welding a gate from a profile pipe, it is necessary to understand the sequence of the technological process. It consists of the following steps:
- Make a drawing of the future gate.
- According to the project, the necessary material is calculated and purchased.
- Marking materials, as well as sawing.
- Installation of support poles.
- Welding a frame from a profile pipe.
- Installation of loops, diagonals for strength.
- Priming and painting the gate.
- Sheathing of the frame from a profile pipe.
- Decoration (optional).
These are the main stages in the manufacture of a gate from a profile pipe. Now let's look at some of them in detail.
Design and drawing
To know what material consumption will be, you should make a drawing. You can use ready-made ones or develop your own, individual. At this stage, it is important to perform all measurements exactly, otherwise it will be difficult to fix something after purchasing the material. In the worst case, you will have to buy more material or there will be an extra one.
First of all, determine the specific dimensions of the future gate from the profile pipe. In doing so, consider some factors. For example, to make everything visually look better, the upper level of the gate should coincide with the general level of the fence (but this is not necessary).
As for the width, the optimal range is from 900 to 1200 mm. Anyone can make such a drawing. It is important to know the source materials. You can also use the diagrams in this article as a basis.
We weld the frame
At the next stage, we proceed to welding the frame from the profile pipe. To do this, according to the project, it is necessary to cut the profile pipe to size. Lay out the pieces on a flat horizontal surface. To make the joints of the profile pipe look beautiful, cut the edges by 45 °.
Next, you need to grab all the elements of the frame with each other. But you don't have to cover everything all at once. It is recommended to check the design for a diagonal, and also if there is a propeller. For greater rigidity of the frame, crossbars must be welded. They can be located diagonally or across the gate, that is, parallel to the upper and lower bars.
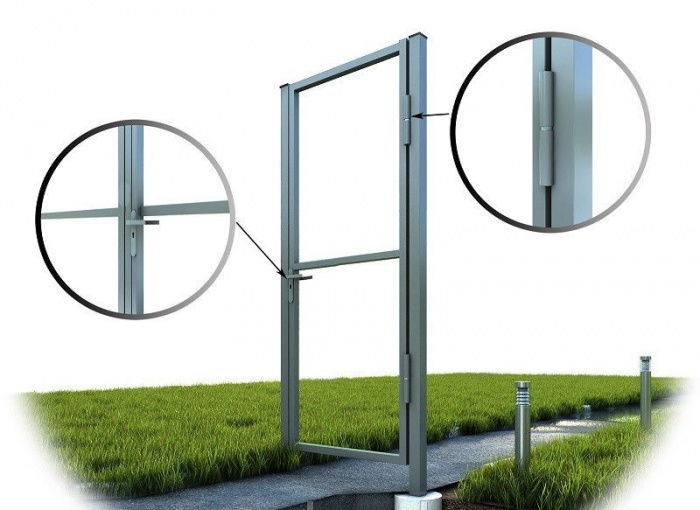
At this stage, it is also worth welding a special box for installing the locking mechanism. This is in case the lock is mortise. If hinged, then hinges should be welded onto the gate from the profile pipe.
An important step is the grinding of the product. So, with a grinding wheel and a grinder, clean all welded joints. It is also worth eliminating all possible burrs and defects from the surface of the structure.
Painting the wicket frame
When the gate is completely welded and polished, the next stage comes - painting. First, a special primer is applied to the profile pipe. It will ensure high-quality adhesion of the paint to the canvas. You can distribute the paint with a spray gun or a regular brush.
Advice! When painting, do not allow the formation of streaks. It is better to apply paint in two layers than to try to cover everything exactly at once with a thick layer of paint. In this case, leaks are almost inevitable.
Mounting
Now it's time to install the gate. It is worth noting that when welding the frame, loops are necessarily welded. They are also covered with paint. You should also install the pillars of the support. Usually, a profile pipe with a cross section of 60 × 60 mm is used for this purpose. The length of such a pole should be such that it can be deepened into the ground up to 700 mm, up to a maximum of 1000 mm. This depth will be enough for the gate and the whole structure to be stable.
Advice! It is recommended to weld a sheet metal element, a kind of sole, onto the lower part of the support column. So, the post will be more stable and it will be easier to level it.
Having measured everything and dug holes for installing pillars, set the supports strictly vertically. At the same time, check the vertical from all sides. By temporarily installing spacers, you can prepare the concrete mixture and fill the hole.

When the concrete has completely hardened, it is necessary to continue work, and in particular, to weld the canopies. This is an important and responsible stage. For this you will need help. Having attached the gate to the posts, as it will hang, put marks where the canopies will be welded. Since the first part of them is already welded on the doors, it remains to weld the canopies to the pole. After that, grind the welding seam with a special wheel and grinder. After you cover the pillars with a primer and also paint.
sheathing
One of the last stages of work is the sheathing of the frame. To do this, you can use profiled metal sheets that are used for wall cladding. Pick up the corrugated board in color to the fence. It is also worth choosing the right fastener. For example, fasten corrugated board to the profile using hardware or special rivets. In the case of hardware, be sure to select the hats according to the color of the corrugated board.
Having attached the sheet to the frame, drill holes around the entire perimeter in increments of about 200 mm. In this case, holes are made in the lower wave. At the end, just screw the corrugated board to the frame and that's it. You just have to hang a gate from a profile pipe.
Having installed the gate in its place, you need to check it for opening and closing. If everything works, install the lock and handle. You can also use decor if you wish. For example, having bought ready-made forging elements, you weld them to the structure.
Advice! The decor should be welded at the stage of manufacturing the frame. After painting, it is better not to weld anything.
Conclusion
So, we have considered with you the question of how to make a gate from a profile pipe. As for the manufacture of gates, the principle is the same. We hope that this material will help you figure things out on your own. Also, you can leave comments if you already have your own experience.