How to age a tree? General recommendations and best practices
Wooden furniture will not go out of trend for many more years, especially since new fashionable ideas are constantly emerging that bring zest to such a familiar interior. In particular, artificially aged wood has recently been at the peak of popularity: this effect is easy to implement even with inexpensive pieces of furniture from IKEA.
There are many ways to achieve the effect of old wood. Any of them assumes the presence of several basic elements and tools, without which nothing will work. Of course, this is the piece of furniture itself, which will be manipulated. In addition to it, a stiff brush with metal wavy bristles is needed. A Bulgarian saw with a circular brush attachment can replace it. Be sure to have several skins of varying degrees of grain roughness: small for final grinding, large - for primary smoothing. You will also need a sweep and brushes with which light (white) paint and an antiseptic in a dark tone will be applied. In addition, a large foam rubber sponge will become useful, an analogue for which any piece of dense fabric can act.
The simplest scheme for giving the effect of antiquity to wood will take no more than 3 hours, and the final result will not be particularly pronounced. This technique is suitable if you want to slightly change the look of the furniture, as well as in the absence of a large amount of free time.
For this purpose, it is required to go through the wood with a metal brush, leaving long scratches-veins on it, after which it is advisable to carefully treat the surface with a rough sandpaper. After that, the part is covered with a thin layer of white azure, which is important to give time to dry. The less dense the coating, the faster it will be possible to move on to the next step, where the wood is again processed with a metal brush. This completes the procedure.
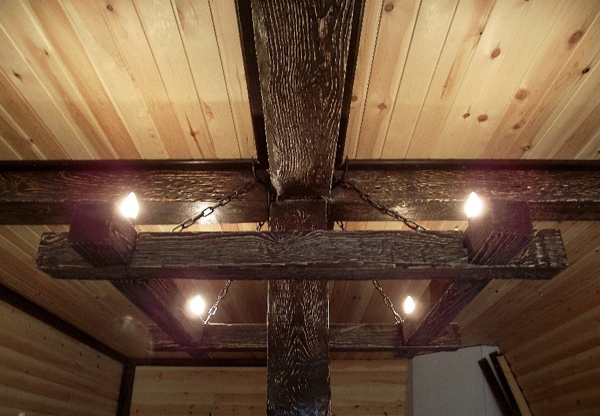
Whatever method you ultimately choose, it is worth knowing that brushing (working with a metal brush) works best on a rough surface: it is pine, larch or oak wood. Therefore, this technique is used mainly to age the floor, doors and doorways, walls. It is undesirable to try to artificially create veins on birch, maple, beech with a brush. How long to drive the brush over the surface is a matter of taste. The more unevenly the veins are located along their depth, the more natural effect can be achieved.
How to age a tree in species with an unexpressed texture?
- Beech, maple and other species are processed at least as often as pine or oak, as a result of which there are separate methods for adding age to them. In most cases, this patting is an uneven coloration achieved through the use of paint. It should be said that mechanical surface treatment will also be carried out here, but it will be the final stage.
- First you need to paint the wood in a tone close to its natural, and give time for the paint to dry. After that, the 2nd layer is applied, as thin as the previous one. It is desirable to choose its shade 2-3 tones lighter, but in no case brighter. The key rule when painting a tree whose appearance should breathe antiquity is not to overly light or bright colors, which are characteristic only of young wood.
- As soon as all layers of paint are completely dry, a rough sandpaper is passed over the surface, partially erasing the top layer of paint. It is important to stay on the edge when the amount of darker color showing through the 1st time does not become too frequent. With this method, you need to give things such a look, as if for many years it had already been painted more than once, and the coating began to come off in places.
- The same can be obtained if you use wax or paraffin. The scheme is similar to the previous one: the wood treated with a disinfectant is covered with a thin layer of dark paint, after which the time allotted for drying is waited. Wax is distributed on top of the paint, but in separate spots with carefully shaded borders. It is undesirable to make these paraffin areas too close to each other.
- Finally, the product is covered with a new layer of paint of a slightly lighter shade. When it dries, using a spatula with a thin edge, the wax is removed from the wood, the surface is cleaned with sandpaper. From above, it is desirable to apply a stain, over which a thin layer of wax is again applied.
We use stain

Far from the last and very popular way to give the tree antiquity is the use of wood stain, which is most actively used for doors and large pieces of furniture: chests of drawers, cabinets, cabinets. It is better to work outdoors or carefully ventilate the room after the procedure.
The wood is cleaned, dried and treated with a water-based stain. At this stage, it is desirable to make the layer dense, not to let it completely seize. While the agent is still in a liquid state in some areas, it is removed by simple touches of a foam sponge. Do not rub: just blot with light movements. Masters recommend removing the stain on the protruding parts of the product, without affecting the corners and junctions. There, on the contrary, it is desirable to additionally apply the agent with a brush.
After drying, the surface is treated with a new layer of stain, this time based on white alcohol.
Then, according to the dry material, it is necessary to close all the wood pores, for which shellac primer is purchased. It can be applied with a sponge or a thin brush. And at the final stage, antique wax is rubbed in, distributed with a brush with a metal bristle. Such an effect of antiquity lasts longer on the tree than those obtained by the previously described methods.
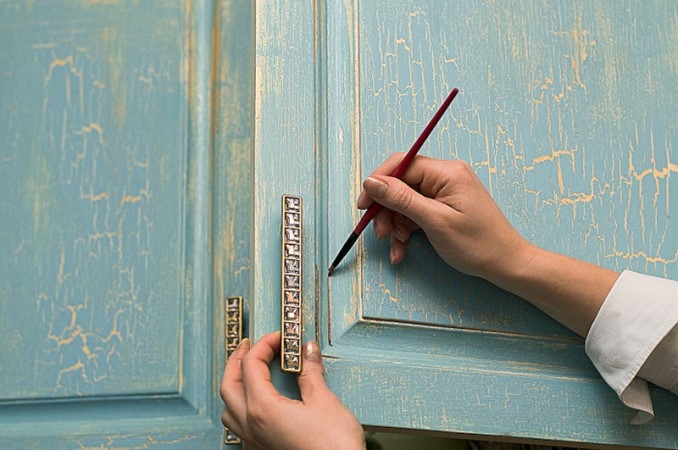
Decoupage craquelure: a master class for small items
Decoupage is a technique for decorating wood. It is used in most cases for small things: cutting boards, boxes, plates, bread boxes, etc. Sometimes masters process slightly larger products in this way - for example, chairs.
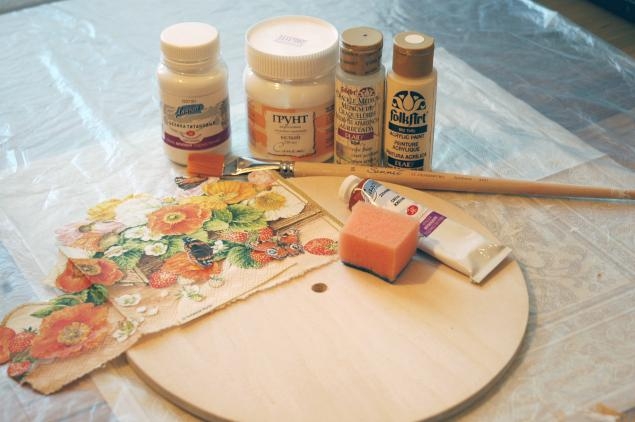
From an old and unremarkable piece of furniture, you can make ... even older, but looking stylish and fitting into the country interior. In addition to the previously mentioned tools and tools in the form of paint, varnish, skins and brushes, this technique requires decoupage cards, which are sheets of paper with an image that will subsequently appear on the product.
Initially, dirt is removed from the thing, after which it is important to let the wood dry. Then the surface is cleaned with skins with varying degrees of their abrasiveness (from 500 to 1000), which can take 1-2 days. In the final, it is advisable to go through the putty, but without destroying the traces of time: for example, minor damage from insects. After puttying, the craftsmen recommend applying acrylic varnish to the product. It takes 8-12 hours to dry.
The next step is to paint the thing in a dark tone: deep brown, graphite, etc. The paint is acrylic, waterproof. All parts of the product are treated with a special varnish designed for one-step craquelure. After it has not completely dried, a thin (this is important!) Layer of paint is applied on top, selected 1-2 tones lighter than the main one. Before she had time to grab, you need to walk on it with a foam rubber sponge, removing excess and creating a pattern on the wood. It is advisable to do this unevenly: the cracks subsequently obtained will turn out to be more natural.
36-48 hours are allotted for drying of these funds, after which artistic work is done with sandpaper. Masters advise resorting to a softer one and overwriting only certain areas, allowing light paint to be removed unevenly. The thinner the transition, the more interesting the product will look. And such abrasions look as natural as possible if you mark them where they form from time to time: in places where things are often touched.
The final stage, which may not be performed, since the main task - artistic cracks - has been completed, is drawing a picture on the product. For this step, decoupage cards were required: the necessary fragment is immersed in water at room temperature, and after 3-4 minutes it is carefully applied to the desired part. After drying, the excess parts are erased with a soft sandpaper, and the finished thing is varnished for the last time.